Dinner With Hussies
A lovely dinner with our friends the Hussies had two notable highlights - the Olive and Ricotta starter for me,
and the Tiramisu for Rachel. Perhaps the level of Amaretto content coloured her judgement.
Sorry no photos. Although I recently bought myself a cool second-hand digital SLR Sony Alpha 200 from ebay, I've only just started playing around with it, and to be honest I thought it might seem a little importunate pulling it out at a dinner party, enormous beast that it is.
Sorry no photos. Although I recently bought myself a cool second-hand digital SLR Sony Alpha 200 from ebay, I've only just started playing around with it, and to be honest I thought it might seem a little importunate pulling it out at a dinner party, enormous beast that it is.
Olive and Ricotta Pâté
starter cheese
Takes 40 minutes.
Serves 6
Ingredients
450g/1 lb ricotta cheese
50g/2 oz parmesan, finely grated
2 medium egg whites, lightly beaten
190g jar lemon and mint marinated green olives
185g can pitted black olives, drained
4 sun-dried tomatoes, roughly chopped
2 sprigs fresh rosemary, leaves only
bread and roasted whole vine tomatoes to serve
Method
50g/2 oz parmesan, finely grated
2 medium egg whites, lightly beaten
190g jar lemon and mint marinated green olives
185g can pitted black olives, drained
4 sun-dried tomatoes, roughly chopped
2 sprigs fresh rosemary, leaves only
bread and roasted whole vine tomatoes to serve
Preheat the oven to 200°C/Gas 6/fan oven 180°C.
Oil and base line a 20cm/8" sandwich tin.
In a large bowl, beat together the ricotta, parmesan, egg whites and seasoning.
Spoon into the prepared cake tin and level the surface with the back of a wet spoon. Press the olives, sun-dried tomatoes and rosemary into the surface and bake for 25-30 minutes until firm.
Turn out and remove the paper. Serve in wedges with bread and roasted tomatoes.
Spoon into the prepared cake tin and level the surface with the back of a wet spoon. Press the olives, sun-dried tomatoes and rosemary into the surface and bake for 25-30 minutes until firm.
Turn out and remove the paper. Serve in wedges with bread and roasted tomatoes.
Leftover Monday. And Tuesday. And Wednesday...
Leftovers. They're a blessing. And a curse.
After days of congealed béarnaise sauce-buttered Breakfast Bap sandwiches filled with leftover Roast beef, mayonnaise, dijon mustard, sliced red onion, tomato and rocket, I hit upon the Beef Wellingtonettes for using up the beef in a hurry.
Not only that, but I used up the spare mussels too. Hurray.
Spare Mussel Tagliatelle
main pasta fish
Something to make after you've drunk a good steaming bowl of mussel stock
It helps if either you thoroughly de-beard the mussels whilst you're cleaning them by wiggling the beards back and forth until the pull cleanly out of the shell, or you remove the tangled seaweedy mass as you shuck the mussel shells after making the stock.
Mouthfulls of chewy mussel beard in your tagliatelle are just yeuch.
Serves 4
Ingredients
tagliatelle
olive oil
2 rashers smoked bacon. Probably not leftover. Unfortunately
24 leftover mussels, shucked and chilled
3 leftover shallots, minced
6 leftover garlic cloves, puréed
2-4 button mushrooms, roughly chopped
2 cups leftover double cream
leftover chilli parsley butter
Method
olive oil
2 rashers smoked bacon. Probably not leftover. Unfortunately
24 leftover mussels, shucked and chilled
3 leftover shallots, minced
6 leftover garlic cloves, puréed
2-4 button mushrooms, roughly chopped
2 cups leftover double cream
leftover chilli parsley butter
Put a pot of pasta water on to boil
Chop the bacon into relatively generous lardons. Fry in olive oil until cooked through, add the shallots and cook until soft, add the garlic and cook through, add the mushrooms (not too finely chopped) and warm through then add the cream.
Start the tagliatelle cooking
Now when the cream mixture has heated through, add the mussels, reheat then add the chilli parsley butter in small quantities and whisk in to thicken the sauce.
Season.
Drain the pasta and serve topped with the mussel sauce
It's pretty tasty, though the sauce could be thicker - maybe some flour cooked in before the shallots?
Beef Wellingtonettes
main meat
Yum. Dig that leftover beef.
It's ok to use shop-bought puff pastry sheets: It's leftovers.
It's ok to use shop-bought puff pastry sheets: It's leftovers.
Ingredients
fist-sized chunks of leftover roast beef
puff pastry
6 button mushrooms
leftover shallots and garlic (optional)
dijon mustard
Method
puff pastry
6 button mushrooms
leftover shallots and garlic (optional)
dijon mustard
Preheat the oven to 200°C/gas 6.
Blend the mushrooms to a paste in a food processor. Add a little shallot or garlic if you like On second thoughts, maybe not the shallots. You could add truffle or fois gras though, if you're feeling rich
Fry in a little butter until slightly reduced and the mushrooms will hold together.
Smear the steak chunks with mustard (or horseradish), then cover with the mushrooms and roll in the puff pastry.
Bake in the oven for 20 minutes until golden brown.
(though not too close together lest they merge into one big soggy Wellingtonboot, and the girlies pick at them listlessly complaining that they aren't properly cooked)
Eat with the leftover Sambuca mushrooms and Green Beans.
John's Massive Burgers
The first time Rachel and I met John socially was at a charity rubber duck race,
where he was running a burger stall.
As I recall, the burgers were rather nice, though obviously I was seriously distracted by all the rubber ducks swimming around unsupervised.
Little tarts.
Today he told me all about the rather nice burger he'd knocked up for dinner, and since the horseradish sounded interesting I thought I'd write it up, together with the stew he made the weekend before.
Little tarts.
Today he told me all about the rather nice burger he'd knocked up for dinner, and since the horseradish sounded interesting I thought I'd write it up, together with the stew he made the weekend before.
Breaking news:
It turns out that John confused horseradish with plain old radish.
Which doesn't sound quite so attractive.
It turns out that John confused horseradish with plain old radish.
Which doesn't sound quite so attractive.
John's Massive Burgers
main snack meat
Serves One Massive Burger EaterIngredients
mince
tomato purée
grated horseradish (!)
a massive fluffy white bun
a slice of Jarlsberg
Method
tomato purée
grated horseradish (!)
a massive fluffy white bun
a slice of Jarlsberg
John's Beef Stew
main meat stew
This recipe is written as dictated, so you will have to forgive the colloquialisms - the poor boy is a local you know.
Ingredients
some nice cubed stewing steak - big thick bits
carrots
baby pearl potatoes
loads of onions (two of the buggers)
wee bit of garlic (natch)
wee spot of Dijon mustard
a handful of wee button mushrooms
a wee touch of paprika for colouring
Method
carrots
baby pearl potatoes
loads of onions (two of the buggers)
wee bit of garlic (natch)
wee spot of Dijon mustard
a handful of wee button mushrooms
a wee touch of paprika for colouring
Brown the steak (with no flour) - adding a wee spot of mustard and just two cloves of garlic,
crushed and wheeched back out - really just to flavour the oil a little.
Cut one of the onions in quarters, and the other very finely chopped to thicken the stew. Soften the chopped onion.
Add some beef shin stock, a dash of Chilean Merlot, paprika, mushrooms, onion quarters and the vegetables.
John also threw in some shitake mushrooms but noted that he thought you should use a bit less of the shitake - they didn't work too well as I only have them dried. I rehydrated them in on their own in the stock while I was bringing it up to temperature.
And that was really about it - except I put a couple of dumpling in in the last twenty minutes. Just suet and water, nothing clever. Not that much flour - about 30/70, and a wee bit black pepper.
John's Pulled Pork Rub
ingredient meat crockpot
John loves to pull his pork. Aye, and here's the rub...
Ingredients
- 5 tbsp smoked hot paprika
- 3 tbsp sea salt flakes
- 2 tbsp cayenne pepper
- 2 tbsp ground cumin
- 2 tbsp ground black pepper
- 2 tbsp ground fennel seeds
- 2 tbsp ground coriander
- 2 tbsp dry mustard powder
Rub pork.
Cook in slow cooker until meat falls apart at the slightest touch.
Eat.
Cook in slow cooker until meat falls apart at the slightest touch.
Eat.
John's Tooth-Achingly Tasty Dessert
sweet veg
John also likes his sweet desserts. Now did he say it was tooth-achingly tasty, or just tooth-aching?
Ingredients
- salted peanuts
- caramel
- fudge
In a baking tray spread a double layer of salted peanuts, followed by a pouring of caramel and a chill in the fridge.
Then make fudge, let it cool and roll it out to the shape of the tray and lay over the caramel.
Roll up with the peanuts outwards.
Slice and eat.
Then make fudge, let it cool and roll it out to the shape of the tray and lay over the caramel.
Roll up with the peanuts outwards.
Slice and eat.
Just about my favourite breakfast. Providing it's washed down by a Bloody good Mary of course.
By way of comforting myself whilst Rachel and I are on our spring breakup (sigh!), I treated myself to my first attempt to make Eggs Benedict from the muffin up. Well, except for curing the ham and laying the eggs of course.
I chose a muffin recipe that uses yoghurt in with the water, which seemed to work perfectly well, Paul Gayler's workmanlike version of Hollandaise sauce, and crispy grilled Parma ham.
Being temporarily unencumbered by a car, I did all my shopping on Sunday at the local Asda, so was extremely limited as to the quality of ingredients. Although I was able to find some pre-packed super-thinly sliced Parma ham, I had to make do with their standard Sad Chicken brand of old eggs. I no more believe that their chickens are organic and free-ranging than I believe their pork products are naturally puce. More surprisingly, it was impossible to find semolina to dust the muffins, because their baking section is ludicrously small and ineptly disorganised over several unrelated aisles. This is either because Asda do not want their customers baking their own products, lest they discover how anaemic are the in-store goods on offer, or because Asda shoppers have lost their capacity to cook flour.
And the result?
A bit disappointing to be honest - I won't be giving those restaurant breakfasts a run for their money just yet.
I couldn't fault the muffins (misshapen and semolina-free as they were), but my Hollandaise was far too tart (Note To Self: Add the lemon juice cautiously and taste the sauce as you go) and the ham was just wrong.
Difficult to say quite why it was so wrong - perhaps it would have worked better if I hadn't grilled it and just laid it on raw, but somehow my mouth was expecting a thick juicy slice of "Canadian" smoked bacon, and what it got was a thin crispy layer of dry-cured Italian lard. Just plain wrong!
Also it's probably a good job I was only cooking for one, because turning out individually poached eggs is a painfully slow process. I do need to figure out a faster serving method for more customers.
Oh, and I didn't have any bloody Bloody Marys
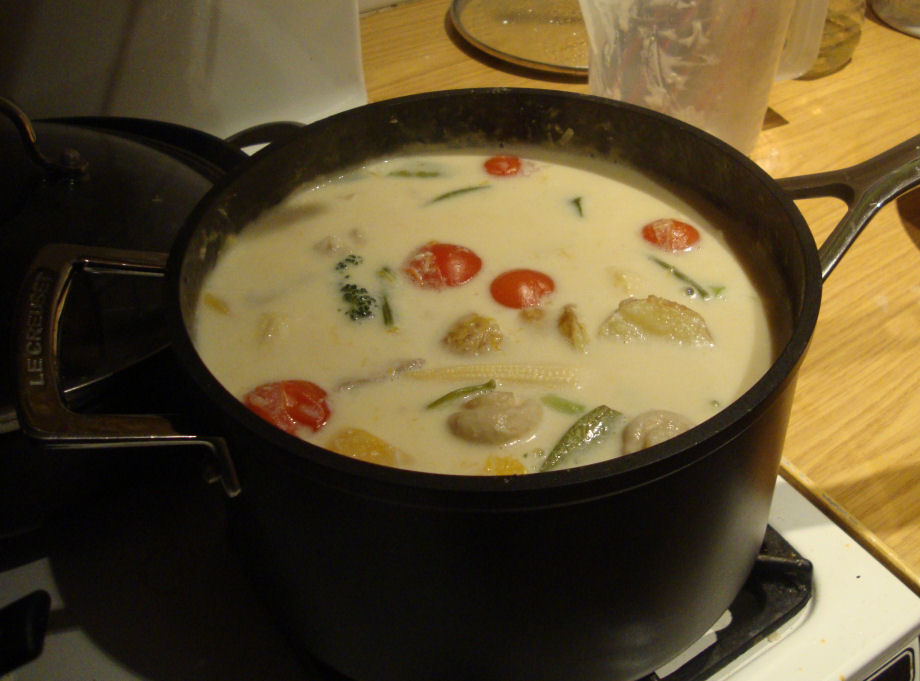
Fish Soup. Or Stew. You choose.
Another Fabulous Failure.
This started as out as an inventive way to use up the enormous sack of (very large pieces of) dessicated coconut that we have cluttering up the kitchen, and all the bits of leftover vegetables from the bottom of the fridge.
But it started to go wrong in the supermarket when Rachel suggested that fish might be acceptable since Georgina had now started trying new things and would no longer only eat super noodles with ketchup on. I suppose I should have expected problems when the smell of my hot fish sauce dressing made everyone gip and completely ban it from the dining room. Even Rachel refused to have it anywhere near her bowl.
Georgina flatly refused to touch the soup.
"I won't eat fish" she said.
"I hate fish" she said.
"I hate the smell of fish" she said.
"You know I hate fish" she said.
"Why do you keep giving me fish" she asked.
"I even tried the Haggis, and I hate haggis" she said.
"I'm never going to eat fish" she said.
"Never".
To cap it all off, even Sophie turned up her nose at it. And she likes fish. But apparently not the tomatoes or the mushrooms or the slop.
"It didn't really taste of anything, it was too lumpy and I didn't like all the UFO's in it" she said.
"The Unidentified Floating Objects" she said.
Bloody Philistines! I thought it was delicious.
Fish soup
soup fish

Ingredients
1lb cod, haddock or coley, skinned and de-boned
12 new potatoes
1 small butternut squash
2 rounded Tablespoons flour.
2 pints milk, or as necessary
6 garlic cloves, pressed
1 large onion, diced
1 cup dessicated coconut. Soaked if you have the time.
mangetout
baby sweetcorn
cherry tomatoes
broccoli
courgette
carton button mushrooms
salt
fishy dressing
2" ginger, finely grated or julienned.
2 Tablespoons fish sauce.
juice of 1 lime
Method
12 new potatoes
1 small butternut squash
2 rounded Tablespoons flour.
2 pints milk, or as necessary
6 garlic cloves, pressed
1 large onion, diced
1 cup dessicated coconut. Soaked if you have the time.
mangetout
baby sweetcorn
cherry tomatoes
broccoli
courgette
carton button mushrooms
salt
fishy dressing
2" ginger, finely grated or julienned.
2 Tablespoons fish sauce.
juice of 1 lime
Start the potatoes boiling in a large pot of water to soften them. No need to scrub or peel them, the pre-boil will take care of that.
Fry the flour in butter until cooked through, but not darkened. Add the garlic then the onions and the dessicated coconut. Fry until the onions soften, but don't brown them.
Clean the mushrooms, cut up any larger ones and add to the sauce.
Cut the baby sweetcorn into nice bite-sized chunks diagonally and add to the pot.
Cut the mangetout diagonally into halfs or bit-sized slices and add to the pot.
Peel the butternut squash, cut into slices, deseed and cut into bite-sized pieces. Add to the pot.
Cut the courgette into bite-sized chunks and add to the pot.
Break the broccoli into florets and add to the pot
Cut the fish into bite-sized chunks and add to the pot
Add the cherry tomatoes to the pot and simmer for another 10-15 minutes until the fish is cooked through and the tomatoes are soft, but not popped.
Meanwhile make the dressing. Fry the ginger in a little vegetable oil until it begins to crisp and brown, then throw in the fish sauce and the lime juice. you might have to do this outside if you don't want to get the dressing banished forever, the smell is a little overpowering
If you have grated the ginger you will need to strain this dressing, if julienned you might be able to leave the ginger in.
Ladle the soup into bowls. Drizzle with a little dressing and serve.
Fry the flour in butter until cooked through, but not darkened. Add the garlic then the onions and the dessicated coconut. Fry until the onions soften, but don't brown them.
I fried the onions and coconut in butter separately, but I don't see why you couldn't do this all together.
Gradually add the milk, whisking constantly to make up a thin roux of sufficient quantity.
(set aside some of the mixture whilst continuing to dilute if it seems to be going to be too thick).
Purée thoroughly in a blender then season, pour into a large pan and bring to a gentle simmer.
If you weren't cooking for philistines you might forget about blending the onion and chop it into reasonably chunky
pieces to fry separately and add to the roux now. I think it makes quite a nice thickener though.
Add the pre-cooked potatoes to the roux.Clean the mushrooms, cut up any larger ones and add to the sauce.
Cut the baby sweetcorn into nice bite-sized chunks diagonally and add to the pot.
Cut the mangetout diagonally into halfs or bit-sized slices and add to the pot.
Peel the butternut squash, cut into slices, deseed and cut into bite-sized pieces. Add to the pot.
Cut the courgette into bite-sized chunks and add to the pot.
Break the broccoli into florets and add to the pot
Cut the fish into bite-sized chunks and add to the pot
Add the cherry tomatoes to the pot and simmer for another 10-15 minutes until the fish is cooked through and the tomatoes are soft, but not popped.
Meanwhile make the dressing. Fry the ginger in a little vegetable oil until it begins to crisp and brown, then throw in the fish sauce and the lime juice. you might have to do this outside if you don't want to get the dressing banished forever, the smell is a little overpowering
If you have grated the ginger you will need to strain this dressing, if julienned you might be able to leave the ginger in.
Ladle the soup into bowls. Drizzle with a little dressing and serve.
Delicious. I thought. The dressing cuts the slightly cloying thickness of the soup.
Obviously if you weren't trying to make it acceptable to small tummies you could spice it up Thai styley.
If you prepare and add the ingredients in the right order they will all be perfectly cooked at serving time.
Obviously if you weren't trying to make it acceptable to small tummies you could spice it up Thai styley.
If you prepare and add the ingredients in the right order they will all be perfectly cooked at serving time.
Georgina Likes Pizza
We followed the instructions for
basic pizza dough
in Susan Conte's pleasant little
Pizza And Pasta book,
dividing the dough into two balls to allow to rise.
We rolled out the pizzas using a rolling pin, but many sources suggest some kind of stretching process using your fists. Georgina gave something like that a try, but resorted to rolling after picking the bits up off the (fortunately recently-cleaned) floor. Maybe next time we could try a bit harder - here's a description from an interesting page claiming to offer the Best Pizza Dough Ever from Peter Reinhart's Bread Baker's Apprentice:
Perhaps we didn't quite allow the balls to double in size, and we certainly didn't bother leaving the rolled-out pizzas to rise for 20 minutes before adding the topping and cooking them, but then the girlies were already STARVING, so we were pressed for time.
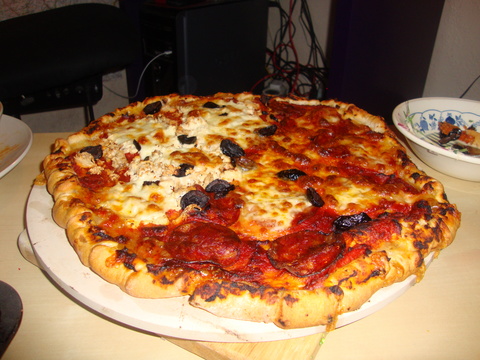
As a result, the crusts were probably a bit heavier than they ought to have been. It might have been nice to add a couple of tablespoons of olive oil to the water too.
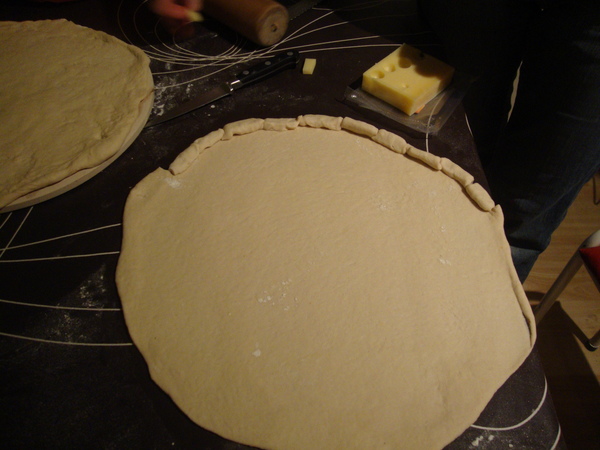
The girls experimented tentatively with rolling the edges around some edam cheese to make a stuffed crust, but I think that has to go into the category of "Needs Further Investigation". Maybe it just needs a more robust cheese?
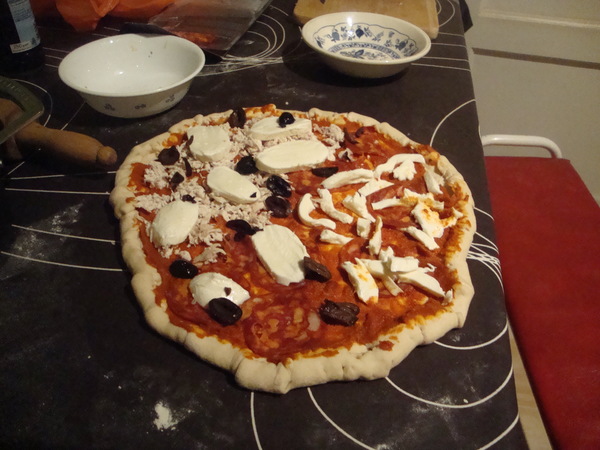
It's fun getting everyone to decorate their section of pizza, but it can easily result in fights if you can't figure out who's portion is whose once the pizza is baked. Black olives are very useful for marking the edges if you can make sure all the kiddies bits are squeezed in-between the grown-ups.
And it's not everywhere you can get away with that!
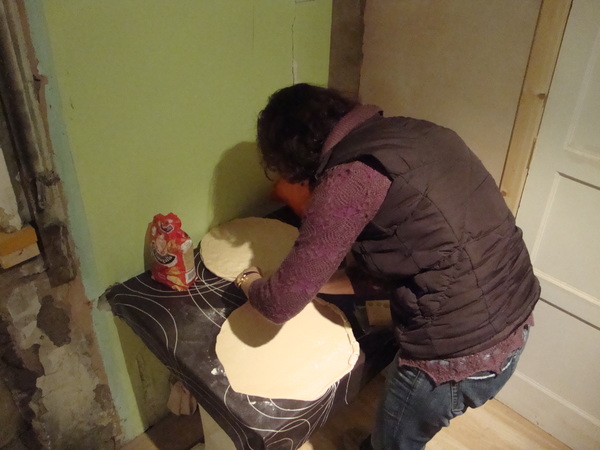
 (In case you were wondering - Rachel is having a stately pleasure dome extension built on to her kitchen,
so cooking conditions somewhat resemble those at the Somme)
We rolled out the pizzas using a rolling pin, but many sources suggest some kind of stretching process using your fists. Georgina gave something like that a try, but resorted to rolling after picking the bits up off the (fortunately recently-cleaned) floor. Maybe next time we could try a bit harder - here's a description from an interesting page claiming to offer the Best Pizza Dough Ever from Peter Reinhart's Bread Baker's Apprentice:
Place the dough balls on top of the floured counter and sprinkle them with flour; dust your hands with flour.
Gently press the dough into flat disks about 1/2 inch thick and 5 inches in diameter.
Dip your hands, including the backs of your hands and knuckles,
in flour and lift 1 piece of dough by getting under it with a pastry scraper.
Very gently lay the dough across your fists and carefully stretch it by bouncing the dough in a circular motion on your hands,
carefully giving it a little stretch with each bounce.
If it begins to stick to your hands, lay it down on the floured counter and reflour your hands, then continue shaping it.
Once the dough has expanded outward, move to a full toss as shown on page 208
This must be some illustration!
If you have trouble tossing the dough, or if the dough keeps springing back,
let it rest for 5 to 20 minutes so the gluten can relax, and try again.
You can also resort to using a rolling pin, though this isn't as effective as the toss method.
Perhaps we didn't quite allow the balls to double in size, and we certainly didn't bother leaving the rolled-out pizzas to rise for 20 minutes before adding the topping and cooking them, but then the girlies were already STARVING, so we were pressed for time.
As a result, the crusts were probably a bit heavier than they ought to have been. It might have been nice to add a couple of tablespoons of olive oil to the water too.
The girls experimented tentatively with rolling the edges around some edam cheese to make a stuffed crust, but I think that has to go into the category of "Needs Further Investigation". Maybe it just needs a more robust cheese?
Breaking News...
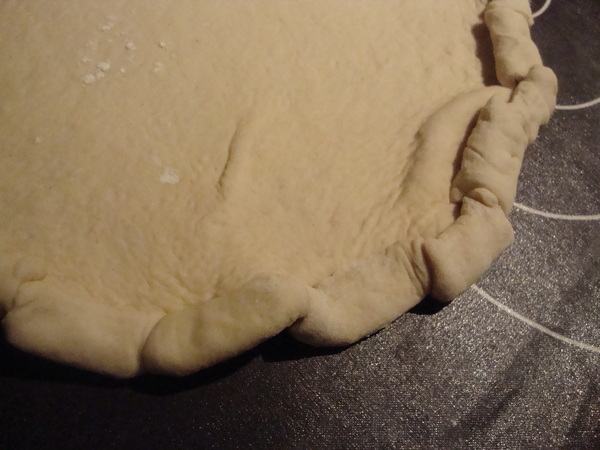
After considerable persuading (don't ask!), Rachel gave the crust-stuffing a bit more enthusiasm (despite the conditions she had to work in) and made a series of cuts around the pizza so she could roll the whole edge in around sticks of Emmentaler (whose holes really impressed Sophie).
Although it seemed like a good idea, the result was just an especially dense and hard ball of crust at the pizza edge. I think we would need to make larger, looser rolls and try to avoid pressing the pastry too much during the process.
Due to the permanent uncertainty of what the girlies might deem acceptable food I brought three different sliced meats
- chorizo, pepperoni and pancetta.
Despite having requested pepperoni, this was judged to be too hot and the pancetta to be too fatty.
Fortunately the chorizo was approved by everyone - so full marks to me for anticipating that difficulty!After considerable persuading (don't ask!), Rachel gave the crust-stuffing a bit more enthusiasm (despite the conditions she had to work in) and made a series of cuts around the pizza so she could roll the whole edge in around sticks of Emmentaler (whose holes really impressed Sophie).
Although it seemed like a good idea, the result was just an especially dense and hard ball of crust at the pizza edge. I think we would need to make larger, looser rolls and try to avoid pressing the pastry too much during the process.
It's fun getting everyone to decorate their section of pizza, but it can easily result in fights if you can't figure out who's portion is whose once the pizza is baked. Black olives are very useful for marking the edges if you can make sure all the kiddies bits are squeezed in-between the grown-ups.
And it's not everywhere you can get away with that!


 (In case you were wondering - Rachel is having a stately pleasure dome extension built on to her kitchen,
so cooking conditions somewhat resemble those at the Somme)
A BIG Georgina seal of approval
Pepperoni Pizza
main meat
Feeds 3 hungry girls - and meIngredients
1 portion pizza dough
1 onion, minced
6 garlic cloves, minced
Tablespoon tomato purée
fresh or dried oregano or thyme. Or other dried herbs
olive oil
2 small cartons of passata or a tin of tomatoes
fresh Mozzarella, in ½" slices
sliced Pepperoni/Pancetta/Chorizo
black olives, sliced
Method
1 onion, minced
6 garlic cloves, minced
Tablespoon tomato purée
fresh or dried oregano or thyme. Or other dried herbs
olive oil
2 small cartons of passata or a tin of tomatoes
fresh Mozzarella, in ½" slices
sliced Pepperoni/Pancetta/Chorizo
black olives, sliced
Make your pizza dough and leave it to rise for an hour or until it doubles in size (if you have the patience).
Meanwhile, prepare the tomato sauce - gently fry the onion and garlic in plenty of olive oil until they are soft and translucent. Don't brown them.
Add the herbs once the onions have got going.
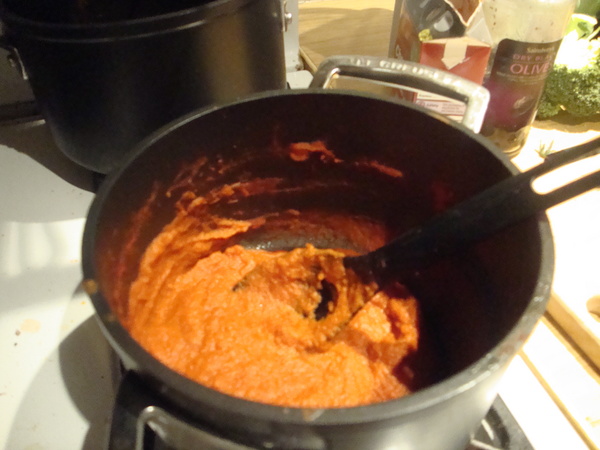
Add the tomato purée and fry until the oil begins to separate out (if no girlies are looking you can toss in a glass of white wine and reduce it too), then add the passata or tinned tomatoes and simmer until thickened to your taste.
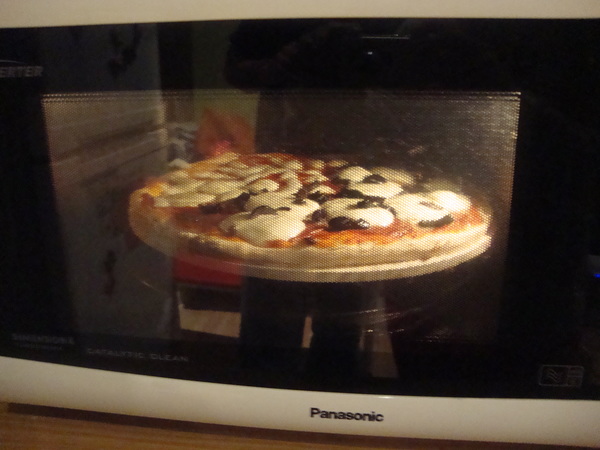
Get your oven as hot as it will go (250°C/Gas 9in our case) and put in your pizza stone(s) to preheat.
Roll out (or spin out if you're brave) your pizza bases onto large floured plates or boards and leave to rise for 15-20 minutes if you are allowed. Spread them not too thickly with the tomato sauce, decorate with your choice of meat product and top with slices of mozzarella, and olives (anchovies etc.) if you're a grown-up.
Carefully slide the pizzas off the boards onto the hot pizza stone(s). I found a couple of fish slices came in really handy at this stage.
Bake for 10-15 minutes or until the crust browns and the toppings begin to bubble.
Slice, serve to all the wrong people and wait for the territorial battles to begin.
Meanwhile, prepare the tomato sauce - gently fry the onion and garlic in plenty of olive oil until they are soft and translucent. Don't brown them.
Add the herbs once the onions have got going.
Add the tomato purée and fry until the oil begins to separate out (if no girlies are looking you can toss in a glass of white wine and reduce it too), then add the passata or tinned tomatoes and simmer until thickened to your taste.
I used only 1 carton of passata, but that made barely enough sauce for the two pizzas.
Also my sauce was a little bit over-sweet so I did add a splash of balsamic vinegar to tarten it up slightly.
Also my sauce was a little bit over-sweet so I did add a splash of balsamic vinegar to tarten it up slightly.
Get your oven as hot as it will go (250°C/Gas 9in our case) and put in your pizza stone(s) to preheat.
Roll out (or spin out if you're brave) your pizza bases onto large floured plates or boards and leave to rise for 15-20 minutes if you are allowed. Spread them not too thickly with the tomato sauce, decorate with your choice of meat product and top with slices of mozzarella, and olives (anchovies etc.) if you're a grown-up.
You really don't want to spread the tomato paste too thickly here - as thinly as you can manage but still cover the surface is about right.
Also the mozzarella spreads a lot when it melts, so cut the mozzarella as thin as you can manage - about the thickness of a pound coin.
This was really nice with some shredded chicken scattered on too, by the way. I just boiled up a chicken in water for an hour with a quartered onion, some bay leaves and peppercorns, (though you could obviously add any extra herbs and vegetables you have lying around because you'll be using the stock later won't you?) then separated off the flesh and shredded it with a fork.
This was really nice with some shredded chicken scattered on too, by the way. I just boiled up a chicken in water for an hour with a quartered onion, some bay leaves and peppercorns, (though you could obviously add any extra herbs and vegetables you have lying around because you'll be using the stock later won't you?) then separated off the flesh and shredded it with a fork.
Carefully slide the pizzas off the boards onto the hot pizza stone(s). I found a couple of fish slices came in really handy at this stage.
Bake for 10-15 minutes or until the crust browns and the toppings begin to bubble.
Slice, serve to all the wrong people and wait for the territorial battles to begin.
Happy Haggis Day
Sunday the 24th is a happy combination of Rachel's Mum's birthday and the Day Before Burns Night,
so it's Once more unto the breach, dear friends, once more.,
or in my case, Once more into the offal: It's time to dust off my Haggis recipe.
I volunteered (if that's the right phrase for the situation where you won't take no for an answer) to make Haggis for the family Birthday Dinner at Rachel's sister's place. That's the one with all the pans, for those who have been following closely.
I'll be bringing Haggis and some sauce, Alan will be cooking the neeps and the tatties and I thought I might bring along a bottle of Grand Marnier for tarting up the neeps too. Or some of the neeps for the grown-ups at the feast.
I had to make the Haggis the weekend before, due to limited time this weekend, so I popped in to George Bower of Stockbridge - the best game butcher in Edinburgh - to order my sheep pluck, and then again to pick it up.
Anyway, enough with the ranting. On to the Haggis...
I followed the same basic recipe as before, but the pluck I got from the butcher this time were a bit disappointing compared with the absolute monster I had last time around.
Either this chap was sadly undernourished, or the last one was a giant amongst sheep.
I didn't get the whole assemblage this time either - the organs had all been separated already, so there was no gullet, kidneys or tongue either, which was a bit of a shame.
I did buy some venison liver from the Castle Street Farmers' Market to bulk the liver quantity out, though for what it cost it was a pitiful quantity compared with even this miniature sheep's liver. It seems a complete venison haggis would be a different order of cost than a sheeps one.
Mind you - the difference in liver price does reflect the delicacy of flavour - I flash-fried a sliver of each of the livers for a quick taste test.
A liver sliver sample if you will.
The venison was absolutely exquisite with a delicate flavour and a fine texture, which made the lamb seem thick and dull by comparison. Probably it was something of a waste to add the venison to the haggis, and I don't think I could tell the difference in the end result.
The friendly butcher handed over some nice shin bones too, so this time I used the offal water to make up a nice dark beef stock for boiling the barley and moistening the mixture before stuffing.
The whole process took about 6 hours this time - quite a lot longer than I'd noted the last time I made them, despite the smaller pluck. Some of that might have been the time spent making the stock, and this time it was just me, whereas I think I managed to rope in a couple of unsuspecting assistants last time.
This time I was also quite conscious of the need to keep these haggii for a week before cooking them, so I deliberately cooked the lights a little more than I would have done otherwise. I imagine this had some impact on their final flavour.
I decided the best way to keep the haggii without them rotting would be to hang them so that they stayed dry - the ceca get very moist if they are left in contact with any surfaces - so I arranged a piece of string in my fridge door and hung the double haggis like a pair of veiny giant testicles. This seemed to work pretty well: they dried out quite thoroughly, and even started to look a little shrivelled towards the end so then I wrapped them in muslin and put them on the fridge shelf.
I gave them a jolly good sniff every day just to make sure there was no hint of rot.
Since I figured the liver was about half the size of the last one (I should really have weighed it, but I reckon around 2lb), I used roughly half quantities of my previous recipe though this turned out to be a bit heavy on the spices. I bought some nice fresh cayenne pepper in preparation, and perhaps this was a mistake.
I also realised that before you over-spice the stuffing mixture you can taste it by frying up a little batch. Probably I should have realised that before I added all the ground up spices eh?
Anyway - the lesson learned is go easy on the cayenne and taste the mixture before you add all the spices in.
Although I bought 3 salted ox ceca (just in case) I only needed one of them, and you really don't need to soak them overnight. I just gave them a thorough rinsing in the bath: run water into them so they swell up like a balloon to really flush all the salt out.
I used them with the fatty veins on the inside, the way they arrive.
Knowing that the kiddies would balk at the taste of liquor in their sauce, I cast around for a child-friendly alternative to the Drambuie sauce to go with the haggii. I think they really need something creamy to smooth off their rather dry edge, and despite some difficult hot-cauliflower-related memories for Rachel, I plumped for a version of Heston Blumenthal's Cauliflower Purée with the addition of some fennel to lighten it up a bit. Unfortunately I wasn't really happy with the result, so I mellowed the flavour back down again by blending in some cashew nuts. The result was pretty nice, but I had foolishly forgotten about Sonny's nut allergies, so we had to make a new version sans nuts (and fennel). Although I seemed to be the only one to notice the slightly acrid flavour to the purée, the original version has the same taste, so I don't think it was due to my fennel addition after all.
I volunteered (if that's the right phrase for the situation where you won't take no for an answer) to make Haggis for the family Birthday Dinner at Rachel's sister's place. That's the one with all the pans, for those who have been following closely.
I'll be bringing Haggis and some sauce, Alan will be cooking the neeps and the tatties and I thought I might bring along a bottle of Grand Marnier for tarting up the neeps too. Or some of the neeps for the grown-ups at the feast.
I had to make the Haggis the weekend before, due to limited time this weekend, so I popped in to George Bower of Stockbridge - the best game butcher in Edinburgh - to order my sheep pluck, and then again to pick it up.
Fortunately for those of us who have to work for a living Bower opens at 8 a.m. which means I can buy quality meat during the week.
It never ceases to amaze me that any of these poxy high street shops that continue, moronically unaffected by modern life to open only 9 to 5, have survived.
Has it really not occurred to these stubborn jackasses that the reason their business traffic has pissed away to nothing has something to do with the fact that everyone who works for a living and therefore has money to spend can't shop between 9 and 5 because they are at work? Is it possible for a business to survive when it's only custom comes from single mothers?
Have they really not noticed that during daylight hours the only other people they see are Pensioners who can only afford to lick their produce, students who are only looking for work, chavs who only want to steal their stuff and drug dealers who want to sell them something?
I mean, for Christ's sake don't these people go to supermarkets themselves after they finish work so they can buy something for their own dinner?
They're absolutely heaving!
They're raking it in!
Yes, OK, it might have something to do with the convenience of having everything under one roof so that if you are the size of a small Welsh cottage you don't suffer the enormous inconvenience of having to step outside to move from aisle to aisle, but look at the tat they sell - it's wall to wall generic shite.
Give me a thriving High Street any day of the week.
But not, apparently, any evening.
Anyway, enough with the ranting. On to the Haggis...
I followed the same basic recipe as before, but the pluck I got from the butcher this time were a bit disappointing compared with the absolute monster I had last time around.
Either this chap was sadly undernourished, or the last one was a giant amongst sheep.
I didn't get the whole assemblage this time either - the organs had all been separated already, so there was no gullet, kidneys or tongue either, which was a bit of a shame.
I did buy some venison liver from the Castle Street Farmers' Market to bulk the liver quantity out, though for what it cost it was a pitiful quantity compared with even this miniature sheep's liver. It seems a complete venison haggis would be a different order of cost than a sheeps one.
Mind you - the difference in liver price does reflect the delicacy of flavour - I flash-fried a sliver of each of the livers for a quick taste test.
A liver sliver sample if you will.
The venison was absolutely exquisite with a delicate flavour and a fine texture, which made the lamb seem thick and dull by comparison. Probably it was something of a waste to add the venison to the haggis, and I don't think I could tell the difference in the end result.
The friendly butcher handed over some nice shin bones too, so this time I used the offal water to make up a nice dark beef stock for boiling the barley and moistening the mixture before stuffing.
The whole process took about 6 hours this time - quite a lot longer than I'd noted the last time I made them, despite the smaller pluck. Some of that might have been the time spent making the stock, and this time it was just me, whereas I think I managed to rope in a couple of unsuspecting assistants last time.
This time I was also quite conscious of the need to keep these haggii for a week before cooking them, so I deliberately cooked the lights a little more than I would have done otherwise. I imagine this had some impact on their final flavour.
I decided the best way to keep the haggii without them rotting would be to hang them so that they stayed dry - the ceca get very moist if they are left in contact with any surfaces - so I arranged a piece of string in my fridge door and hung the double haggis like a pair of veiny giant testicles. This seemed to work pretty well: they dried out quite thoroughly, and even started to look a little shrivelled towards the end so then I wrapped them in muslin and put them on the fridge shelf.
I gave them a jolly good sniff every day just to make sure there was no hint of rot.
Since I figured the liver was about half the size of the last one (I should really have weighed it, but I reckon around 2lb), I used roughly half quantities of my previous recipe though this turned out to be a bit heavy on the spices. I bought some nice fresh cayenne pepper in preparation, and perhaps this was a mistake.
I also realised that before you over-spice the stuffing mixture you can taste it by frying up a little batch. Probably I should have realised that before I added all the ground up spices eh?
Anyway - the lesson learned is go easy on the cayenne and taste the mixture before you add all the spices in.
Although I bought 3 salted ox ceca (just in case) I only needed one of them, and you really don't need to soak them overnight. I just gave them a thorough rinsing in the bath: run water into them so they swell up like a balloon to really flush all the salt out.
I used them with the fatty veins on the inside, the way they arrive.
Knowing that the kiddies would balk at the taste of liquor in their sauce, I cast around for a child-friendly alternative to the Drambuie sauce to go with the haggii. I think they really need something creamy to smooth off their rather dry edge, and despite some difficult hot-cauliflower-related memories for Rachel, I plumped for a version of Heston Blumenthal's Cauliflower Purée with the addition of some fennel to lighten it up a bit. Unfortunately I wasn't really happy with the result, so I mellowed the flavour back down again by blending in some cashew nuts. The result was pretty nice, but I had foolishly forgotten about Sonny's nut allergies, so we had to make a new version sans nuts (and fennel). Although I seemed to be the only one to notice the slightly acrid flavour to the purée, the original version has the same taste, so I don't think it was due to my fennel addition after all.
The verdict?
As I've intimated, I ever so slightly overspiced the mixture, but Alan still assured me that they were delicious, and I have to defer to his excellent taste. Though not quite as good as I remember the first ones being, they were still really good. At least as good as shop bought haggii, especially when smothered in the Drambuie sauce.
Despite my misgivings about the cauliflower 'gravy' the kids seemed to quite like it.
Everyone except the vegetarians had a good old dig at the haggis (yes, even Georgina), some of the kiddies even coming back for thirds (no, not Georgina), their empty skins lying like hollowed-out husks at the end of the meal were testaments to their popularity.
Although I was never completely sure about the cauliflower 'gravy', the kids seemed to like it.
Mostly a reprise of Haggis I
Haggis II
main meat
Serves LotsIngredients
- Offal. Lots of offal!
Cover the offal with water in a large pot and boil it up until it's cooked through.
Skim off any scum as it rises.
Drain the offal and use the cooking water to make beef stock
Begin gently toasting the oatmeal in a heavy frying pan on the stove top until it turns golden and smells toasty(!), and start the barley simmering until tender in some of your rich beef stock
Pick through the liver, heart and lungs removing any tubes and stripping away the flesh. Grate the liver and blend the heart and lungs to a paste.
Take an ox cecum sock and stuff the mixture in until you have a decent-sized package. 4-6 person sized haggii were a bit easier to handle than monster rugby balls.
Pack the mixture in quite firmly, and make sure to fill the stocking so as not to leave any air pockets.
You end up with a couple (or more I suppose if you like) giant maracas. I tied the final end of the stocking into a knot, tied string around it too for security, and then cut off the excess with scissors. You can wash off the mess you've made on the outside with a little water and hey presto. The finished product.
I don't think I would have left the haggii in a bowl or bag for a week as the ox intestine seems to stay quite moist and slimy on contact with any kind of surface but it dries out quite nicely when hung up somewhere cool and dry. It's especially easy to hang them from the middle stretch of stocking if you've made a nice pair of haggii out of the one cecum.
To cook the haggii, place them in a large pot of water and slowly bring to the gentlest of simmers. Simmer for 3 hours.
You need to keep a close eye on the fellows in case their skins split open, in which case you will need to wrap them in aluminium foil for the rest of their cooking. If you prefer you could probably wrap them right from the start just in case.
These home-made haggii seem to have an annoying tendency to split, though one of the two we made this time did make it whole all the way to the table!
Because I knew I was going to be keeping the haggii for a whole week before eating them
I decided to cook the ingredients somewhat more thoroughly than last time so they didn't go off.
Possibly this meant the result was not quite so succulent as last time, but hey - we didn't get food poisoning either!
Possibly this meant the result was not quite so succulent as last time, but hey - we didn't get food poisoning either!
Drain the offal and use the cooking water to make beef stock
Begin gently toasting the oatmeal in a heavy frying pan on the stove top until it turns golden and smells toasty(!), and start the barley simmering until tender in some of your rich beef stock
Pick through the liver, heart and lungs removing any tubes and stripping away the flesh. Grate the liver and blend the heart and lungs to a paste.
Stripping out the flesh from the lungs takes a really long time since it mostly consists of capillaries.
For the amount of flesh you get I'm not at all convinced it's worth it, but it seems a shame to waste them,
and I think if you just puréed it all up tubes and all,
you would end up with an awful lot of gristly stringy bits. I found one or two as it was.
Mix all your ingredients (except the spices) together now and moisten with stock as necessary to get the mixture to cohere nicely.
Add some of the spice blend now, but fry up a sample spoonful or two of the mixture to check the levels as you go to make sure you don't overdo it.
Be especially cautious with the cayenne pepper(!).Take an ox cecum sock and stuff the mixture in until you have a decent-sized package. 4-6 person sized haggii were a bit easier to handle than monster rugby balls.
Pack the mixture in quite firmly, and make sure to fill the stocking so as not to leave any air pockets.
An alternative view here - half fill the sock, squeeze out any air left inside,
then tie off and carefully work the filling back out into the full length of the sausage.
Tie some string around the stocking in a couple of places when you are happy,
then continue stuffing to make the next, connected, haggis ball.You end up with a couple (or more I suppose if you like) giant maracas. I tied the final end of the stocking into a knot, tied string around it too for security, and then cut off the excess with scissors. You can wash off the mess you've made on the outside with a little water and hey presto. The finished product.
I don't think I would have left the haggii in a bowl or bag for a week as the ox intestine seems to stay quite moist and slimy on contact with any kind of surface but it dries out quite nicely when hung up somewhere cool and dry. It's especially easy to hang them from the middle stretch of stocking if you've made a nice pair of haggii out of the one cecum.
To cook the haggii, place them in a large pot of water and slowly bring to the gentlest of simmers. Simmer for 3 hours.
You need to keep a close eye on the fellows in case their skins split open, in which case you will need to wrap them in aluminium foil for the rest of their cooking. If you prefer you could probably wrap them right from the start just in case.
These home-made haggii seem to have an annoying tendency to split, though one of the two we made this time did make it whole all the way to the table!
It is also been suggested that (watching hawk-like) you can pierce any air bubbles as they appear during cooking
which might rescue the haggis and stop the split "running".
I'm not convinced - but feel free to give it a try before you whip out the tin hat.
I'm not convinced - but feel free to give it a try before you whip out the tin hat.
Cauliflower, Fennel And Cashew Purée
side veg
Serves 4Ingredients
1 medium
1 small fennel
50g unsalted butter
3 pierced cardamoms
10 strands saffron
handful cashew nuts
175-200ml semi-skimmed milk though I don't see why you couldn't use whole milk
salt
Method
1 small fennel
50g unsalted butter
3 pierced cardamoms
10 strands saffron
handful cashew nuts
175-200ml semi-skimmed milk though I don't see why you couldn't use whole milk
salt
Warm most of the milk with the cardamoms and saffron then set aside to infuse.
Trim the base off the cauliflower, break into florets.
Cook gently in a generous amount of butter until they start to colour (15 minutes or so).
Add the cashews
Halve and slice the fennel and add to the cauliflower then cook until they soften.
Strain the infused milk into the cauliflower and simmer for 5 minutes, then purée in a blender and pass through a sieve. Add extra milk as necessary to achieve a slightly sloppy consistency.
Season to taste
When I made this first, I thought the fennel had given it a slightly acrid edge,
so I added the cashews to take some of the bitterness away.
However, when we made it again without the fennel (or cashews) the same edge was there - so I think it's from the cauliflower after all. Cooking for a little longer might take some of that away, but I have to say I was the only one who thought there was anything wrong, and the purée was quite popular with the girlies.
Another admission - I must have misunderstood my own reference to Fiona Becket's book, because I expected this to be something like a gravy substitute, but it definitely isn't. Once you accept that though, I did like the fennel/cashew addition. It rounded the purée out quite nicely.
Drambuie Sauce
sauce veg
Ingredients
4 minced shallots (optional)
300ml double cream
150-200ml Drambuie
2 tsps honey (optional)
Method
300ml double cream
150-200ml Drambuie
2 tsps honey (optional)
If you fancy some shallot flavour (and tiny lumps) in your sauce, sweat the shallots in 30g butter until translucent.
Add the Drambuie and reduce by half, then add the cream and heat through.
If you want extra sweet, add some honey.
Serve hot.
Add the Drambuie and reduce by half, then add the cream and heat through.
If you want extra sweet, add some honey.
Serve hot.
Neeps
side veg
Ingredients
Turnips. Or as we Southerners call them, Swedes.
Grand Marnier
Butter. Lots of butter
Method
Grand Marnier
Butter. Lots of butter
Have Alan mash up your neeps for you.
Add a generous splash of Grand Marnier and an unfeasibly large lump of butter.
Season well.
Take all the credit.
Add a generous splash of Grand Marnier and an unfeasibly large lump of butter.
Season well.
Take all the credit.
Stovies
It's just past Christmas and time to start using up those leftovers.
Unless you had Christmas dinner at the in-laws, in which case you won't have any leftovers and will have to improvise.
Stovies is one way of using up leftover beef or ham, or the odd tin of corned beef you might have lingering in the back of the cupboard like we did.
And what better way to christen Rachel's fancy new Le Creuset saucepan than with a fine stovie?
The big stock pot seems to work pretty well for stews too...
Georgina said it wasn't horrible! Another one for the list.
Stovies
main meat
Serves 1 Eldorado familyIngredients
2 onions, sliced
dripping or butter and olive oil for frying
4-6 potatoes peeled, sliced ¼" thick
1 Oxo cube
Worcestershire sauce
water
gravy granules
½ cooking apple, peeled, quartered, thinly sliced
12oz tin corned beef, shredded.
Method
dripping or butter and olive oil for frying
4-6 potatoes peeled, sliced ¼" thick
1 Oxo cube
Worcestershire sauce
water
gravy granules
½ cooking apple, peeled, quartered, thinly sliced
12oz tin corned beef, shredded.
Peel and cut the onions in half then slice thinly.
Heat the dripping (preferably) or half and half butter and olive oil in a large heavy pot.
Fry the onions gently until soft and translucent (I added garlic too, but I don't know that it really contributed much).
Peel the potatoes (I used about twice the volume of potatoes as corned beef), cut into ¼" slices and wash them to remove excess starch.
Mix the oxo cube with a pint of hot water.
When the onions are cooked add the potatoes, the oxo water, a good dose of Worcestershire sauce and enough water to just cover the potatoes. Cover the pan and leave to simmer gently until the potatoes are ready to fall apart, turning occasionally, and adding the apple slices towards the end.
Shred or finely chop the corned beef, add to the potatoes and throw in a few gravy granules for good measure. Cook uncovered until the potatoes and meat are melting together and the mixture has nicely dried out.
You can fry up some finely chopped bacon or sliced chorizo and add to the corned beef if you fancy.
Season (it probably won't need any - not seeing as how the second ingredient listed in Oxo and the third in Bisto is salt) and serve.
A fine traditional Scottish dish!
OK, maybe the apple is a bit novel (though it works very nicely I have to say), but you can't go wrong with Oxo cubes and Bisto Gravy Granules now can you?
OK, maybe the apple is a bit novel (though it works very nicely I have to say), but you can't go wrong with Oxo cubes and Bisto Gravy Granules now can you?
Incidentally you can make it with a cup of pinhead oatmeal or rolled oats instead of the potatoes if you want to be really Scottish.
Don't use Gala apples though - they never go soft.
Buttered braised cabbage makes an ideal accompaniment.
Don't use Gala apples though - they never go soft.
Buttered braised cabbage makes an ideal accompaniment.
Beef In Red Wine with Dumplings
main meat stew
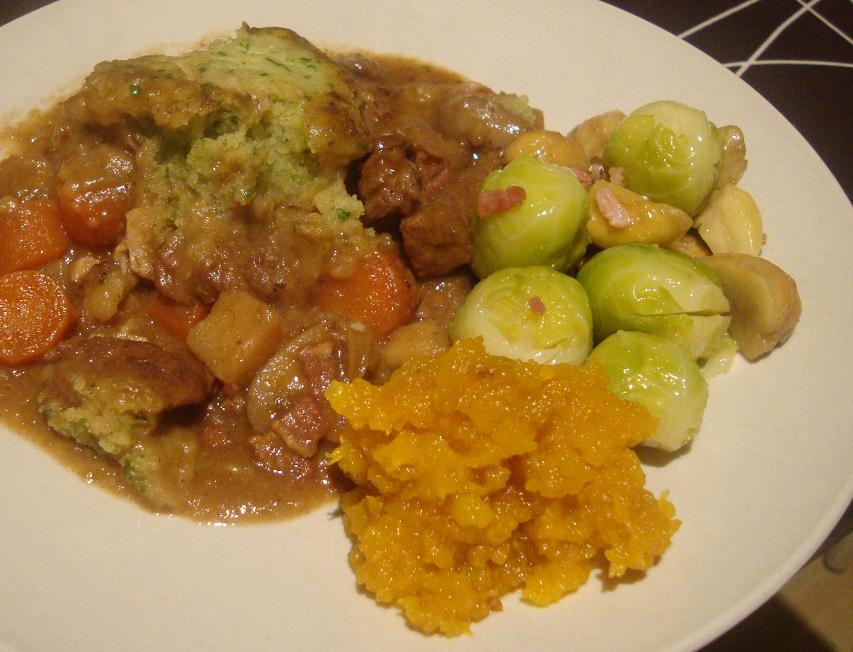
Ingredients
olive oil
1 lb Stewing Steak in 1" cubes
2 Tablespoons plain flour
2 Tablespoons tomato purée
1 potato
3 carrots, in ½ slices
2 onions, roughly chopped
6 garlic cloves, crushed and roughly chopped
1 leek, minced
4 oz bacon, sliced into lardons
6 oz mushrooms, halved if they're large
2-3 glasses red wine
water/stock
For The Dumplings
125g very chilled butter
125g self-raising flour
fistful parsley leaves, washed, minced
pinch salt
Method
1 lb Stewing Steak in 1" cubes
2 Tablespoons plain flour
2 Tablespoons tomato purée
1 potato
3 carrots, in ½ slices
2 onions, roughly chopped
6 garlic cloves, crushed and roughly chopped
1 leek, minced
4 oz bacon, sliced into lardons
6 oz mushrooms, halved if they're large
2-3 glasses red wine
water/stock
For The Dumplings
125g very chilled butter
125g self-raising flour
fistful parsley leaves, washed, minced
pinch salt
Slice the bacon into lardons and fry in olive oil until they start to crisp up, remove and set aside.
Reheat the bacon fat and olive oil (adding extra if necessary) until smoking and seal the beef. Remove with a slotted spoon and set aside
Chop the onions roughly - I halved the onions, then quartered those halves and sliced into ½" pieces.
Mince the leeks.
Peel the carrots and potatoes and cut into ½" pieces.
Reheat the oil, adding extra if necessary and fry the carrots and potatoes until they begin to colour. Remove with a slotted spoon and set aside.
Reheat the oil, adding extra if necessary and return the meat to the pan. Fry until it is on the point of browning again, then sieve a couple of tablespoons of plain flour into the mixture. Mix well and fry a little until the flour has absorbed the oil and is beginning to take on colour then add a couple of tablespoons of tomato purée and fry until the oil separates.
Return all the other vegetables to the pan, reheat, then gradually add the red wine, stirring and reducing until the mixture thickens. Add enough water to cover, put on the lid, turn down the heat and leave to simmer for an hour or two.
In a small pot, heat up some olive oil and fry the mushrooms until they brown then add them to the stew.
The Dumplings
Put a stick of butter in the freezer for a half-hour, then grate the well-chilled butter into a food blender, add the sieved self-raising flour and a pinch or two of salt.
Blend until the mixture becomes like fine breadcrumbs, add the parsley and a tablespoon or two of cold water and pulse until the mixture coheres.
Form into palm-sized balls and gently press down into the stew about 30 minutes before serving. Leave the stew covered to cook the dumplings.
Reheat the bacon fat and olive oil (adding extra if necessary) until smoking and seal the beef. Remove with a slotted spoon and set aside
Chop the onions roughly - I halved the onions, then quartered those halves and sliced into ½" pieces.
Mince the leeks.
I forgot to mince the leeks (so as to hide them from the kids) and only sliced them into rings.
So I was forced to blend them in a food processor.
I suppose this added to the thickness of the stew - you could just purée the entire onion/garlic/leek combination if you like
Reheat the oil, adding extra if necessary and fry the garlic until it starts to colour, followed by the onions until they start to caramelise,
followed by the leeks until they soften.
Remove with a slotted spoon and set aside.I suppose this added to the thickness of the stew - you could just purée the entire onion/garlic/leek combination if you like
Peel the carrots and potatoes and cut into ½" pieces.
Reheat the oil, adding extra if necessary and fry the carrots and potatoes until they begin to colour. Remove with a slotted spoon and set aside.
Reheat the oil, adding extra if necessary and return the meat to the pan. Fry until it is on the point of browning again, then sieve a couple of tablespoons of plain flour into the mixture. Mix well and fry a little until the flour has absorbed the oil and is beginning to take on colour then add a couple of tablespoons of tomato purée and fry until the oil separates.
Return all the other vegetables to the pan, reheat, then gradually add the red wine, stirring and reducing until the mixture thickens. Add enough water to cover, put on the lid, turn down the heat and leave to simmer for an hour or two.
In a small pot, heat up some olive oil and fry the mushrooms until they brown then add them to the stew.
The Dumplings
Put a stick of butter in the freezer for a half-hour, then grate the well-chilled butter into a food blender, add the sieved self-raising flour and a pinch or two of salt.
Blend until the mixture becomes like fine breadcrumbs, add the parsley and a tablespoon or two of cold water and pulse until the mixture coheres.
Form into palm-sized balls and gently press down into the stew about 30 minutes before serving. Leave the stew covered to cook the dumplings.
I would have used suet rather than butter for the dumplings, but according to Rachel,
the whole of Edinburgh had sold out of suet because shops don't sell that kind of shit any more,
though she was sweet enough to bring me some lard thinking presumably that one hard white fat is as good as another.
So I tried improvising with butter instead. The resulting dumplings were a bit more loose and a bit less dense than they ought to have been. This might have something to do with using the same weight of butter as flour - I did try twice the weight of flour, but the mixture didn't show any signs of "crumbing" so I added more butter. Perhaps it would have been fine with half the butter?
Anyway, the dumplings weren't too bad.
I served this with mashed butternut squash (which oddly wasn't too popular, although the Eldoradoes do enjoy their butternut squash in chunks. Maybe I didn't mash it thoroughly enough?) - just slice your squash in half, scoop out the seeds and bake cut side down on a buttered baking tray for 45 minutes or so at Gas 6/200°C
Definitely NOT a Georgina favourite!
Beef And Carrot Stew
main meat stew
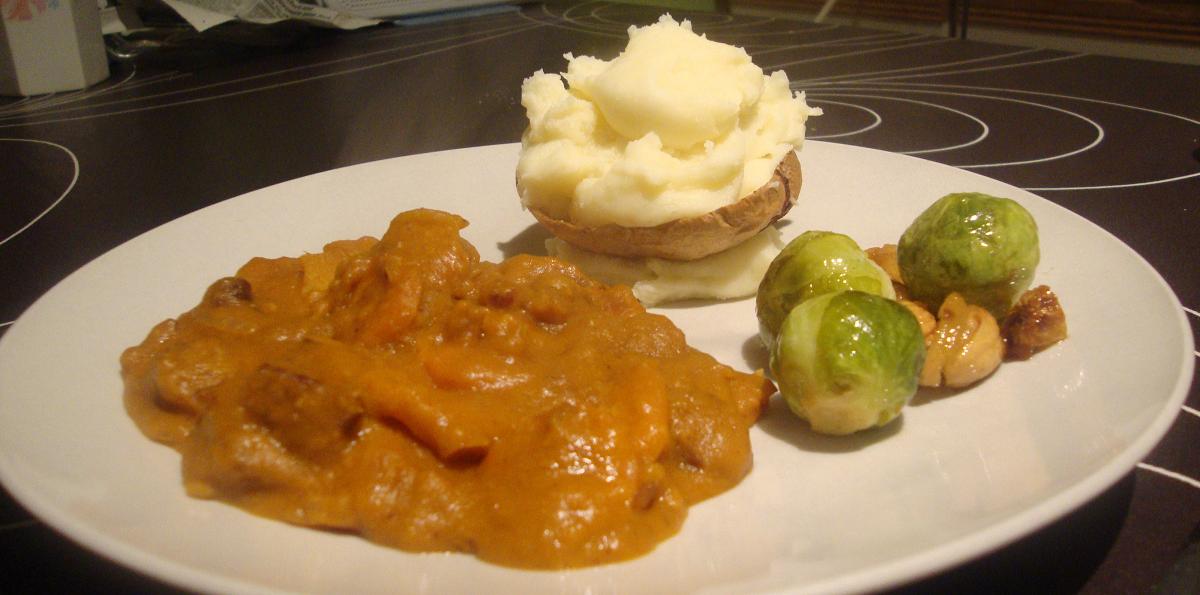
This was quite popular with everyone except Georgina who refused to touch it.
It's not really a stew so much as a meaty soup to be honest - it could probably do with more vegetable chunks and fewer lentils which made the sauce a bit gloopy.
It's not really a stew so much as a meaty soup to be honest - it could probably do with more vegetable chunks and fewer lentils which made the sauce a bit gloopy.
Serves 1 Eldorado family
Ingredients
olive oil
1 lb Stewing Steak in 1" cubes
2 Tablespoons plain flour
2 Tablespoons tomato purée
3 carrots, in ½ slices
2 onions, finely sliced
6 garlic cloves, pressed
1 leek, roughly chopped
1 tin tomatoes
handful red lentils
4 oz bacon, sliced into lardons
3 cardamoms
dried herbs
water/stock
Method
1 lb Stewing Steak in 1" cubes
2 Tablespoons plain flour
2 Tablespoons tomato purée
3 carrots, in ½ slices
2 onions, finely sliced
6 garlic cloves, pressed
1 leek, roughly chopped
1 tin tomatoes
handful red lentils
4 oz bacon, sliced into lardons
3 cardamoms
dried herbs
water/stock
Fry the roughly chopped leeks until they soften, add the lentils and fry through,
add the tinned tomatoes, a little water or stock and simmer until the lentils soften and expand.
Purée this mixture in a blender.
Slice the bacon into lardons and fry in olive oil until they start to crisp up, remove and set aside.
Reheat the bacon fat and olive oil (adding extra if necessary) until smoking and seal the beef.
Remove with a slotted spoon and set aside
Cut the onions in half, then again quarters or thirds. Slice thinly. Reheat the oil, adding extra if necessary and fry cardamoms until they sizzle, the onions until they soften, followed by the the garlic purée, followed by the herbs.
Remove with a slotted spoon and set aside.
Peel the carrots and cut into ½" pieces. baby carrots would be nice
Reheat the oil, adding extra if necessary and fry the carrots until they begin to colour. Remove with a slotted spoon and set aside.
Reheat the oil, adding extra if necessary and return the meat to the pan. Fry until it is on the point of browning again, then sieve a couple of tablespoons of plain flour into the mixture. Mix well and fry a little until the flour has absorbed the oil and is beginning to take on colour then add a couple of tablespoons of tomato purée and fry until the oil separates.
Return all the other vegetables with the leek and lentil purée to the pan, reheat, add enough stock or water to thin slightly, cover, turn down the heat and leave to simmer for an hour.
Serve with mashed potato.
Use baked potatoes for your mash - they really are just better.
Plus you get to crisp up the skins in a hot oven for 10 minutes to use as little mashed potato serving dishes!
Plus you get to crisp up the skins in a hot oven for 10 minutes to use as little mashed potato serving dishes!
Yum. Sprouts!
Sprouts with chestnuts and bacon
side meat
Not a bad idea, but needs work.
I tried to keep the chestnuts whole, or halved rather than minced, since Rachel really likes them. But they were a bit hard, and consequently this didn't work as one dish.
Perhaps if the chestnuts were melting into the sprouts it would be better.
Not quite sure how to achieve this...
I tried to keep the chestnuts whole, or halved rather than minced, since Rachel really likes them. But they were a bit hard, and consequently this didn't work as one dish.
Perhaps if the chestnuts were melting into the sprouts it would be better.
Not quite sure how to achieve this...
Ingredients
butter
dozen chestnuts
dozen sprouts
2 slices bacon
Method 1
dozen chestnuts
dozen sprouts
2 slices bacon
Cut small crosses in the flat side of each chestnut and put in boiling water to soften.
Take them out one at a time and peel thoroughly, making sure to remove all the thin brown papery skin.
Cut in half and simmer in milk for 10 minutes, drain and wash.
Meanwhile, cut the bacon into small dice pieces and fry in a small amount of butter until starting to crisp.
Combine the cooked sprouts, chestnuts and bacon and stir.
Serve.
Not really sure why I used milk here - I suppose I hoped it would keep the nuts sweet, but I don't think they really cooked for long enough.
Roasting them might preserve more of their nuttiness, then they could be just simmered with the sprouts to finish off.
Cut the thick stems off the sprouts and strip off their outer leaves.
Your mum would cut little crosses into the stems too.
Modern thought on this subject has it that since sprouts are traditionally smaller these days
and considerably sweeter-flavoured, there is no longer any need to make the little crosses in their stems.
To be honest once you've gone to the trouble of peeling off the wrinkly outer leaves and cutting off any stubs of thick stems anyway
it probably doesn't take any extra time. And I can't see it doing any great harm.
Gordon Ramsay is a believer in halving his sprouts and cooking them only briefly:
Next chop them in half, this makes them prettier to serve and quicker to cook. Cook the sprouts for 2 minutes ... it prevents the sprouts becoming too waterlogged and also preserves their colour.
Gordon also boils his sprouts and then thoroughly drains them before cooking them up with the oil/butter/garlic.
Melt a knob of butter in a saucepan, roll the sprouts in the butter until well coated,
add the smallest amount of water or white wine, cover and simmer for 10-15 minutes until tenderGordon Ramsay is a believer in halving his sprouts and cooking them only briefly:
Next chop them in half, this makes them prettier to serve and quicker to cook. Cook the sprouts for 2 minutes ... it prevents the sprouts becoming too waterlogged and also preserves their colour.
Gordon also boils his sprouts and then thoroughly drains them before cooking them up with the oil/butter/garlic.
Meanwhile, cut the bacon into small dice pieces and fry in a small amount of butter until starting to crisp.
Combine the cooked sprouts, chestnuts and bacon and stir.
Serve.
Method 2
This time around I tried roasting the chestnuts first and cooking them for longer.
I'm trying to get the nice toasty flavour, but soften the chestnuts up too.
I think the longer cooking helped with the softening, but the trouble with roasting the chestnuts
is that it toughens the skins, and makes dark hard spots which don't soften up properly.
Perhaps I could just boil them in their skins for 20 minutes or so?
Perhaps I could just boil them in their skins for 20 minutes or so?
Preheat the oven to Gas Mark 7/220°C.
Cut small crosses in the flat side of each chestnut and roast for 20 minutes or so. Peel thoroughly and cut in halves or quarters
Peel any tough outer leaves off some brussels sprouts and remove any tough stems.
Heat butter in a small saucepan, roll the chestnuts around in it, then throw in the brussels. Toast them for a few minutes without browning, then add a glass of white wine, season and cover for 15 minutes until the wine has reduced and the sprouts are tender.
Or in my case not quite tender enough to prevent Georgina gagging on them and making a dash for the bathroom.
Sigh - If only Rachel had been a bit quicker with the camera...
Sigh - If only Rachel had been a bit quicker with the camera...
Method 3
Nicest round of sprouts so far - the chestnuts have a lovely flavour simmered in their skins but they still aren't "melting"!
I first simmered them for half an hour, and the extra time below definitely adds a tiny margin of softness without completely losing all their flavour, but I can't see any way of softening them any further simmering with baking soda?.
I'm wondering about just making chestnut butter, maybe with a touch of vanilla instead of the lemon here?
Mind you I'm also tempted by Raptor's [since disappeared] description of Brussels Sprouts with Garlic, Capers, Lemon and Parsley though she seems to be talking about sprouts that might have been deep-fried, and there isn't a chestnut in sight.
Select between one and two times as many chestnuts as brussels sprouts, depending on how much you like chestnuts. Or sprouts.
I think I'd go for 1 to 1.
Grate the peel of a lemon and juice it.
Cut little crosses in the chestnuts and put them still in their skins into a saucepan with half the lemon juice. Cover them with plenty of water and simmer for one hour (!).
Peel them thoroughly and cut into quarters or slivers.
Dice some bacon slices, press some garlic cloves and prepare your sprouts by peeling off their outer leaves and trimming their stalks. Cut into quarters.
Gently fry the bacon dice in a little butter. When it's on the edge of crisping, add the garlic, then the sprouts, then the chestnut quarters. Throw in a glass of white wine (to almost cover the sprouts), the remaining lemon juice and some salt.
Cover and simmer gently until the sprouts are done and the liquid absorbed: about 15-20 minutes.
Throw on the grated lemon peel, shake generously and serve.
Method 4: Brussels Sprouts with Chestnuts and Candied Bacon
Thanks to Felicity Cloake's ideas for
brussels sprouts with toasted hazelnuts and candied bacon
and my own idea for using bicarbonate of soda to soften the chestnuts, I'm closing in on the ideal sprout/chestnut/bacon combo.
Unfortunately she shreds her brussels which seems a waste to me, but I'm taking her candied bacon and running with it. If there is a criticism, it's that you need to be slightly cautious with the bacon - if you don't allow time for it to soften into the sprouts it can be a bit like eating shards of glass.
Unfortunately she shreds her brussels which seems a waste to me, but I'm taking her candied bacon and running with it. If there is a criticism, it's that you need to be slightly cautious with the bacon - if you don't allow time for it to soften into the sprouts it can be a bit like eating shards of glass.
Pre-heat the oven to 200°C/Gas Mark 6.
Spread soft brown sugar in a shallow bowl and generously coat both sides of 2 or 3 slices of smoked streaky bacon not too thin is best. Cover a baking sheet with parchment and lay on the bacon. Sprinkle with a little extra sugar.
Bake for about 10 minutes until the surface of the bacon bubbles and darkens (don't worry if the excess sugar starts to burn).
Lift out to cool and harden on a wire rack. Stick them back in the oven for a bit longer if they're still too soft.
Snip them up with kitchen scissors and set aside.
Select about as many chestnuts as brussels sprouts, cut little crosses in them and simmer for a few minutes until the skins soften enough to peel easily. The inner membrane should also come away cleanly. Throw away any hard or black ones, or those which put up too much of a fight.
It's a good idea to boil a few extra in anticipation of casualties.
Bring a fresh pot of water to the boil, add the peeled chestnuts and a tablespoon yes a tablespoon or so of bicarbonate of soda. Simmer for 15 minutes, or until the chestnuts are meltingly soft.
Rinse thoroughly, then cut into quarters or slivers.
Peel and trim the sprouts and cut into halves, or quarters. Gently sweat in a little butter until they are glistening. With a little pressed garlic if you like Add the chestnuts, throw in a glass of white wine or stock, or both, to almost cover the sprouts.
Season.
Partially cover and simmer for 15-20 minutes until the sprouts are done to your satisfaction and the liquid absorbed. Toss thoroughly with the grated lemon peel, lemon juice and the candied bacon bits.
The bicarbonate really melts the chestnuts, but don't overdo it.
It's perhaps a bit cloying with the candied bacon, but still pretty damn good - leave to stand for a minute or two before serving to let the flavours meld and the bacon soften ever-so slightly.
I think my work here is done!
It's perhaps a bit cloying with the candied bacon, but still pretty damn good - leave to stand for a minute or two before serving to let the flavours meld and the bacon soften ever-so slightly.
I think my work here is done!
Christmas With Gravy
My first Eldorado Christmas!
Went pretty well I thought.
OK, the cooking went well I thought - there was a certain amount of social discord caused by my insensitive attempts to import some familiar Christmas Eve traditions into my new family - like eating curries and watching our favourite black and white Christmas movies. Unfortunately whilst unilaterally promoting the virtues of timeless fantasies like Miracle on 34th Street (and yes I do mean the 1947 original directed by George Seaton - those remakes are just pitiful and unnecessary imitations) I (apparently) completely failed to appreciate the value of such modern classics as Love Actually, and more heinously still, the value of a negotiated settlement when stubborn families' traditions clash!
Maybe it has something to do with having so often invited everyone I know to "Kill me, for God's sake kill me if I ever watch Love Actually actually" I'm now quite worried one or other more disreputable acquaintance might take that at face value.
Anyway, and more importantly, the feasting was most excellent - Amanda, Rachel's sister and Alan (not Allen - sorry Alan), traditionally host the Eldorado Christmas Dinner and this year cooked for an astonishing 17 people.
Rachel made her very tasty signature prawn, salmon, melon and ham kebab starters. and we had the leftovers for tea on Boxing Day. That's the downside of not cooking your own Dinner - there's nothing to eat on Boxing Day. Or the day after. Or the day after that. Of course, you save on washing up!
There was no leftover seafood sauce though, so I whipped up a Marie Rose Sauce which went pretty nicely.
My own minor contribution to the gastronomic festivities was that bread sauce I've been working on, a rather tasty Christmasy version of my Carrots Ricard with Clementines, and the best damn traditional Christmas gravy in the world (if I do say so myself).
Although I'd been promised that there would be Bisto on hand for those hard-core Eldorado traditionalists afraid of food that doesn't come out of a packet there didn't seem to be any on the table - maybe because we'd ended up with so much of mine: it's astonishing how much juice comes out of a 20lb turkey.
Mind you, I didn't hear any complaining.
I like my cooking I do, but I'm not sure I could handle Christmas dinner for 17 guests without blowing a gasket. It took me two days to make my mere three dishes! I do tend to get caught up in the fiddly little details me, lose sight of the bigger picture, the bigger pots.
And my, there were big pots.
Where does Alan keep such big pots?
Christmas Gravy
sauce
The best damn Christmas Gravy in the world - this is a whole lot of trouble, but well worth the effort.
The problem with just using the juice from your Christmas Dinner Bird (turkey, goose or emu) is that the gravy ends up looking slightly anaemic, even it if does taste perfectly fine.
Making a dark, rich stock beforehand takes much of the trouble out of the gravy for that special dinner - you can even make the whole gravy a day ahead, and just reheat it, thinning with fresh stock, on the big day.
The benefit of such a lovely rich stock is that you need minimal flavourings to finish the gravy off (even if I did add a touch of port and orange!)
Serves a dinner party
Ingredients
1 pint dark chicken stock
2 Tablespoons flour
2 Tablespoons butter
1 pint juices fresh from the Christmas Bird
juice of 1 Clementine
glass port
Method
2 Tablespoons flour
2 Tablespoons butter
1 pint juices fresh from the Christmas Bird
juice of 1 Clementine
glass port
Fry equal quantities of butter and flour in a generous pot
Whisk in the juice of a Clementine (or a Satsuma or other Mandarin orange).
You can chill the gravy at this stage and finish it off a day or so later.
To finish the gravy, reheat and then whisk in any strained juices syphoned off from the Christmas Bird, adding some of the vegetable water if you like (the dark stock can be a little overwhelming) and a nice splash of Port to finish off (other flavours are available).
Decant and float your gravy boat.
You can fry the butter and flour up in the Christmas Bird's baking tray scraping up all the delicious crispy bits
if the tray is free.
Gradually whisk in the dark stock, a few spoonfuls at a time to start with,
then more generously when the roux has loosened up.
Around 1 tablespoon flour per pint of stock works well if you like your gravy rather thin,
2 tablespoons if you like it a bit thicker like me,
3 if you're making wallpaper paste.
2 tablespoons if you like it a bit thicker like me,
3 if you're making wallpaper paste.
Whisk in the juice of a Clementine (or a Satsuma or other Mandarin orange).
You can chill the gravy at this stage and finish it off a day or so later.
To finish the gravy, reheat and then whisk in any strained juices syphoned off from the Christmas Bird, adding some of the vegetable water if you like (the dark stock can be a little overwhelming) and a nice splash of Port to finish off (other flavours are available).
Decant and float your gravy boat.
If you make the gravy ahead of time, be sure to plan the amount of flour appropriate for the finished volume and make the first round extra thick.
If you aren't quite sure how much you will be making you can always make extra roux and save some of it after you've added the first few portions of stock. Then if your finished gravy is too thin, you will need to whisk it back into your saved roux, a little at a time as for making gravy normally.
If you aren't quite sure how much you will be making you can always make extra roux and save some of it after you've added the first few portions of stock. Then if your finished gravy is too thin, you will need to whisk it back into your saved roux, a little at a time as for making gravy normally.
This didn't merit the Georgina Seal of approval I'm afraid
Marie Rose Sauce
sauce veg
The classic version of this sauce uses lemon rather than lime juice,
tomato ketchup rather than purée and omits the cream.
Other more upmarket versions also add brandy, cayenne pepper, Worcestershire sauce, and garlic.
I have an ingrained resistance to over-processed ingredients, and though I suppose that marie rose sauce is the epitamy of over-processed produce I didn't think my Heinz-free version was all that bad.
Other more upmarket versions also add brandy, cayenne pepper, Worcestershire sauce, and garlic.
I have an ingrained resistance to over-processed ingredients, and though I suppose that marie rose sauce is the epitamy of over-processed produce I didn't think my Heinz-free version was all that bad.
Ingredients
juice of a lime
1-2 teaspoons tomato purée
4 teaspoons mayonaisse
drizzle double cream
Method
1-2 teaspoons tomato purée
4 teaspoons mayonaisse
drizzle double cream
Whip up the ingredients.
Pour over your prawns.
Chicken Pie Mark 2
After my first watery chicken pie disaster I've been reluctant to subject the girlies to a second
round, but seeing as how I have a lot of spare chicken since I had to roast one up because I need the bones to make
stock to make gravy
for Christmas dinner, I'm going in....
First time I attempted a chicken and leek pie with the girls I left the fried shredded leeks and onions whole, and just covered them with cream and milk, without mixing this up into a roux. Damn those internet recipes.
This curdled during cooking and the resulting stringy, runny mess totally alarmed the girlies, who don't like to see too much of what they're eating.
We also made the mistake of making our own pastry, which was fun, but took all bloody evening.
This time I decided to try blending all those nasty vegetables away so as not to spook the horses, to make a really thick roux to make damn sure the sauce is going to thicken, and cheat outrageously by buying the pastry ready made.
It would have helped if I'd bought enough pastry to line the dish as well as making a top, but we made do by blind-baking the offcuts from shaping the pie top which almost covered the bottom of the pie dish. Personally I like the way pastry gets soggy with pie juices, but you could always skip the base if you think soggy pies are gross.
You can serve with boiled potatoes and the lemony carrots Ricard if you don't want the girlies to eat any, or with a nice winter salad if you are desperately trying to make room in your belly for Christmas.
Ding Ding! Round Two.
Chicken Ham and Leek Pie
main meat fowl cheese
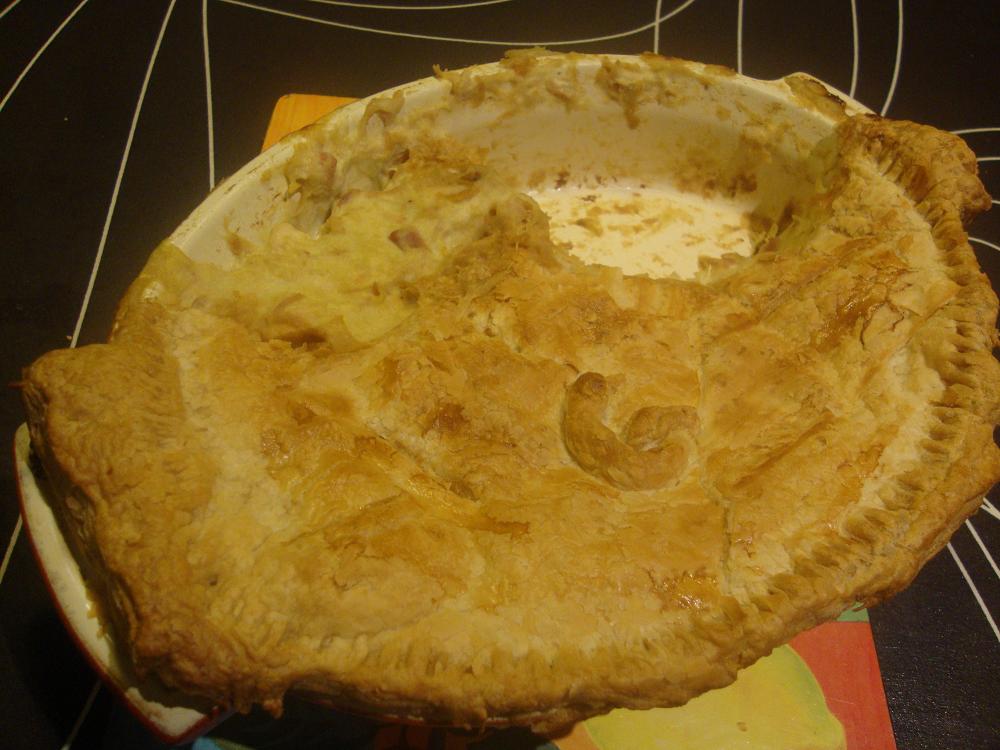
Ingredients
1 roast chicken, meat shredded
½ lb ham, thick-sliced, cut into pieces
butter
2 leeks
1 onion
4 cloves garlic, sliced
6 mushrooms, sliced
1 pint milk
4 Tablespoons cream
3-4 Tablespoons plain flour
1-2 teaspoons mustard
cheese, grated optional
salt. Plenty of salt.
2 packs puff pastry
Method
½ lb ham, thick-sliced, cut into pieces
butter
2 leeks
1 onion
4 cloves garlic, sliced
6 mushrooms, sliced
1 pint milk
4 Tablespoons cream
3-4 Tablespoons plain flour
1-2 teaspoons mustard
cheese, grated optional
salt. Plenty of salt.
2 packs puff pastry
Preheat the oven to Gas Mark 7/220°C.
Line a large pie dish with the puff pastry and bake the dish blind (you probably don't need to use baking beans as the puff pastry seems to stay down pretty well) for 15 minutes or until the pastry puffs and starts to turn golden. Don't bake it too dark or it will be difficult to scoop the pie off the bottom of the dish.
Meanwhile sweat the leeks, onions and garlic in butter until they soften, then add the sliced mushrooms and cook until they start to shrink.
When the vegetables are cooked through, add enough milk to blend this mixture and purée the fuck out of it to completely disguise all those horrible vegetables, especially the mushrooms, which no one likes.
Shred all the meat off a medium roast chicken and cut up the ham into bite-sized pieces.
Melt another four tablespoons of butter and add around 4 tablespoons or so of plain flour, fry it up until it begins to colour, then gradually add milk, whisking to make a nice roux. When you have a reasonable paste, next time start adding the vegetable purée and continue whisking in until all the purée is used up, adjusting the consistency with extra milk as necessary.
Add the shredded chicken and ham pieces, a teaspoon or two of english mustard (I considered using Dijon, but I was rather afraid the horrible "bits" might scare the girlies) to taste, and finish off with a generous slop of double cream.
Season with plenty of sea salt
Reduce the oven to Gas 4-5 (180-190°C).
Fill the pie dish with this mixture and cover with the remaining puff pastry sheet. (You will have bought enough pastry, of course).
Line a large pie dish with the puff pastry and bake the dish blind (you probably don't need to use baking beans as the puff pastry seems to stay down pretty well) for 15 minutes or until the pastry puffs and starts to turn golden. Don't bake it too dark or it will be difficult to scoop the pie off the bottom of the dish.
Meanwhile sweat the leeks, onions and garlic in butter until they soften, then add the sliced mushrooms and cook until they start to shrink.
When the vegetables are cooked through, add enough milk to blend this mixture and purée the fuck out of it to completely disguise all those horrible vegetables, especially the mushrooms, which no one likes.
I'm not really sure the mushroom flavour really worked - I used those anaemic white button ones
- maybe something a bit meatier like shitake might have been nicer?
They actually taste a lot better if you fry them separately until they lose most of their moisture and colour up nice and golden before adding them to the sauce.
They actually taste a lot better if you fry them separately until they lose most of their moisture and colour up nice and golden before adding them to the sauce.
Shred all the meat off a medium roast chicken and cut up the ham into bite-sized pieces.
Melt another four tablespoons of butter and add around 4 tablespoons or so of plain flour, fry it up until it begins to colour, then gradually add milk, whisking to make a nice roux. When you have a reasonable paste, next time start adding the vegetable purée and continue whisking in until all the purée is used up, adjusting the consistency with extra milk as necessary.
Add the shredded chicken and ham pieces, a teaspoon or two of english mustard (I considered using Dijon, but I was rather afraid the horrible "bits" might scare the girlies) to taste, and finish off with a generous slop of double cream.
Season with plenty of sea salt
You could probably add grated cheese here too.
Though then you wouldn't need so much salt.
Reduce the oven to Gas 4-5 (180-190°C).
Fill the pie dish with this mixture and cover with the remaining puff pastry sheet. (You will have bought enough pastry, of course).
The crust will try to shrink if you give it half a chance, there are a few things you can do to combat this:
Bake until golden on top (you can glaze with milk or beaten egg
if the girlies haven't yet lost interest and wandered off to play on their Wii)
for 30-45 minutes whilst you ruin the vegetables.- Rest the dough for 5 minutes after rolling it out - this allows the gluten to relax again after working.
- Rest the pie in the fridge for 15 minutes after you've laid on the crust for the same reasons.
- Trim the crust slightly larger than the pie dish to allow for a little shrinkage.
- Firmly crimp the edges of the pie to the dish with a fork or your fingers, or fold the crust over the edge of the dish to secure it.
Sophie described the pie as "Quite nice - not runny and curdled like the last time".
Score!
Score!
Winter Salad
salad cheese
Serves 4Ingredients
½ red cabbage, thinly sliced
4 sticks celery, thinly sliced
1 red onion, thinly sliced
1 red pepper, thinly sliced
½ dozen gherkins, thinly sliced
dozen green olives, pitted, halved
small pack mangetout, sliced diagonally into pieces
4 carrots, grated
red chillies, seeded, sliced
thyme (or other fresh herbs - tarragon might be nice)
thick-cut smoked bacon slices
3 cloves garlic, sliced
feta cheese
rocket
Dressing:
juice of 2 limes
1 clove garlic, crushed
green olives
2 teaspoons capers
gherkins
olive oil
salt
Method
4 sticks celery, thinly sliced
1 red onion, thinly sliced
1 red pepper, thinly sliced
½ dozen gherkins, thinly sliced
dozen green olives, pitted, halved
small pack mangetout, sliced diagonally into pieces
4 carrots, grated
red chillies, seeded, sliced
thyme (or other fresh herbs - tarragon might be nice)
thick-cut smoked bacon slices
3 cloves garlic, sliced
feta cheese
rocket
Dressing:
juice of 2 limes
1 clove garlic, crushed
green olives
2 teaspoons capers
gherkins
olive oil
salt
Slice your vegetables
Cut the bacon in to strips and fry them until they start to crisp up. Throw in the sliced garlic towards the end of the frying to colour. Dry this on kitchen paper and mix with the other salad ingredients, adding the cheese last so it doesn't break up too much.
Process the garlic, olives, capers and gherkins with the lemon juice, then whizz in the olive oil to make a thick pungent dressing and season.
Dress the salad and serve on the rocket.
Nice Dressing!
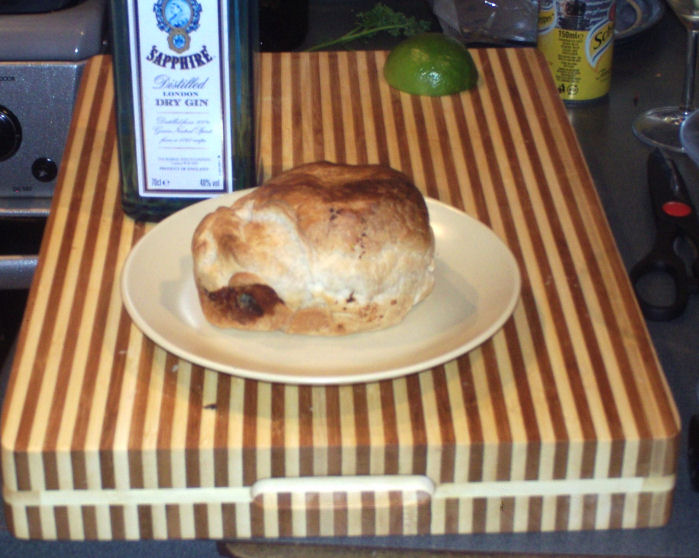


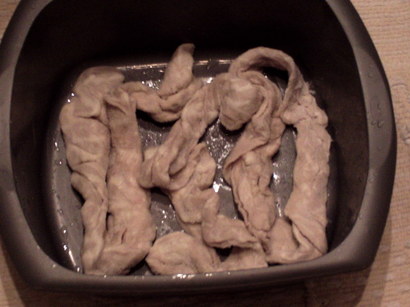
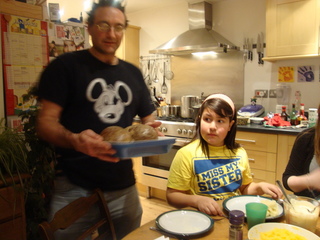
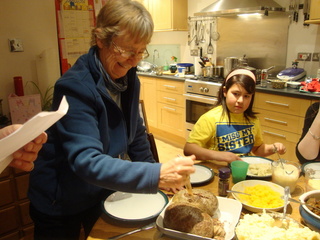
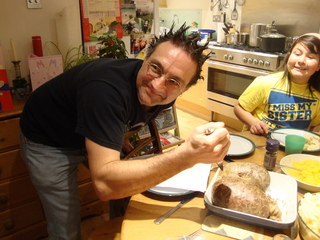
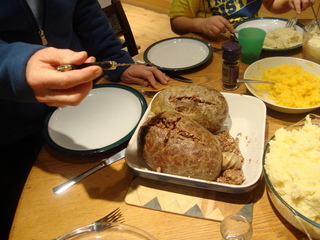
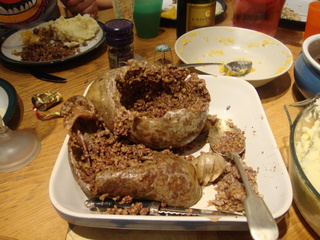
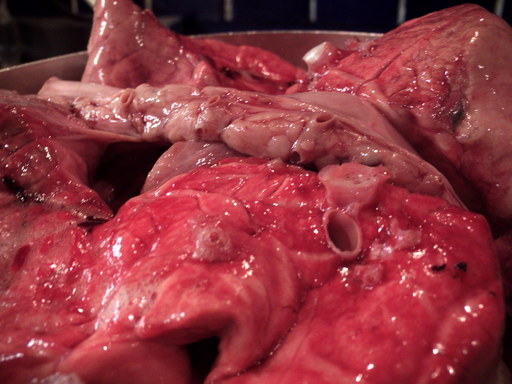
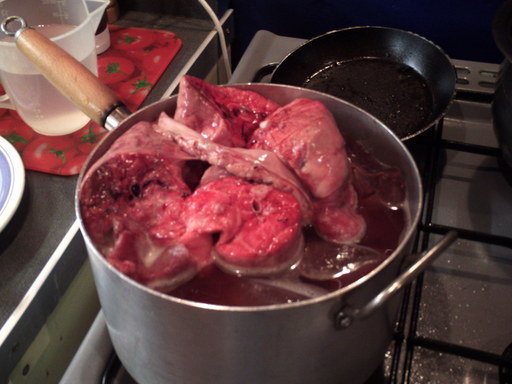
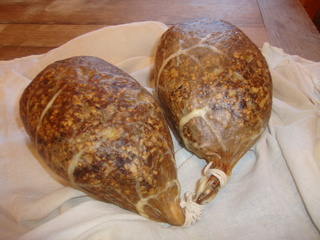
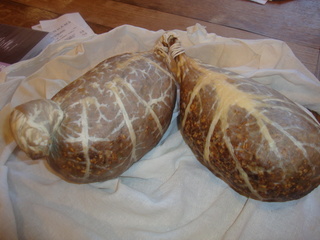
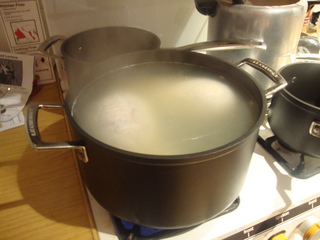
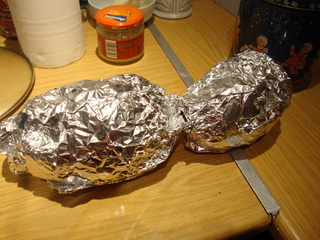
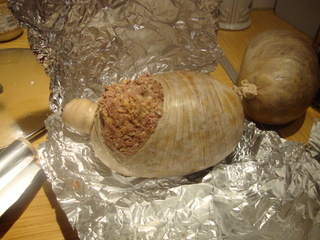
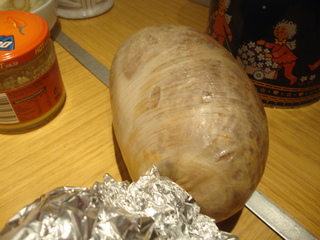
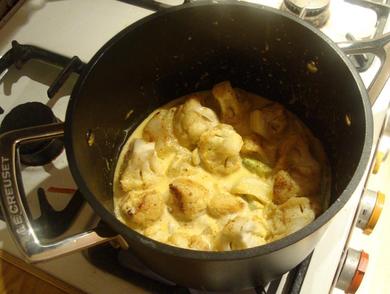
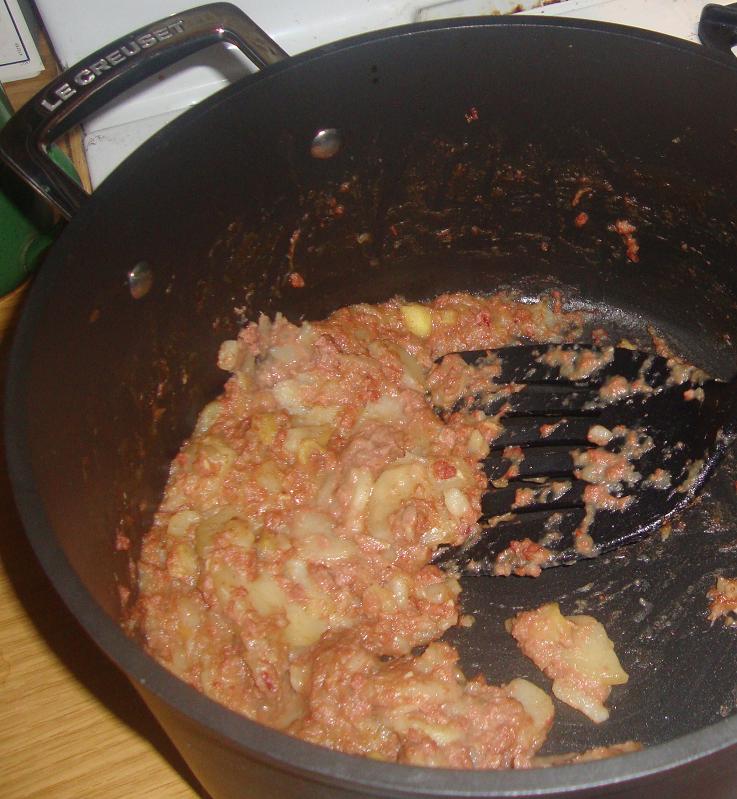
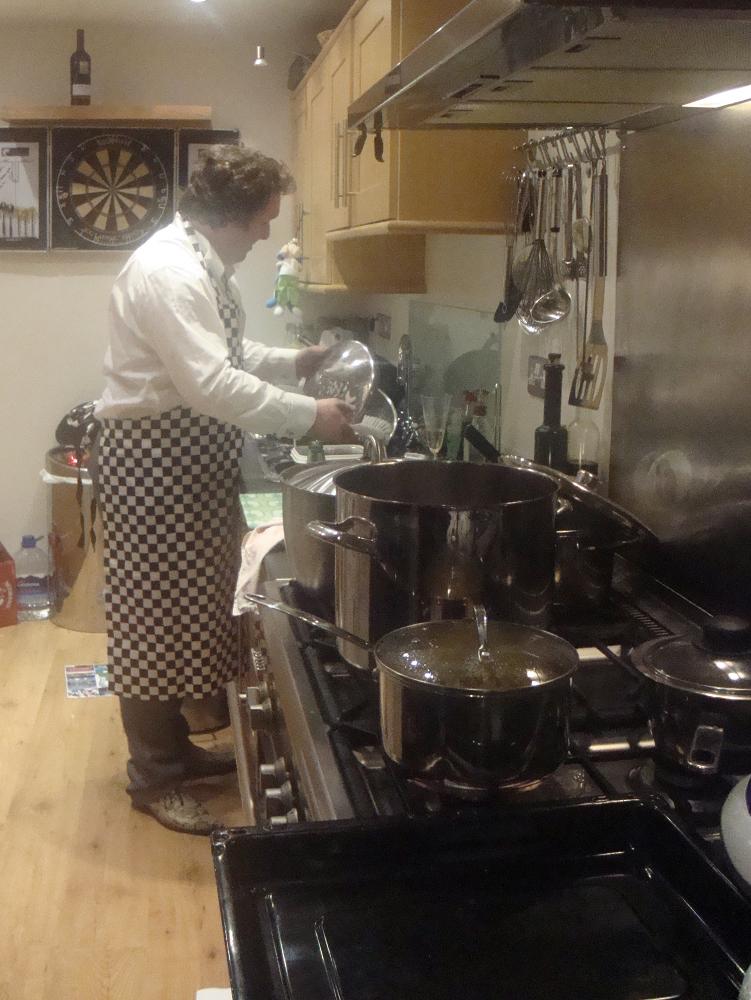

You can serve it cold, with a small salad around the roast tomatoes, though I think it would go really well with a tomato sauce or oil.
To roast the tomatoes, you can place them whole on a non-stick backing tray, drizzle with olive oil and bake for 10 minutes in the 200°C oven or until they start to split or blister. They look nice with their stalks still in.