
Spring Roll

As the action hero Super-Ram says: It's Lambin' Time!. Probably.
I had another go at rolling some baby lamb's breasts and roasting them, and discovered the delicious glory of a slow-braised lamb's shoulder. I really dunno why my kitchen is now covered in spare lamb parts?
And then I carried on cooking for the next 3 months.
And here it all is...
Slow Cooked Braised Rolled Lamb Breast
Round Three
Round Three
main meat
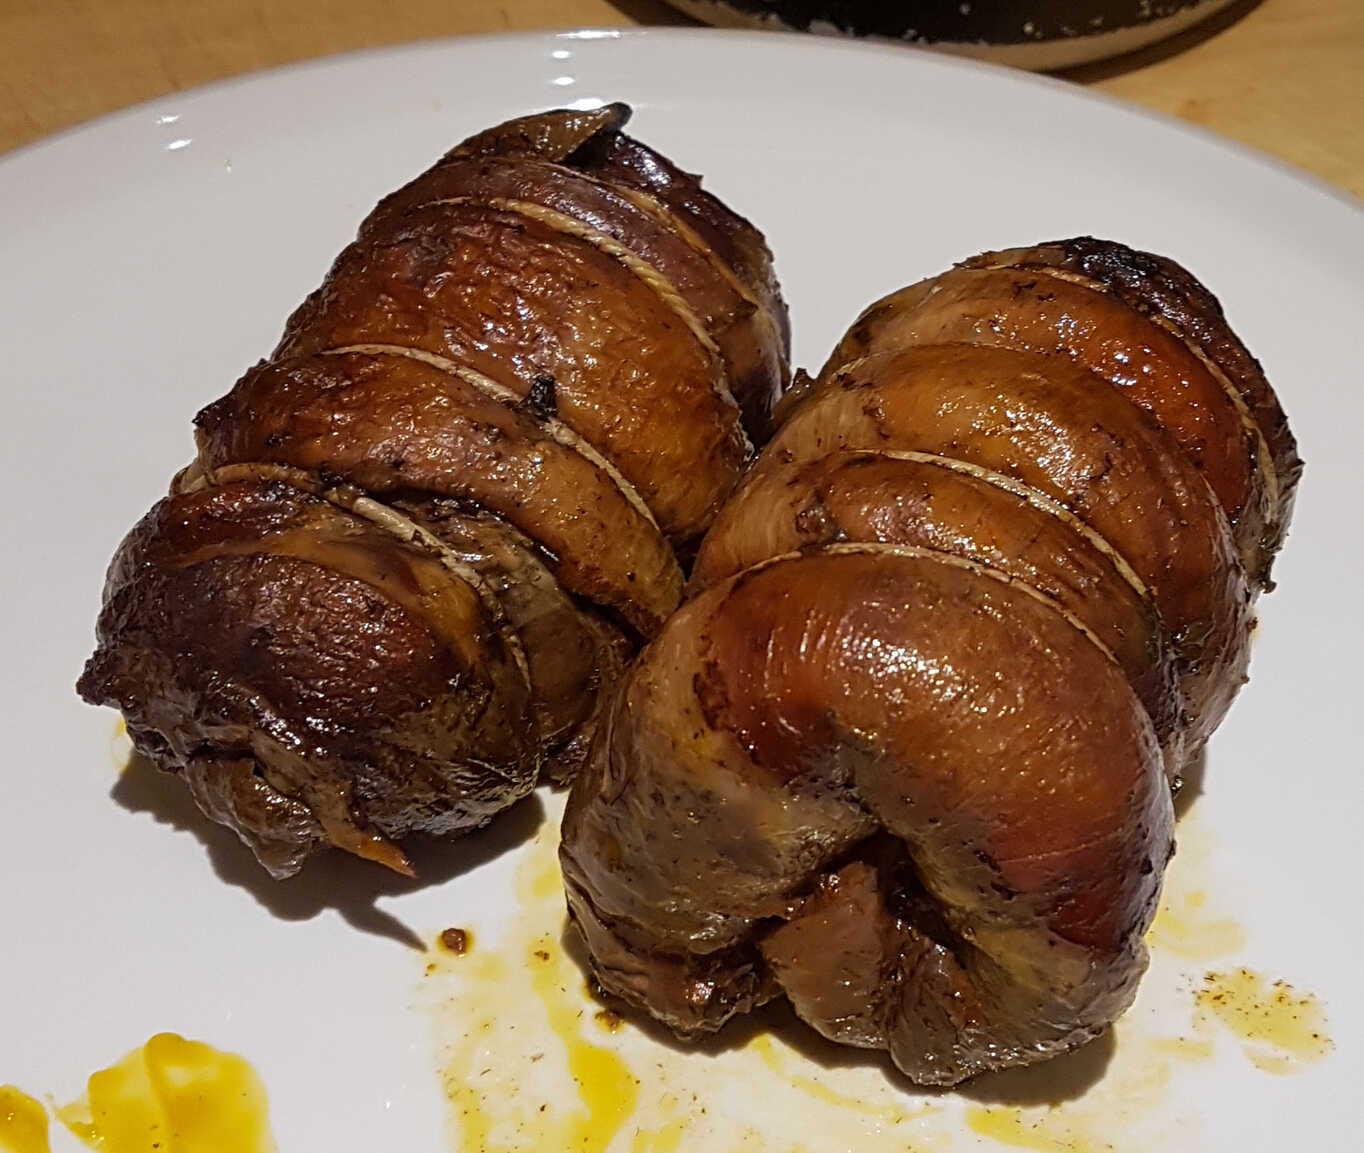

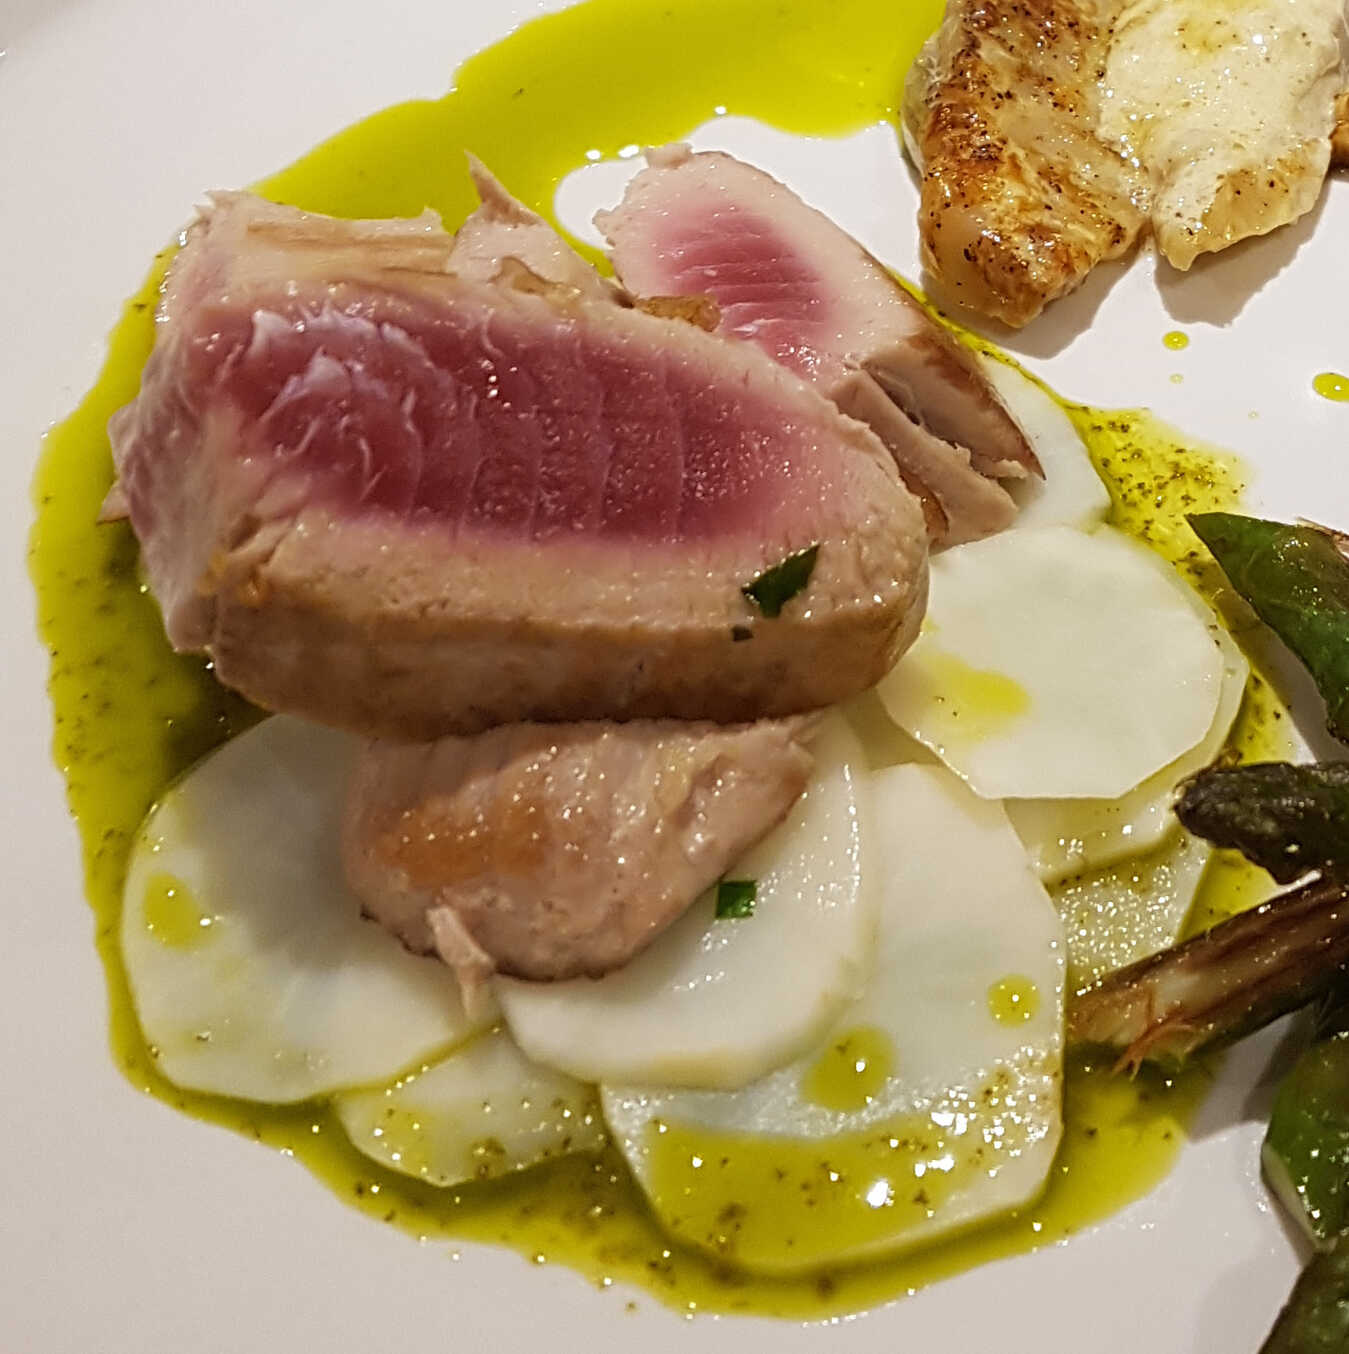
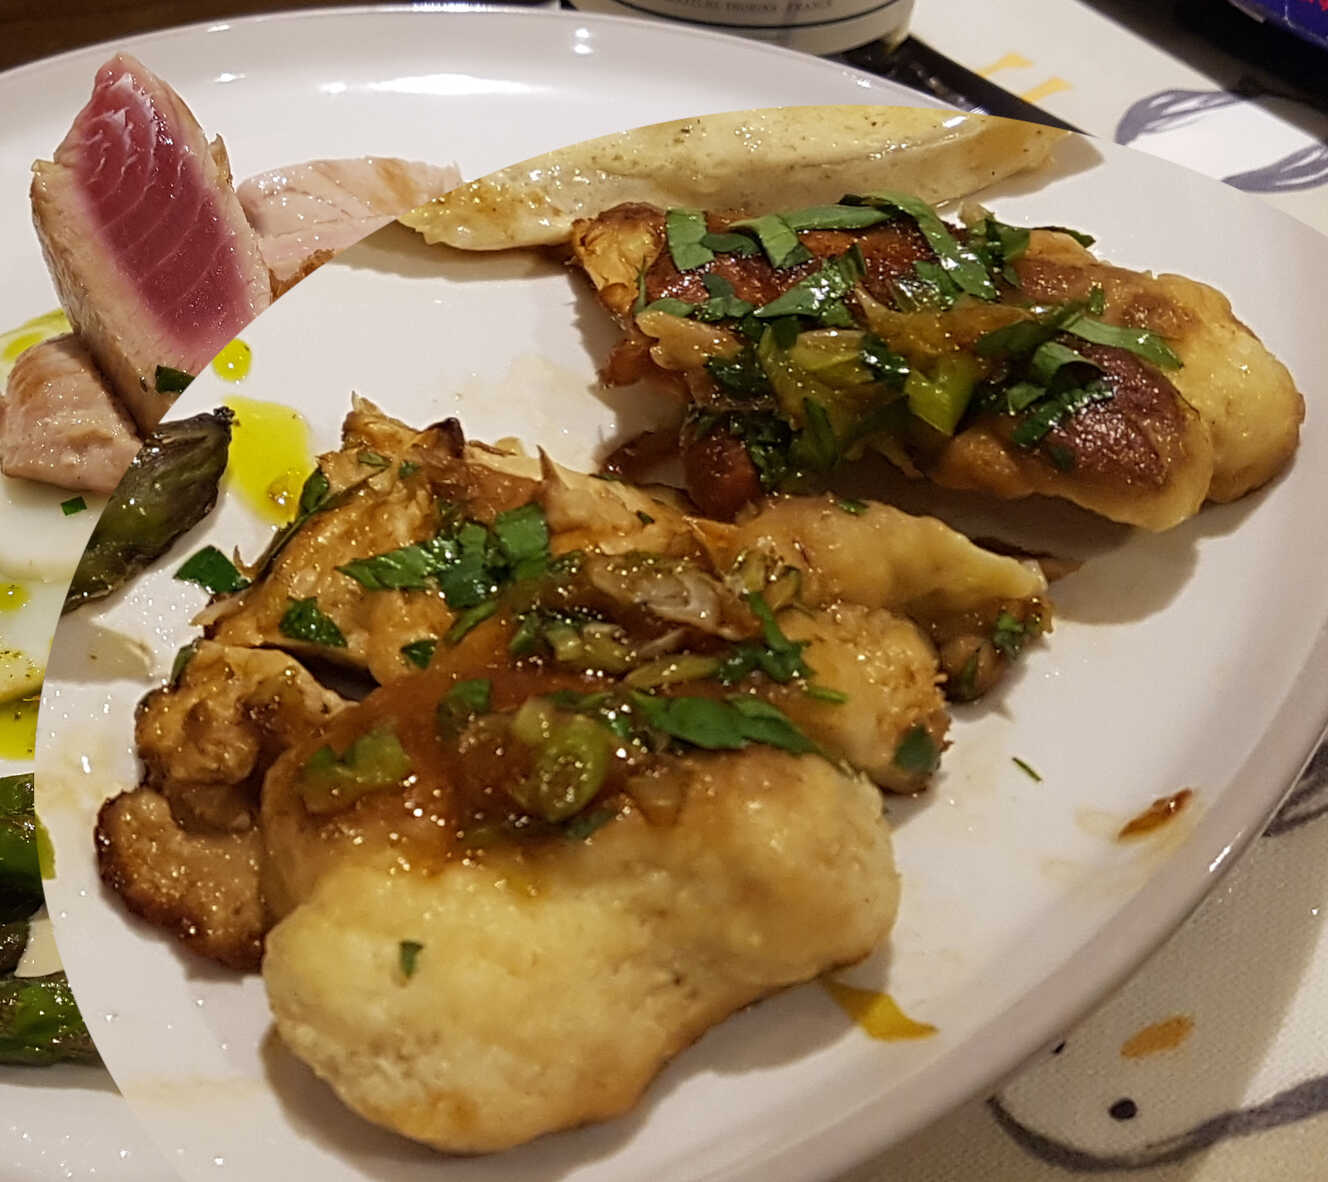
Round 3 of my experiments with rolled lambs' breasts.
So far I've produced them succulent with leathery hides, or crispy with (more) leathery insides.
I thought I'd try them in the slow cooker this time - and they turned out soft and succulent throughout.
So hurrah!
Either it was the longer cooking (8 hours in the slow cooker), or more likely the increased amount of liquid I used.
This time the rolls were almost covered, and I basted them a couple of times too.
Now, if I could only figure out how to get crispy skin and succulent insides I'd have covered everything.
Unfortunately if you just take the rolls from the braise and roast them for 10 minutes at Gas Mark 8 they do crisp, but it's a bit on the stringy, chewy side.
Perhaps better fat larding? Watch this space...
Serves about 2 per breast
Ingredients
- olive oil
- rolled lambs' breast(s)
- garlic
- onions
- hot-smoked anchovies other anchovies are also available
- thyme
- rosemary
- couple of tablespoons of tomato purée
- red wine
- zest of a lemon
- bay leaves
- splash balsamic vinegar
- water
First buy the rolled lamb breasts. Or, you know, buy lamb breast and roll it up yourself.
In which case you can salt the inside and cover it with the anchovies, lemon zest and herbs first. I guess.
Roughly chop the onions. Halve the head of garlic. We're going to strain the sauce before using it, so you can leave the peel on these.
Sear the rolled lamb breast(s) all over in olive oil in a large frying pan. Put them into the slow cooker.
Add thickly sliced onions, halved garlic cloves, anchovies, rosemary and thyme to the pan with more oil if required and fry until they soften and begin to colour up.
Stir through the tomato puée and cook down for a few minutes, then add the red wine and bubble the alcohol off.
Pour the contents of the pan into the slow cooker and add the bay leaves, lemon zest and a splash of balsamic vinegar. Maybe a tiny pinch of chilli flakes for some gentle warmth?
Cook in the slow cooker on low for 8 hours.
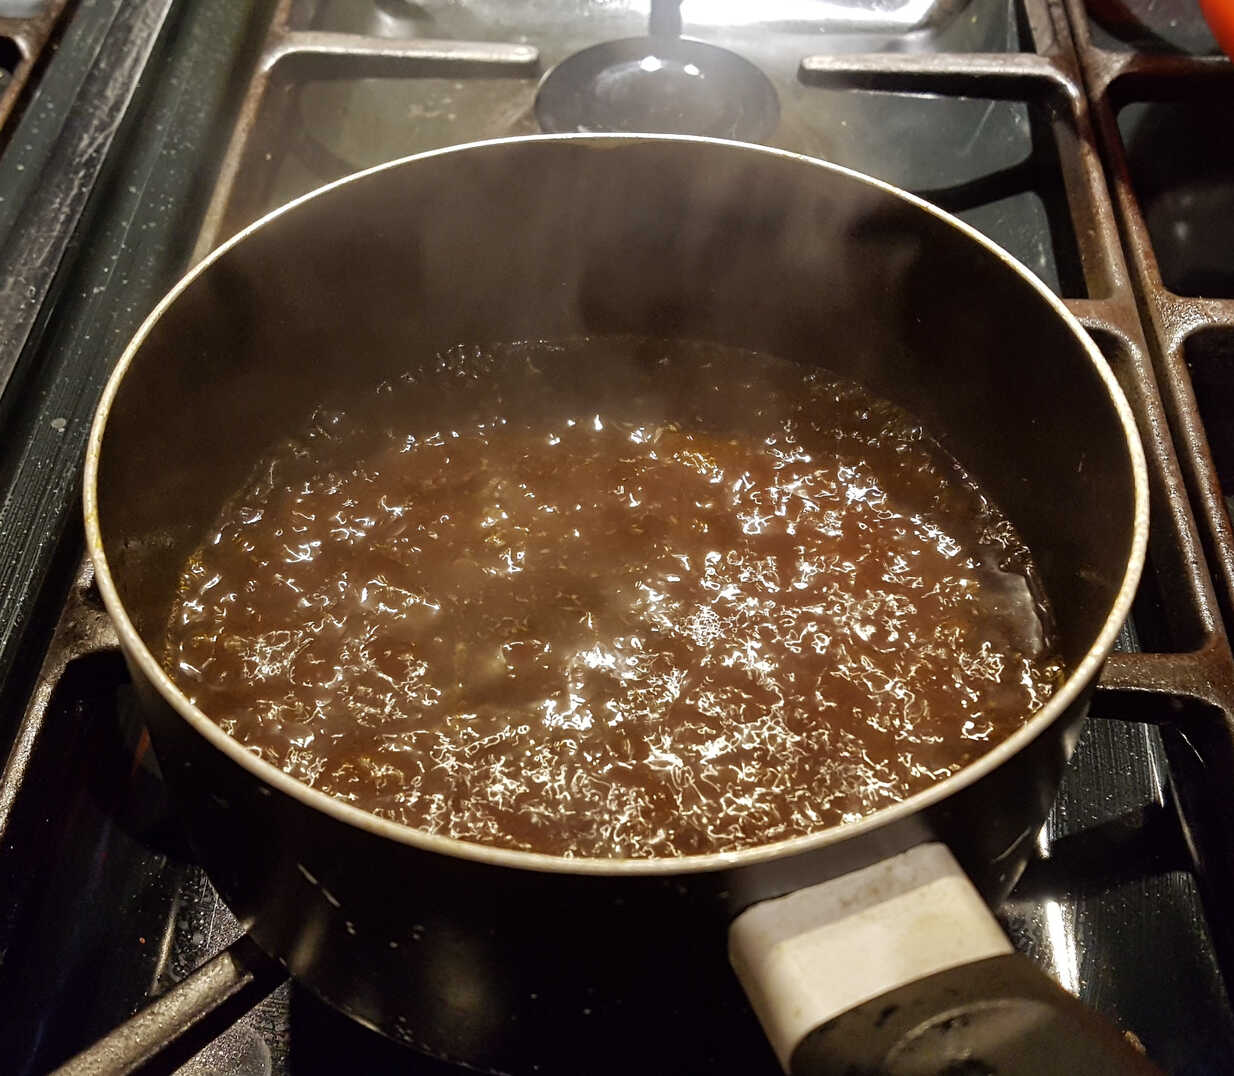
Decant the rolls and set them to rest for 10 minutes while you strain the liquid into a pan and boil hard to reduce to a nice jus.
Or you could thicken the liquid with cornflour slurry if you prefer.
In which case you can salt the inside and cover it with the anchovies, lemon zest and herbs first. I guess.
Roughly chop the onions. Halve the head of garlic. We're going to strain the sauce before using it, so you can leave the peel on these.
Sear the rolled lamb breast(s) all over in olive oil in a large frying pan. Put them into the slow cooker.
Add thickly sliced onions, halved garlic cloves, anchovies, rosemary and thyme to the pan with more oil if required and fry until they soften and begin to colour up.
Stir through the tomato puée and cook down for a few minutes, then add the red wine and bubble the alcohol off.
Pour the contents of the pan into the slow cooker and add the bay leaves, lemon zest and a splash of balsamic vinegar. Maybe a tiny pinch of chilli flakes for some gentle warmth?
You can add the lemon's leaves too, if it happened to come with any.
Rinse the frying pan with water or stock, using enough to cover ⅔ of the rolled breasts.Cook in the slow cooker on low for 8 hours.
Decant the rolls and set them to rest for 10 minutes while you strain the liquid into a pan and boil hard to reduce to a nice jus.
Or you could thicken the liquid with cornflour slurry if you prefer.
A reasonably good version. Well served with
Date Gratin,
Fennel Gratin,
Charred Asparagus and
Minted Pea Purée
Slow Braised Lamb Shoulder
main meat
Because of the amount of collagen and connective tissue in a lamb shoulder you can't cook it rare like you might for a leg.
Long and slow is the only way to go.
Following Nagi more-or-less exactly except for adding some grated lemon zest after the initial roast, before sealing.
Since I had a 2lb shank-side half-shoulder I only added 1 cup of liquid, half of which was white wine (and some of it was stock - just because I had some to use up).
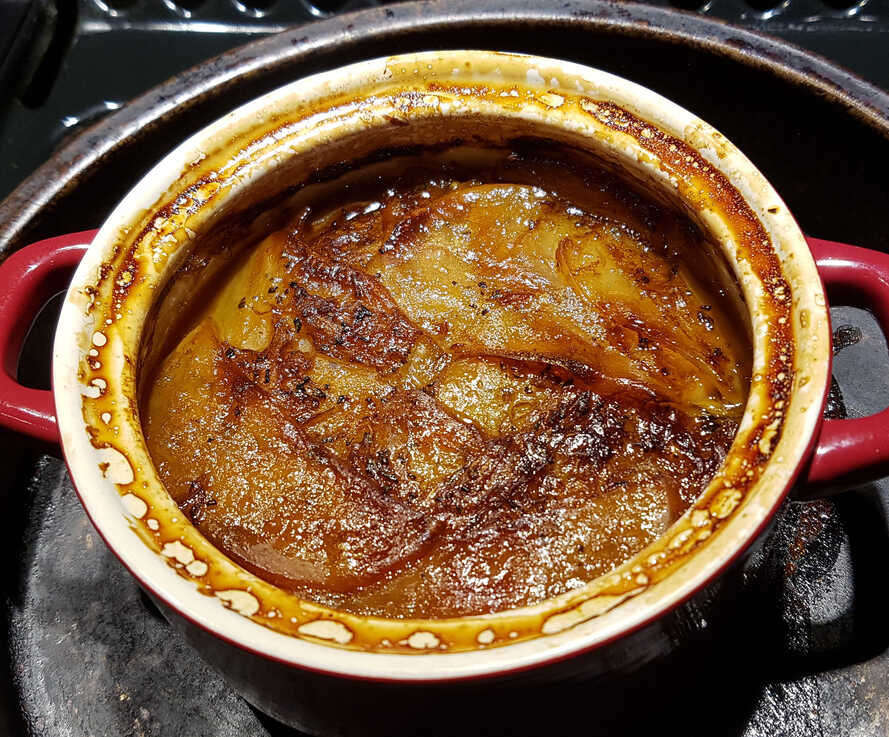
I super-sealed the roasting dish before slow-roasting:
Since I cooked mine overnight, the joint was ready many hours before dinner. So I just left the still-sealed dish untouched on the side, then reheated it for an hour at 150°C/300°F/Gas Mark 2-3, before opening it up to reduce the jus and serve.
Long and slow is the only way to go.
Following Nagi more-or-less exactly except for adding some grated lemon zest after the initial roast, before sealing.
Since I had a 2lb shank-side half-shoulder I only added 1 cup of liquid, half of which was white wine (and some of it was stock - just because I had some to use up).
I super-sealed the roasting dish before slow-roasting:
- Covered the joint with baking parchment, to stop it sticking, and prevent the bone from poking through the next layers.
- Wrapped air-tight in several layers of cling film.
- Covered again with baking parchment, to stop the cling film melting.
- Wrapped tightly in a couple of layers of tin foil.
Since I cooked mine overnight, the joint was ready many hours before dinner. So I just left the still-sealed dish untouched on the side, then reheated it for an hour at 150°C/300°F/Gas Mark 2-3, before opening it up to reduce the jus and serve.
That's how confident I was that it was perfectly cooked, and not burned to cinders!
I suppose I could have opened it immediately to check it and prepare the jus, and then reheated just the meat and veg, covered, in the roasting tin to serve at dinner time?
Ingredients
- 1.5-2.5kg / 3-4.5lb lamb shoulder, bone-in
- 2 cups water
- 4-6 large banana shallots, halved
- a few large garlic cloves, peeled
For the Marinade:- zest from ½ lemon, grated
- 1 tblsp fresh rosemary, finely chopped
- 1 tblsp dried oregano
- 2 large garlic cloves, minced
- 1 tsp salt
- ½ tsp black pepper
- ¼ cup extra virgin olive oil
For the Jus:- 1 tsp cornflour optional
Mix the Marinade ingredients in a small bowl. Rub thoroughly all over the lamb surface. You can do this in the roasting tin.
Leave the lamb to marinate for a couple of hours, or 24 hours in the fridge.
Peel and halve the shallots (or onions) lengthways.
Make a bed for the meat using these and lay the lamb shoulder on top. You can throw in a few extra rosemary sprigs too if you like.
Pour the water into the pan.
Cover lamb with baking paper, then a double layer of foil and seal very tightly to avoid water evaporation.
Braise for 12 hours.
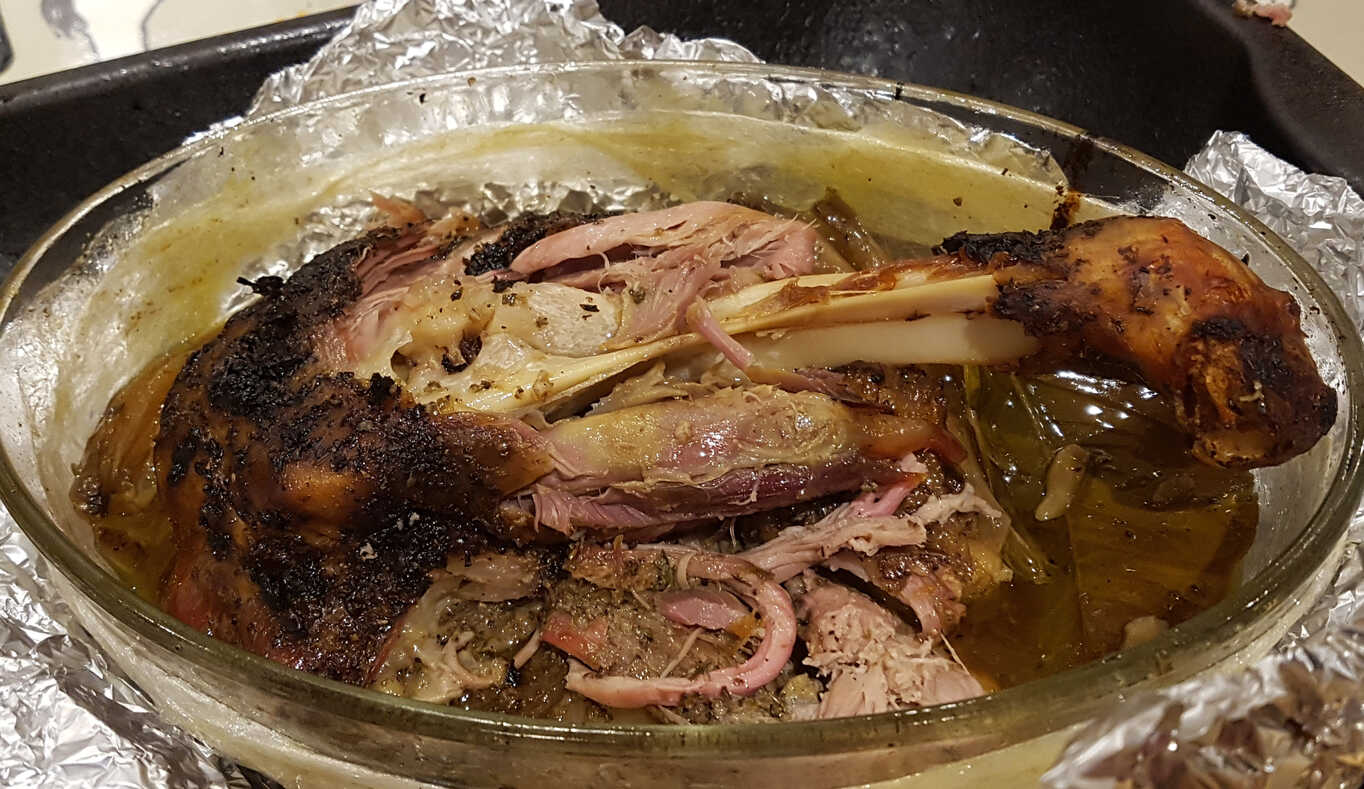
Remove lamb to a large dish. There will (should!) be a lot of liquid pooled under the lamb in the roasting pan.
Cover loosely with foil to keep warm. It will stay warm for 2 to 3 hours.
Strain the liquid into a small pan. Retain the vegetables.
There will tons of rendered fat which you will want to remove somehow. Let the juices settle or cool to scoop it off, or suck the juice from underneath with a turkey baster.
Now you can either reduce the liquid to a decent syrupy jus by hard boiling, or you can thicken it to gravy by heating with a teaspoon of cornflour added in a slurry.
Season to taste.
Tear the meat apart with tongs or forks. Dress with the jus and serve with the well-braised shallots and garlic cloves, if you like.
Leave the lamb to marinate for a couple of hours, or 24 hours in the fridge.
Nagi suggests that skipping this period does no discernable harm.
Preheat oven to 210°C fan/230°C/450°F/Gas Mark 8.Peel and halve the shallots (or onions) lengthways.
You could leave the peel on, but if you want to serve some of the shallot with the meat you probably shouldn't.
Peel a few large garlic cloves.Make a bed for the meat using these and lay the lamb shoulder on top. You can throw in a few extra rosemary sprigs too if you like.
Pour the water into the pan.
I used only half the suggested quantity of liquid - half wine and half water with a bit of spare stock added.
Roast uncovered for 45 minutes until nicely browned.
To be honest I'm not happy with the degree to which much of the dressing now burns in the hot oven while searing the meat.
If it were possible, I wonder if the meat couldn't be smeared with the dressing after this initial sear?
Perhaps wear latex gloves?
Turn down the oven to 100°C/210°F/Gas Mark ¼ or as low as your oven will go.If it were possible, I wonder if the meat couldn't be smeared with the dressing after this initial sear?
Perhaps wear latex gloves?
Cover lamb with baking paper, then a double layer of foil and seal very tightly to avoid water evaporation.
Braise for 12 hours.
You can cook it for longer! Nagi does it overnight. As did I.
You can also, as I did, include layers of cling film on the inside. The oven temperature will be low enough not to melt it.
Check the meat - test the side of lamb with two forks. The meat should be fall-apart tender. If not, cover and return to oven.You can also, as I did, include layers of cling film on the inside. The oven temperature will be low enough not to melt it.
Remove lamb to a large dish. There will (should!) be a lot of liquid pooled under the lamb in the roasting pan.
Cover loosely with foil to keep warm. It will stay warm for 2 to 3 hours.
Strain the liquid into a small pan. Retain the vegetables.
There will tons of rendered fat which you will want to remove somehow. Let the juices settle or cool to scoop it off, or suck the juice from underneath with a turkey baster.
Now you can either reduce the liquid to a decent syrupy jus by hard boiling, or you can thicken it to gravy by heating with a teaspoon of cornflour added in a slurry.
Season to taste.
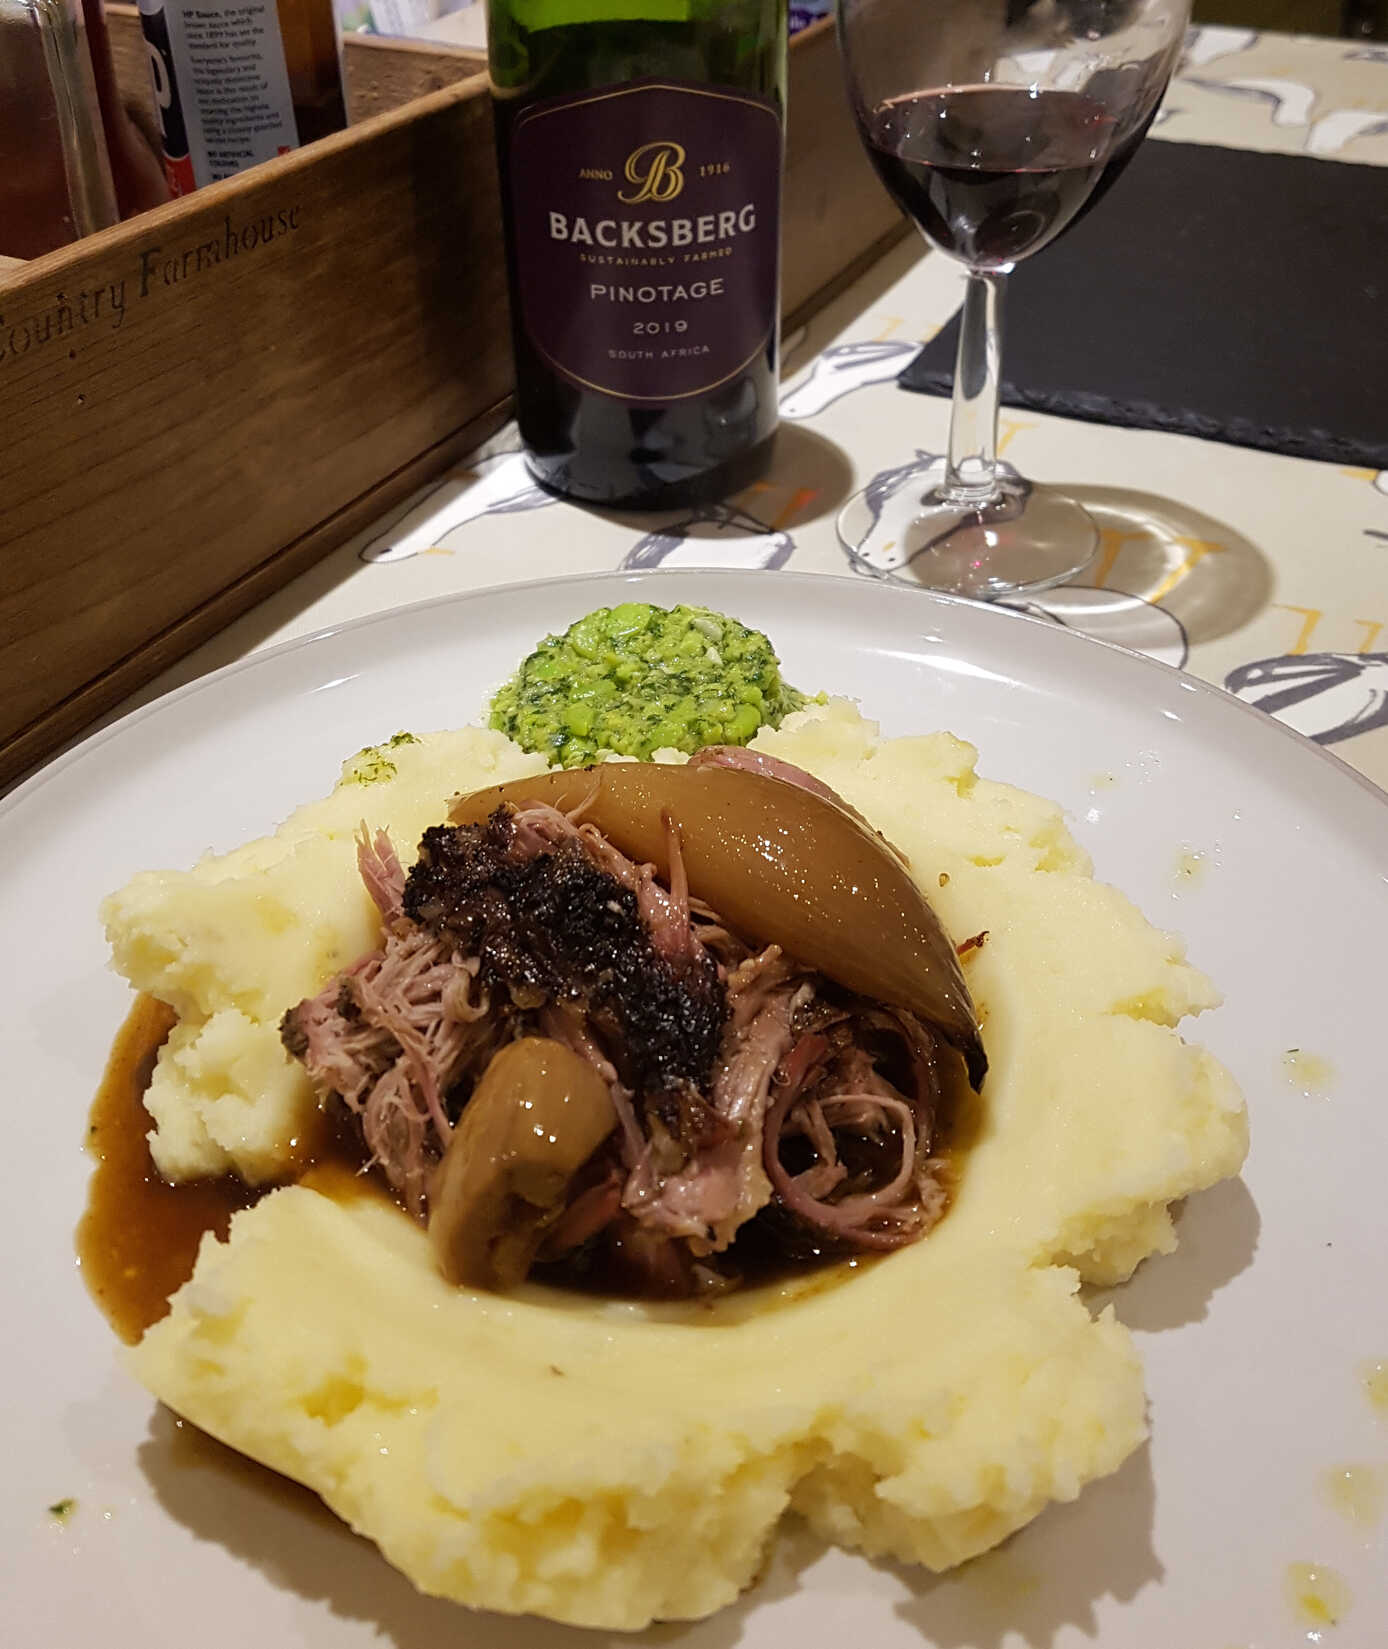
Tear the meat apart with tongs or forks. Dress with the jus and serve with the well-braised shallots and garlic cloves, if you like.
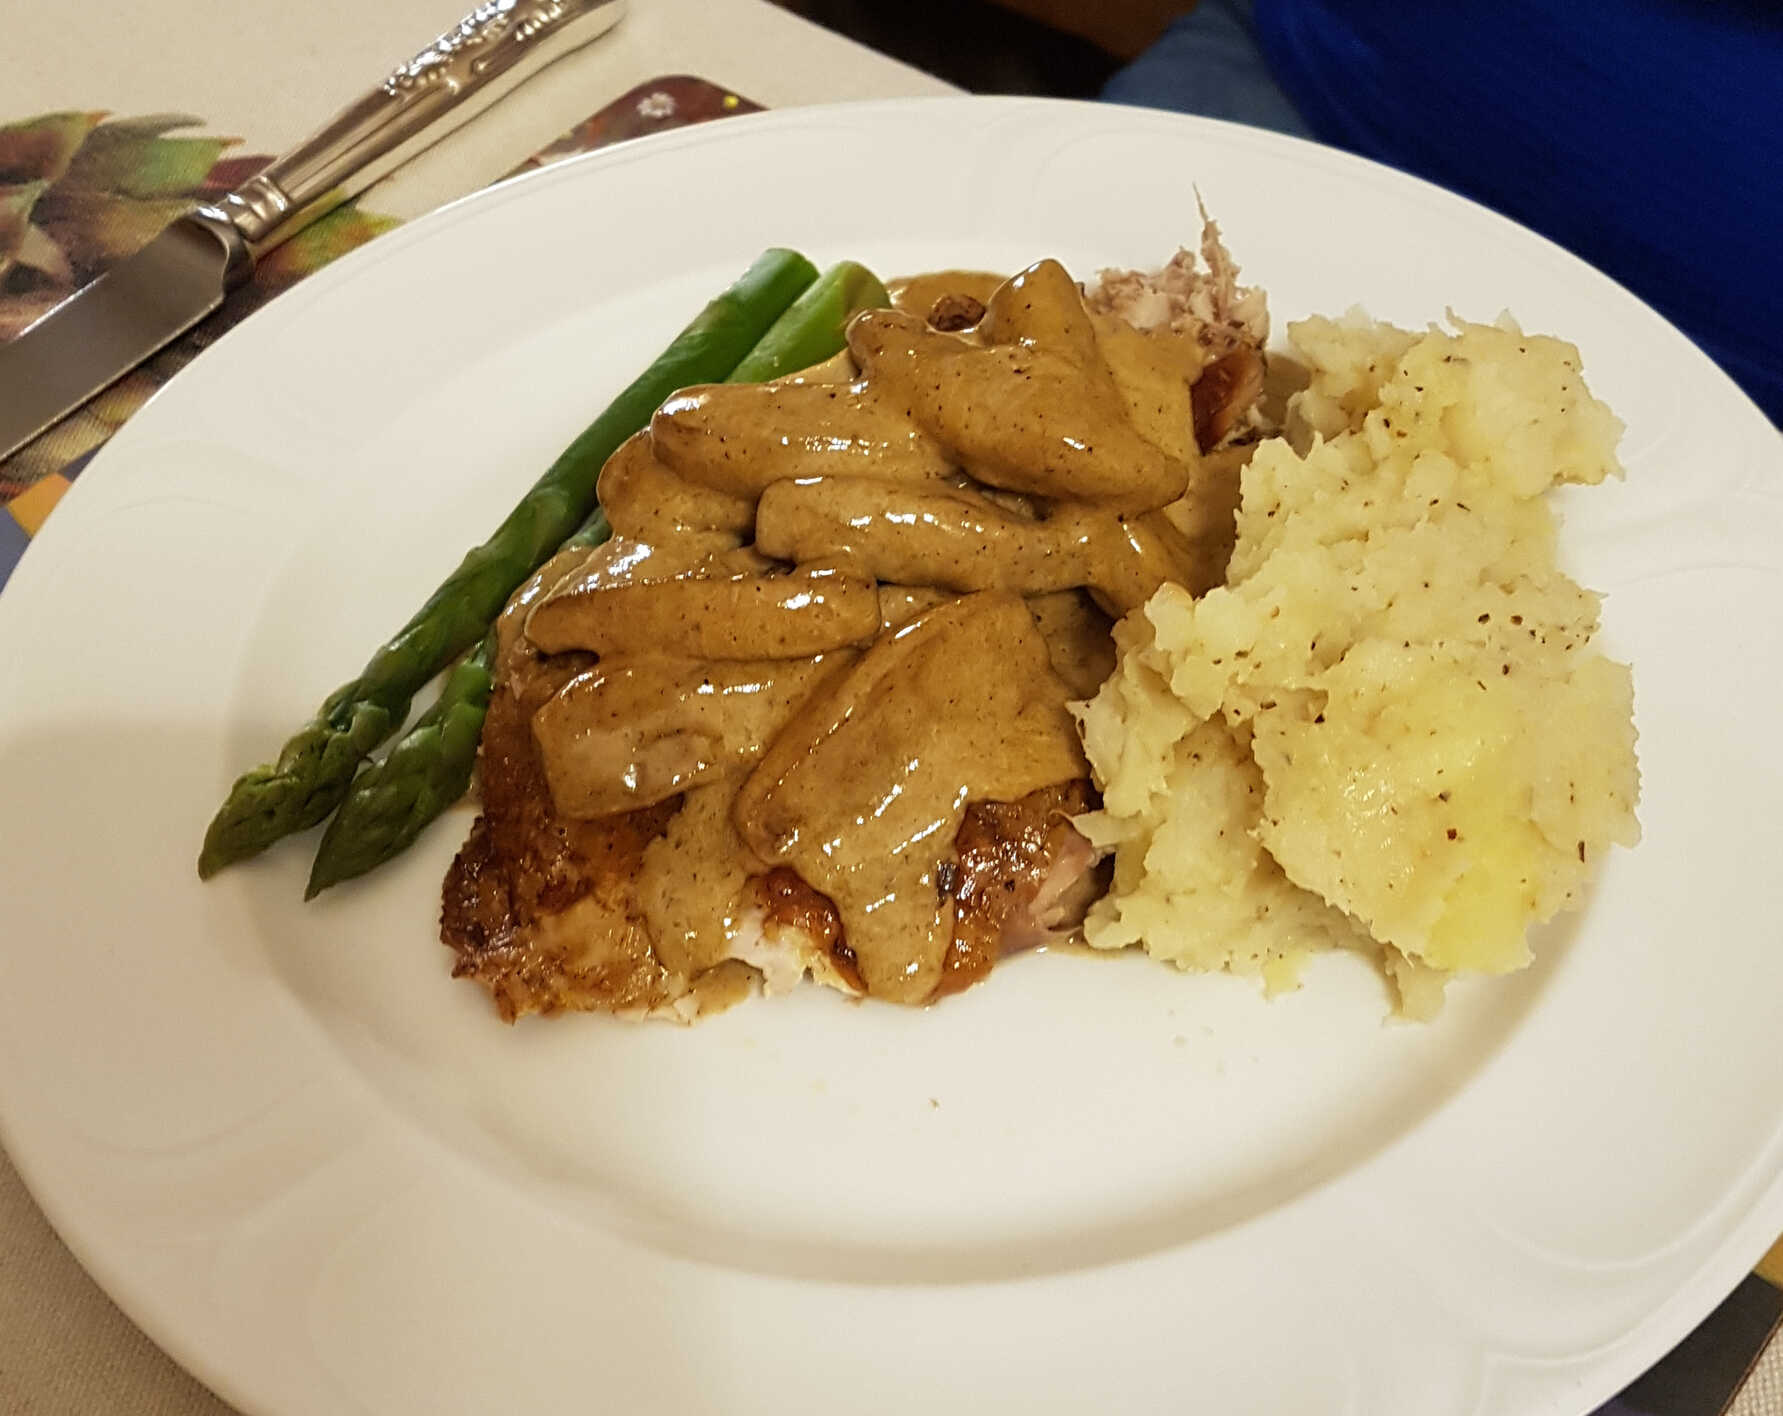
Marvellous!
Delicious served on a Parmesan and Crème Fraîche Mash, with Broad Beans mashed with Mint and Lemon.
Delicious served on a Parmesan and Crème Fraîche Mash, with Broad Beans mashed with Mint and Lemon.
Gratin de Dattes
Potato Gratin with Dates
Potato Gratin with Dates
side

I had some fresh dates which needed eating, so I thought I'd invent a new gratin.
I used a rich chicken stock as the liquid, but I'm sure you could use cream instead. It might even be better - the stock makes the gratin rather sloppy unless you cook it all off, and that risks mis-timing the cooking and burning the gratin.
I used a rich chicken stock as the liquid, but I'm sure you could use cream instead. It might even be better - the stock makes the gratin rather sloppy unless you cook it all off, and that risks mis-timing the cooking and burning the gratin.
By the way, fresh dates taste best when they've gone soft and squishy and seem on the edge of rotting.
Then they taste much like the dried versions.
Ingredients
- dates, stoned, thinly sliced
- potatoes, thinly sliced
- chicken stock
- butter
- rosemary leaves, finely minced
Thinly slice your potatoes into a bowl of cold water using a mandolin.
Pour in stock until it almost comes to the top.
Cook uncovered in the oven at Gas Mark 3-4 for a couple of hours until the stock has mostly bubbled off. It will take a while.
I blanched my slices afterwards because the gratin was going to sit around half the day before cooking.
Fill a casserole dish with alternate layers of potato and a filling of sliced dates ssprinkled with finely minced rosemary and dots of butter.Pour in stock until it almost comes to the top.
Cook uncovered in the oven at Gas Mark 3-4 for a couple of hours until the stock has mostly bubbled off. It will take a while.
Meh, it's not bad. Not amazing either.
Might need to add more butter, which I resisted, so that all the stock can cook off without hardening the potato too much.
Might need to add more butter, which I resisted, so that all the stock can cook off without hardening the potato too much.
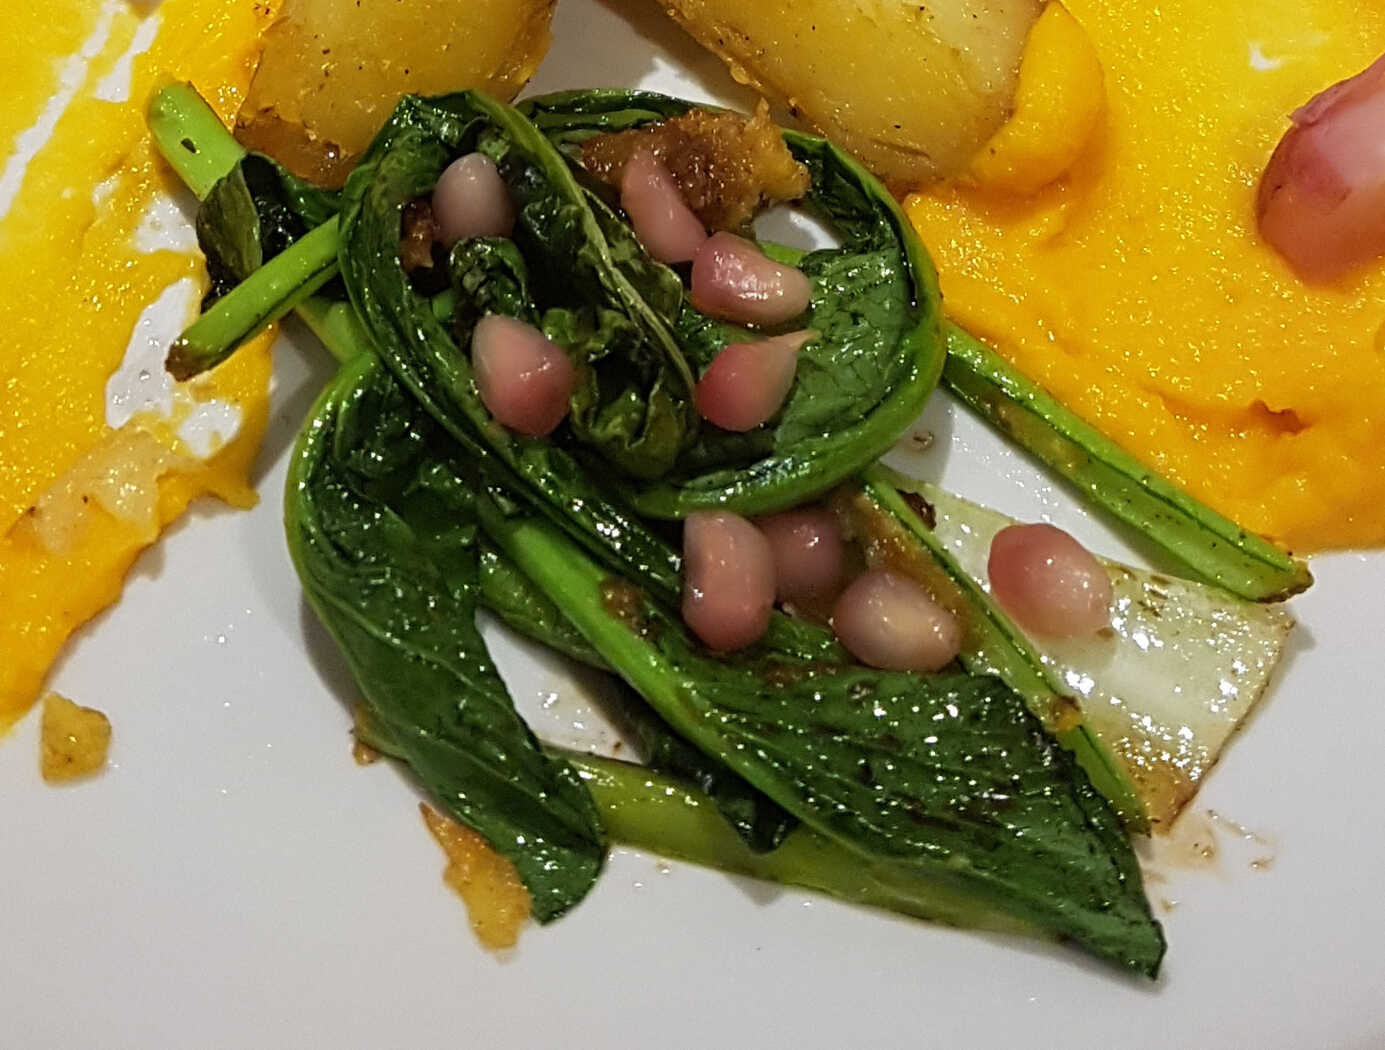
Crushed Broad Beans with Mint and Lemon
side veg

Depending on the quantities of ingredients you use this can basically become mostly gremolata thickened with beans.
But first a history lesson:
Fava or Faba beans, from their latin name Vicia Faba, are a broad bean indigenous to North Africa and have been been consumed for several thousands of years during which time they have migrated throughout Europe.
The pods are the typical long green furry bean sleeves, which you can eat raw whole like mange-tout when (very) young. Or just grilled.
When they are mature the beans themselves inside grow a thick fibrous skin which many people also prefer to remove before eating.
You (or most people anyway) can eat fava beans raw.
Broad bean, on the other hand, is a description of the shape of the bean, rather than their species, and are generally flattened - the bean not the pod.
Usually in Europe Broad Beans means Fava beans, but might sometimes be used to refer to Lima beans. Also known as Butter beans.
These younger varieties come from the Americas and indeed are named after Lima - the capital of Peru where they were first cultivated a couple of thousand years ago.
They are best not eaten raw since they are wont to contain small amounts of cyanide and various other toxins.
If you plan on double-podding your fava beans it's best, if you can, to choose pods containing either beans large enough to easily remove their skins, or small enough not to bother. Otherwise you're going to be spending a lot of time popping hundreds of fiddly piddling-sized beans.
Be aware, especially if you're double-podding, that there is an enormous amount of wastage from these beans - you'll need bushels of the things to finish up with anything more than a handful of kernels.
Ingredients
- broad beans, podded
Optional Flavours:- fresh mint leaves, minced
- garlic, crushed
- parmesan, grated
- lemon zest, grated
- lemon juice
- olive oil
- salt & pepper
Pop the broad beans out of their long outer sleeves.
Drop them into salted boiling water, bring back to the boil and simmer for a bare 30 seconds. Strain them immediately into iced water to cool.
With a paring knife, slit one end of each bean's thick outer skin or rind I cut the end opposite where the sprout attached and pop out the bright green, tender kernels.
Keep these in the iced water until required, then blanche them briefly in salted boiling water to reheat before using.
Drain the double-podded beans and roughly mash with chopped mint, grated lemon zest, lemon juice, puréed garlic, grated parmesan and olive oil to taste.
Season if necessary.
Not perhaps the most attractive serving, but they taste pretty good.
King Oyster Mushroom Tempura
mushroom oriental side veg
Yes, I still have leftover King Oyster mushrooms and tamarillo salsa.
These fat mushrooms are also pretty tasty halved, tempura'd and deep-fried.
I'm sure you could fry regular oyster mushrooms too the same way.
The batter flour proportions are not too critical but I mostly tried to follow my favourite tempura batter number 8.
Add whatever spices you like to the dry mixture. You could even try some dried herbs like oregano.
Ingredients
- king oyster mushrooms, halved
- vegetable oil for deep-frying
For the dry mix:- 1 tsp onion powder or salt
- 1 tsp garlic powder
- 2 tsps wheat flour
- ½ tsp cumin
- ½ tsp paprika
For the batter:- 2 tblsps rice flour
- 2 tblsps cornflour
- 1 tblsp wheat flour
- vodka
- ice cold water
- salt
Mix together the dry mix in a plastic bag without holes!.
Mix the tempura batter flours, season, then stir briefly with a splash of vodka and iced water (or iced soda water) to make a usable slurry.
Don't overmix - it's fine for the batter to have floury lumps.
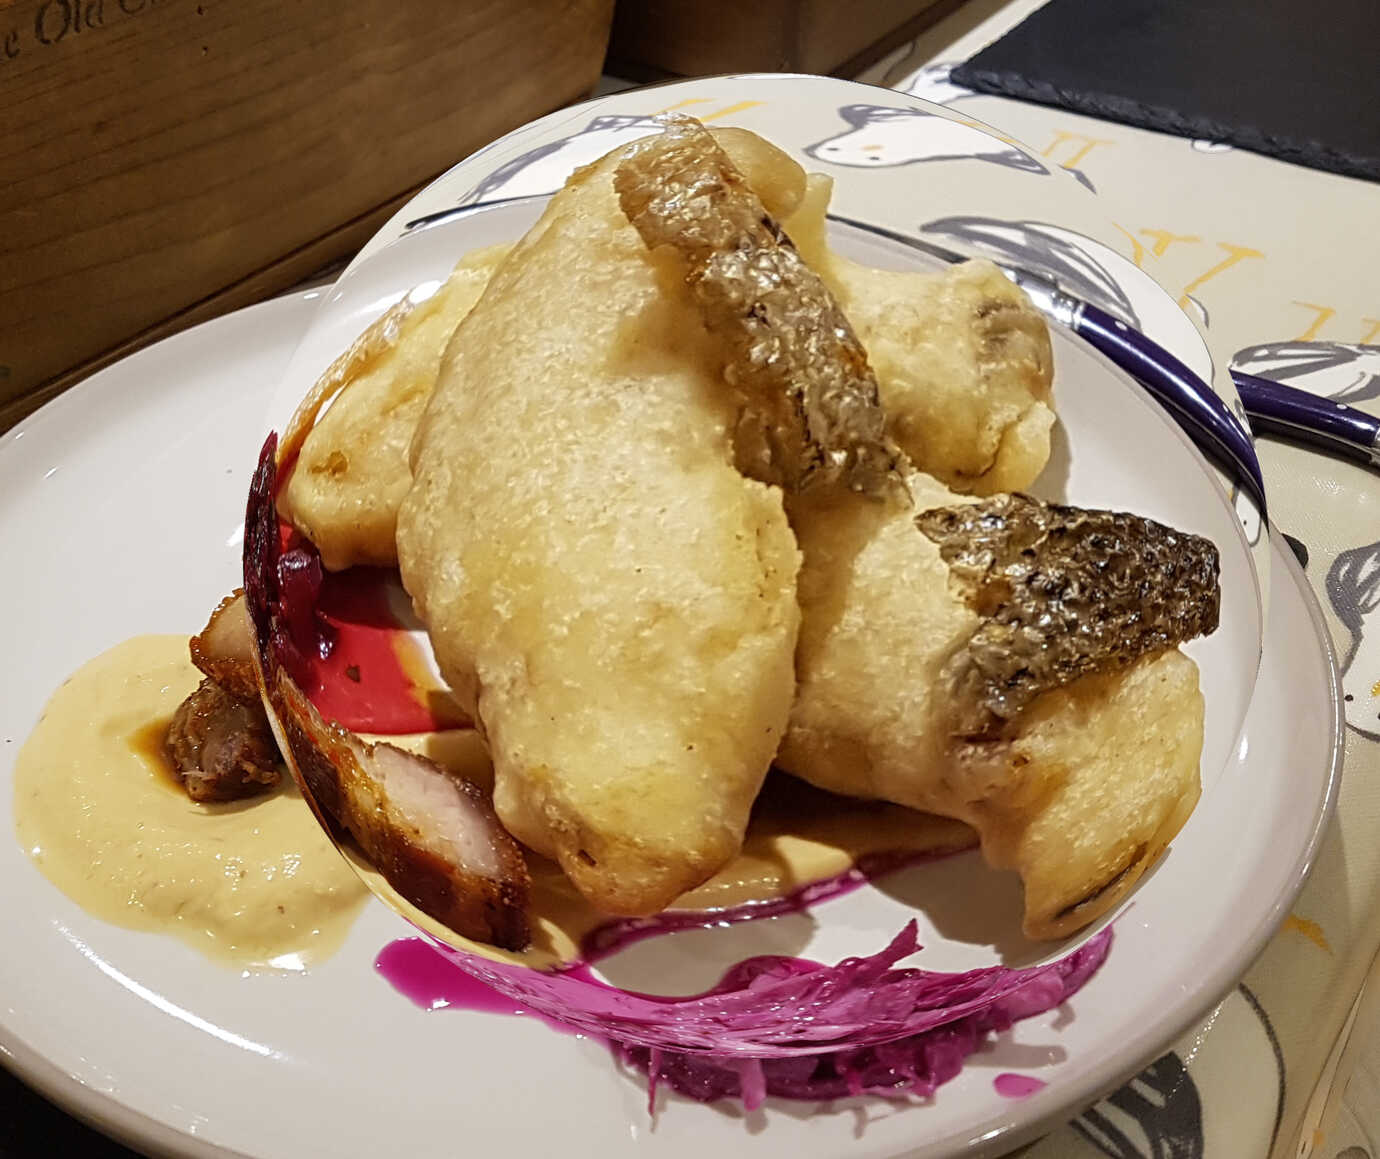
Halve the mushrooms lengthways and make a pattern of shallow slashes in the cut surfaces. Shake the mushrooms in the dry mix bag, then roll them in the wet batter mix to coat thickly.
Drain on kitchen paper and serve with smoked salmon dip In which case you could decorate them with crispy-fried salmon skin!, or aïoli, or maybe Sriracha or wasabi mayonnaise.
Mix the tempura batter flours, season, then stir briefly with a splash of vodka and iced water (or iced soda water) to make a usable slurry.
Don't overmix - it's fine for the batter to have floury lumps.
Halve the mushrooms lengthways and make a pattern of shallow slashes in the cut surfaces. Shake the mushrooms in the dry mix bag, then roll them in the wet batter mix to coat thickly.
You might roll them again to finish in the dry mix. If you want to try and get an even more crunchy coating.
Deep-fry the battered mushrooms in 350°F/175°C oil for 3-5 minutes until they are nicely crisped and coloured.Drain on kitchen paper and serve with smoked salmon dip In which case you could decorate them with crispy-fried salmon skin!, or aïoli, or maybe Sriracha or wasabi mayonnaise.
Smoked Salmon and Cream Cheese Salad Dressing. Or Dip.
dressing sauce fish cheese
I wanted to make a smoked anchovy salad dressing
but the Wine 'n' Cheese didn't have any hot smoked anchovies and I didn't have any Boursin.
So I made this version with hot smoked salmon and Philadelphia instead.
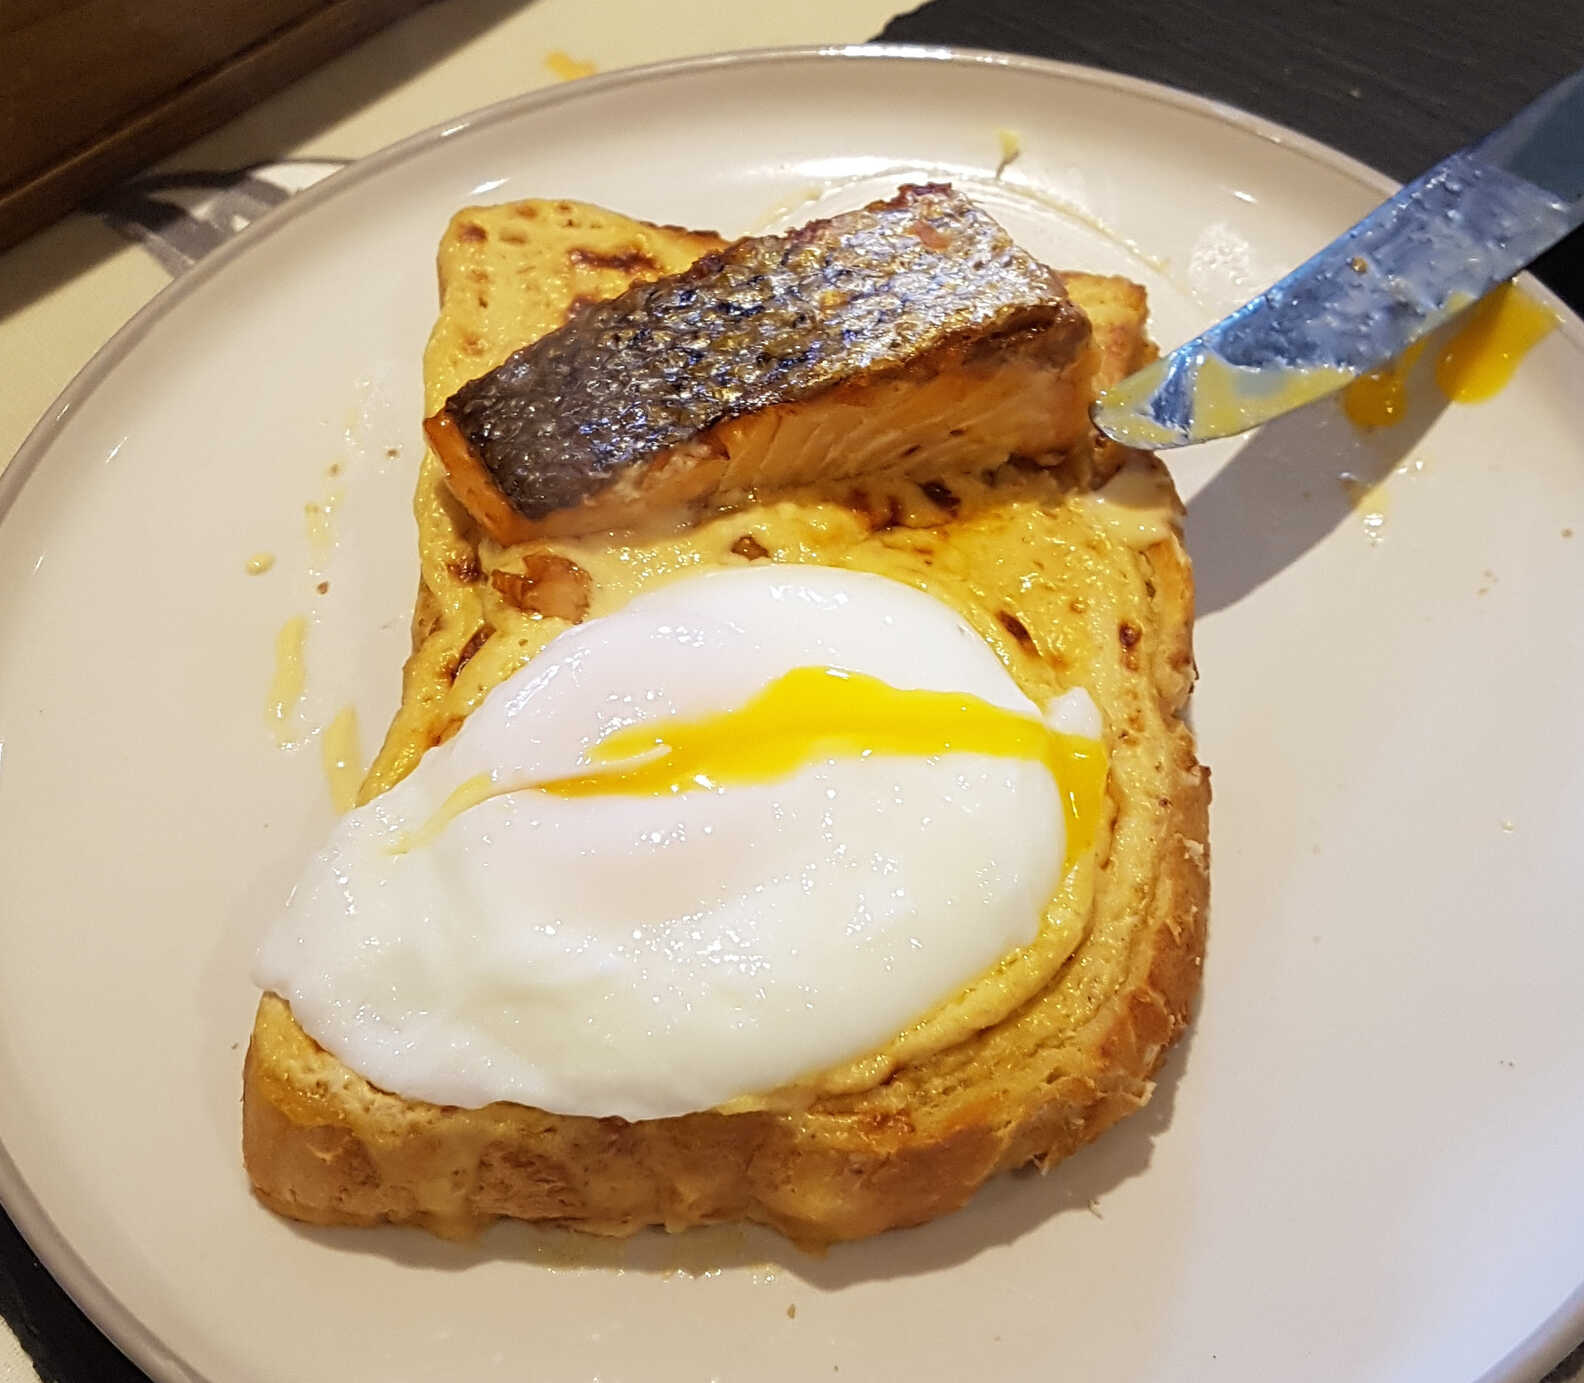
It makes quite a good substitute for Hollandaise sauce on an Eggs Royale, Eggs Hemingway, Eggs Atlantic, Eggs Pacifico, or whatever you like to call Eggs Benedict with smoked salmon.
I made the dressing without any anchovies to begin with, but it didn't seem quite fishy enough for me, so I added a half-dozen of the regular kind.
Your fishy-sense may vary!
Some sun-dried tomato or red pesto blended in might go quite well too. It would certainly look the part.
Serves 2-4
Ingredients
- piece of hot smoked salmon
- 100g cream cheese
- 2-3 garlic cloves
- dollop of cream or crème fraîhe
- juice of 2-3 clementines
- ½ red chilli
- olive oil
Flavour options:- half a dozen anchovies
- splash of red wine vinegar
- teaspoon mustard
- paprika
- sun-dried tomatoes maybe?
Remove the salmon skin.
Blend the salmon, garlic, chilli just enough to give a little warmth, anchovies, sun-dried tomatoes if using, cream and orange juice to a smooth paste.
Blend in as much cream cheese as needed to enrich the mixture, season, then drizzle in olive oil whilst beating or running the food processor until you have a consistency like mayonnaise.
Pretty tasty. Probably better as a dip than a salad dressing if I'm honest.
Sweetcorn Velouté
sauce veg
A velouté is technically a stock thickened with blond roux, but blended sweet corn is pretty much thick enough on its own.
The recipe which inspired me for this uses crème fraîche, but I don't think the sourness really works.
Go for regular cream.
It also adds turmeric, which seems too coarse for the sauce, so I went with saffron.
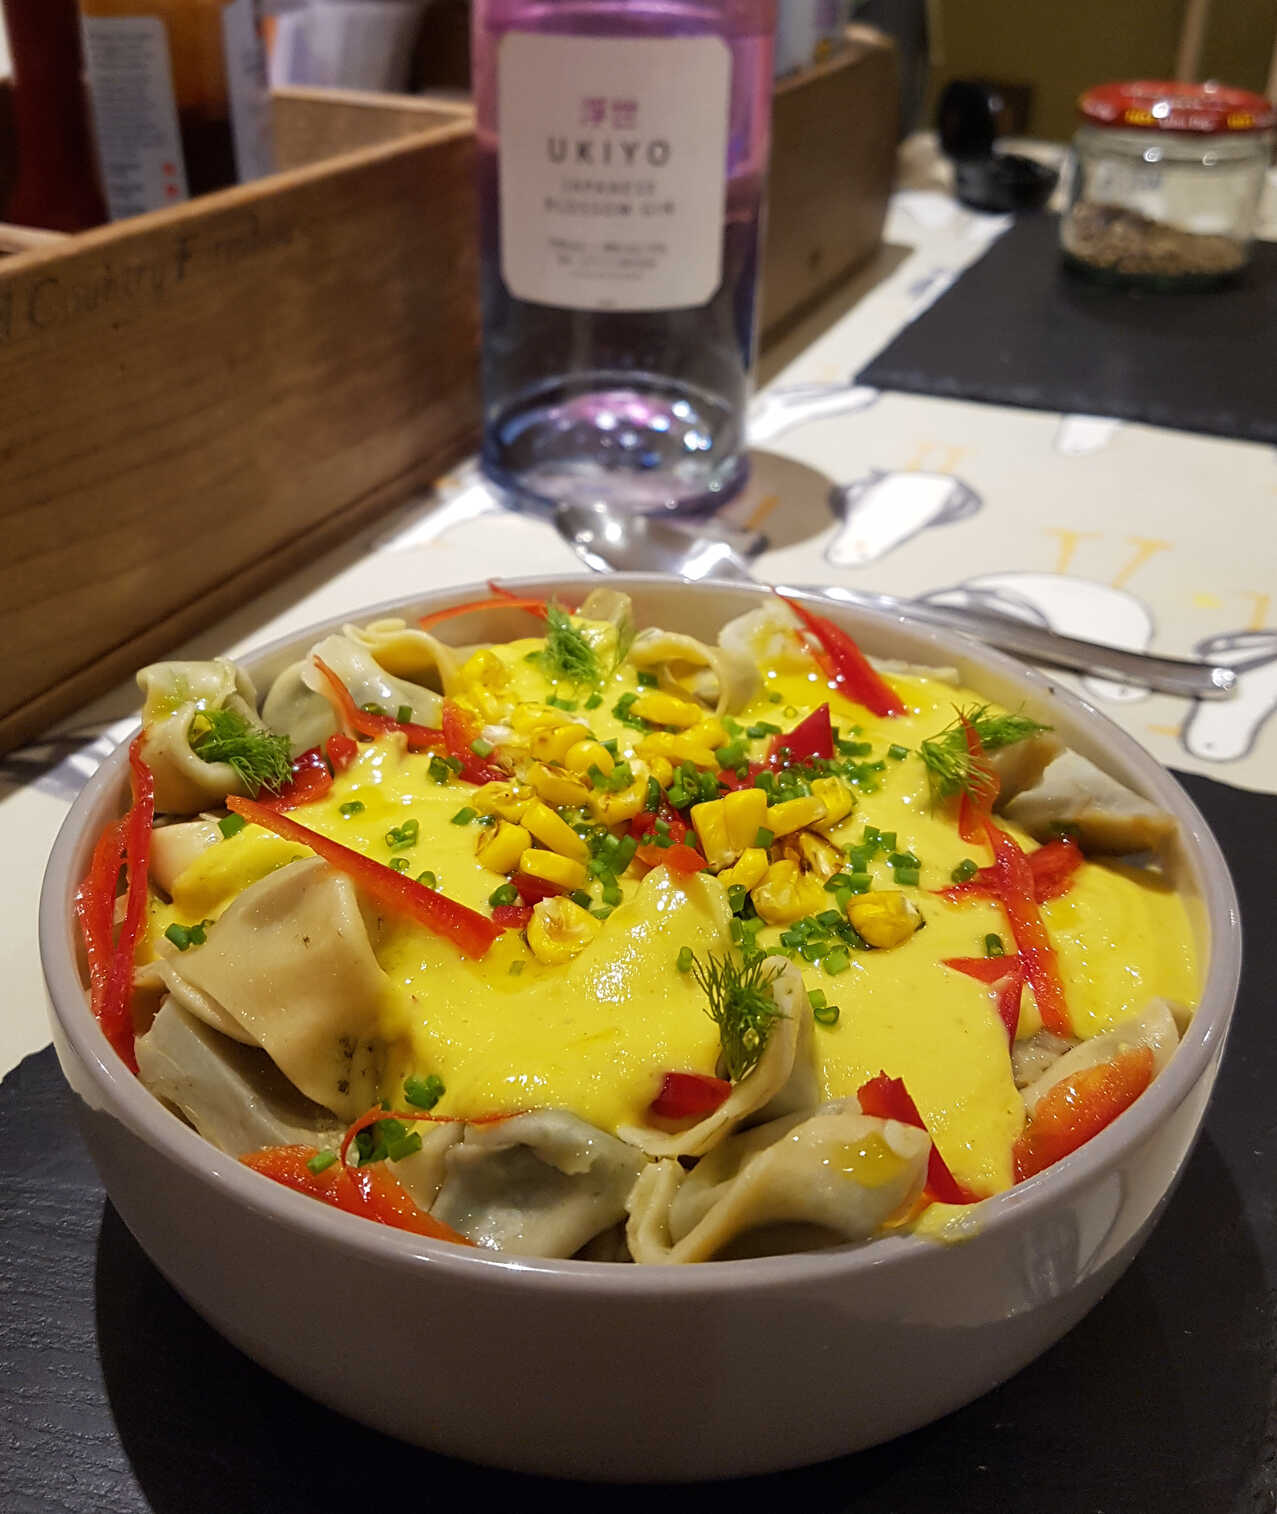
I used my velouté to lubricate some Culinary Masterclass spinach and mascarpone tortellinis (no, that's not an idle boast!) and served them dressed with red pepper slices and artichoke hearts.
You don't get a lot of edible heart out of an artichoke though, especially considering the effort involved 🙁
The recipe which inspired me for this uses crème fraîche, but I don't think the sourness really works.
Go for regular cream.
It also adds turmeric, which seems too coarse for the sauce, so I went with saffron.
I used my velouté to lubricate some Culinary Masterclass spinach and mascarpone tortellinis (no, that's not an idle boast!) and served them dressed with red pepper slices and artichoke hearts.
You don't get a lot of edible heart out of an artichoke though, especially considering the effort involved 🙁
Serves 2
Ingredients
- 2 corn cobs
- 2 tblsps double cream
- 1 large banana shallot
- ½ small fennel or 1 stick celery
- 2 garlic cloves
- glass white wine
- pinch saffron
- light chicken stock or water
- salt & ground white pepper
- butter
Additions:- artichoke hearts
- red pepper, charred, skinned and sliced
- a few corn kernels, toasted if you like
Simmer the corn cobs in a large pot of salted water for 10 minutes or so until it softens.
Drain, allow to cool enough to handle, and slice the kernels off the cobs. Reserve some for decoration.
Meanwhile sweat the shallots, garlic and fennel or celery slices in olive oil and butter in a small pan until they soften.
De-glaze with white wine and bubble off.
Add the corn kernels to the pan with enough water or light stock to cover.
Add a pinch of saffron strands with the water/stock. Cook until the corn is well-softened, then blend until smooth and pass through a seive back into the pan.
Reheat, season with ground white pepper and salt, and stir in cream, and perhaps a knob of butter until the sauce is thick and glossy.
Globe Artichoke Hearts
Add lemon juice to the pot of boiling salted water.
Pull off the artichoke's larger outer leaves and trim the stalk.
Use a Y-shaped vegetable peeler to peel off the fibrous outer layer of the stop of the stalk and the bottom of the artichoke bulb. Cut the stalk away leaving an inch or two attached to the bulb.
Cut the top of the globe off somewhere below the mid-point. Using a paring knife remove leaves and coarse skin from the bottom of the artichoke and right in to the hairy choke.
Add to the boiling water and cook for 10-15 minutes until softened. Strain and keep in acidulated water until required.
Core and quarter a red pepper and char the skin over a flame or under the grill. Let them rest in a plastic bag to soften the charred skin, then peel it off and slice them thinly.
Toast a handful of corn kernels in a hot, lightly oiled frying pan.
Boil up some spinach and mascarpone tortellinis, if you like, and serve them with the artichoke hearts dressed with the corn velouté and the red pepper slices and toasted corn kernels.
Drain, allow to cool enough to handle, and slice the kernels off the cobs. Reserve some for decoration.
Meanwhile sweat the shallots, garlic and fennel or celery slices in olive oil and butter in a small pan until they soften.
De-glaze with white wine and bubble off.
Add the corn kernels to the pan with enough water or light stock to cover.
Add a pinch of saffron strands with the water/stock. Cook until the corn is well-softened, then blend until smooth and pass through a seive back into the pan.
Reheat, season with ground white pepper and salt, and stir in cream, and perhaps a knob of butter until the sauce is thick and glossy.
Globe Artichoke Hearts
Add lemon juice to the pot of boiling salted water.
Pull off the artichoke's larger outer leaves and trim the stalk.
Use a Y-shaped vegetable peeler to peel off the fibrous outer layer of the stop of the stalk and the bottom of the artichoke bulb. Cut the stalk away leaving an inch or two attached to the bulb.
Cut the top of the globe off somewhere below the mid-point. Using a paring knife remove leaves and coarse skin from the bottom of the artichoke and right in to the hairy choke.
You can add some lemon juice, and the squeezed-out lemon remains, to a bowl of cold water to wet the artichoke as you work.
This will help reduce browning.
Now quarter the artichoke base vertically and cut away the choke with the paring knife, which you can now easily access.Add to the boiling water and cook for 10-15 minutes until softened. Strain and keep in acidulated water until required.
Actually it's pretty hard to tell how much of the fibrous artichoke peel to remove, if you're a novice.
But you can quite easily tell when the artichoke is cooked since the edible parts turn a whiter shade, and are softer. Obviously. So it might be easier to do most, or all, of your trimming after the artichoke pieces (or maybe even the whole heart) are cooked.
Plus you risk less browning.
I found hardly any of the stalk to be edible, but perhaps that depends on their age and size?
Core and quarter a red pepper and char the skin over a flame or under the grill. Let them rest in a plastic bag to soften the charred skin, then peel it off and slice them thinly.
Toast a handful of corn kernels in a hot, lightly oiled frying pan.
Boil up some spinach and mascarpone tortellinis, if you like, and serve them with the artichoke hearts dressed with the corn velouté and the red pepper slices and toasted corn kernels.
It sure looks pretty. Though the whole thing is a little insipid. I think the velouté might be a better match with something else.
When I find it I'll let you know.
When I find it I'll let you know.
Minted Pea Purée
side veg cheese
One of very many pea purées on this site,
though perhaps more complex than most.
Ingredients
- peas
- mint leaves, roughly chopped
- lemon zest
- olive oil
- crème fraîche
- parmesan, grated
Blanch the peas then shock them in iced water.
Drain and blend them with the other ingredients, adding enough crème fraîche to lubricate the blender without diluting the purée too much.
Heat gently when required.
Drain and blend them with the other ingredients, adding enough crème fraîche to lubricate the blender without diluting the purée too much.
Heat gently when required.
Quite colourful; you can play with the proportions to meet your tastes.
Cream might make a reasonable substitute for the crème fraîche.
Pickled Jerusalem Artichokes
pickle veg vegan
Although Thyme Farm does not specify how long you should leave this pickle to mature before using it,
most other sites recommend leaving it for a week or longer.
Mind you, they don't thinly slice their artichokes. So up to you I guess.
I don't believe I left mine for very long at all!
Mind you, they don't thinly slice their artichokes. So up to you I guess.
I don't believe I left mine for very long at all!
Serves 2
Ingredients
- 6 Jerusalem Artichokes
- ½ juice of a lemon
- 3tbsp water
- 250ml good quality vinegar
- 25g sugar
- pinch salt
- ½ teaspoon fennel seeds
- ½ teaspoon mustard seeds
- Sprig rosemary
Add all the pickling ingredients to a heavy pot and bring to the boil.
Peel the artichokes under running water or using a large bowl of iced water.
Slice them straight into the pickle using a mandolin.
Return the pot to the boil, then immediately set aside to cool.
Press the artichokes to keep them submerged.
Peel the artichokes under running water or using a large bowl of iced water.
Slice them straight into the pickle using a mandolin.
Return the pot to the boil, then immediately set aside to cool.
Press the artichokes to keep them submerged.
Not, I must admit, my favourite way of serving these artichokes, but they are crunchily different.
Pheasant Normandy
fowl main
On a visit to Edinburgh, Flora and I cooked this Two Fat Ladies recipe from their
Gastronimic Adventures cookbook,
which seems to be just about the only place to find it. I've scoured their TV series but it's just not in there.
Which is a pity because it's pretty good.
Here's what they have to say about it:
Here's what they have to say about it:
This is a sumptuous way of preparing pheasant.
It also makes the birds go quite a long way due to the richness of the sauce
and the fact that it arrives fully prepared at table so there is no waste from badly carved carcasses.
Serves 2
Ingredients
- a brace of young pheasants
- 4 sweet apples (Cox's or similar)
- 115g/4 oz butter
- 1 tsp brown sugar
- 150ml/¼ pint Calvados
- 660ml/1 pint thick cream
- salt and freshly ground pepper
Peel and core the apples, slice into rings and fry in 55g/2 oz of the butter.
Add the sugar and cook until golden brown and slightly caramelised. Reserve.
Melt the rest of the butter in a flameproof casserole large enough to take the birds. Brown the creatures on all sides, turning and coating with the butter. Cover with the lid and place in a preheated oven at 190°C/375°F/Gas 5 to cook for 40 minutes; or you can cook them on top of the stove, turning at half time.
Carve the birds into good-size pieces and lay them in a shallow gratin dish. Make sure to pick every little piece of meat from the bones. Place the legs at either end. Keep warm. Scrape any morsels from the carving into the casserole juices and heat until bubbling then pour in the warmed Calvados. Set fire to the mixture, but take care not to singe your eyelashes. Roll the juices round and round until the flames subside. Add the cream and continue cooking, stirring the while with a wooden spoon, until the sauce thickens. Season to taste.
Place the apple rings over the pheasant pieces, then pour the sauce over the whole dish and bring to the table. If you prefer, you can serve the apple rings separately. Wild rice with fried celery would be excellent with this dish, and a watercress salad should suffice.
Or you can serve it with a juniper berry mash. Either way it's delicious.
Roslyn's Kebabs
meat snack
Roslyn passed along this masala paste recipe from a friend of hers, with which she coated some field mushrooms for barbecueing.
And said were delicious!
I'm ashamed to say that I have yet to try it out.
Incidentally, she also barbecued aubergine slices dressed with tamarind paste, which sounded interesting too.
And said were delicious!
I'm ashamed to say that I have yet to try it out.
Incidentally, she also barbecued aubergine slices dressed with tamarind paste, which sounded interesting too.
Ingredients
- diced chicken or mushrooms!
- oil
- 2 tblsps soy sauce
- 2 tblsps Worcestershire sauce
- 1 tblsps tomato purée
- 1 tsp turmeric
- 1 tsp coriander powder
- 1 tsp garam masala powder
- 1 tsp chilli powder
- 1 tsp paprika
- 1 tsp green masala
- ½ tsp salt
- dash of lemon juice (optional)
Mix well and marinate for a minimum of half an hour, the longer you leave it the better the taste!
(Marinate overnight for best results.)
Put on skewers and cook in oven under grill or barbecue.
Put on skewers and cook in oven under grill or barbecue.
The chicken, that is.
If you're using field mushrooms then just smear them all over then slap them on the grill or barbecue.
If you're using field mushrooms then just smear them all over then slap them on the grill or barbecue.
Roslyn's Green Masala
sauce veg vegan
This green masala is an ingredient in Roslyn's friend's kebab recipe.
According to her friend's notes:
According to her friend's notes:
A teaspoon of Green Masala can be added to any Indian dish to give it flavour and a kick.
The idea is that it is pre-made to save you making it every time you make a curry.
It only has 3 ingredients, balanced as follows:
The idea is that it is pre-made to save you making it every time you make a curry.
It only has 3 ingredients, balanced as follows:
Makes about 4 teaspoons
Ingredients
- 4-5 green chillies (preferably birds eye chillies) I'd use finger chillies!
- 1 clove garlic
- 1 inch ginger
Cut the stem off the chillies and take the skin off the garlic and ginger.
Throw into a food processor and mix until it becomes a finely minced paste (not liquified!).
You can chop by hand if you do not have a food processor.
The above is how much a curry should contain.
If you are making a small batch then times the above by 5 or more and consume with a week.
The key thing my parents told me is that it should be greener than it is white, so if your paste isn't that green, then add more green chillies.
If you wish to make a larger batch that will cover you for a longer period of time then add a tablespoon of oil and a teaspoon of salt into your Green Masala to extend its life.
Keep your Green Masala in a pot in the fridge, or keep half of it in the fridge and freeze the other half for another time.
You can even put your Green Masala into an ice cube tray (one teaspoon per ice cube hole) and use one cube per curry, which will extend the life of your Green Masala hugely!
Included for completeness. After all, it's just ginger/garlic/chilli paste.
Cordyceps
mushroom ingredient veg vegan
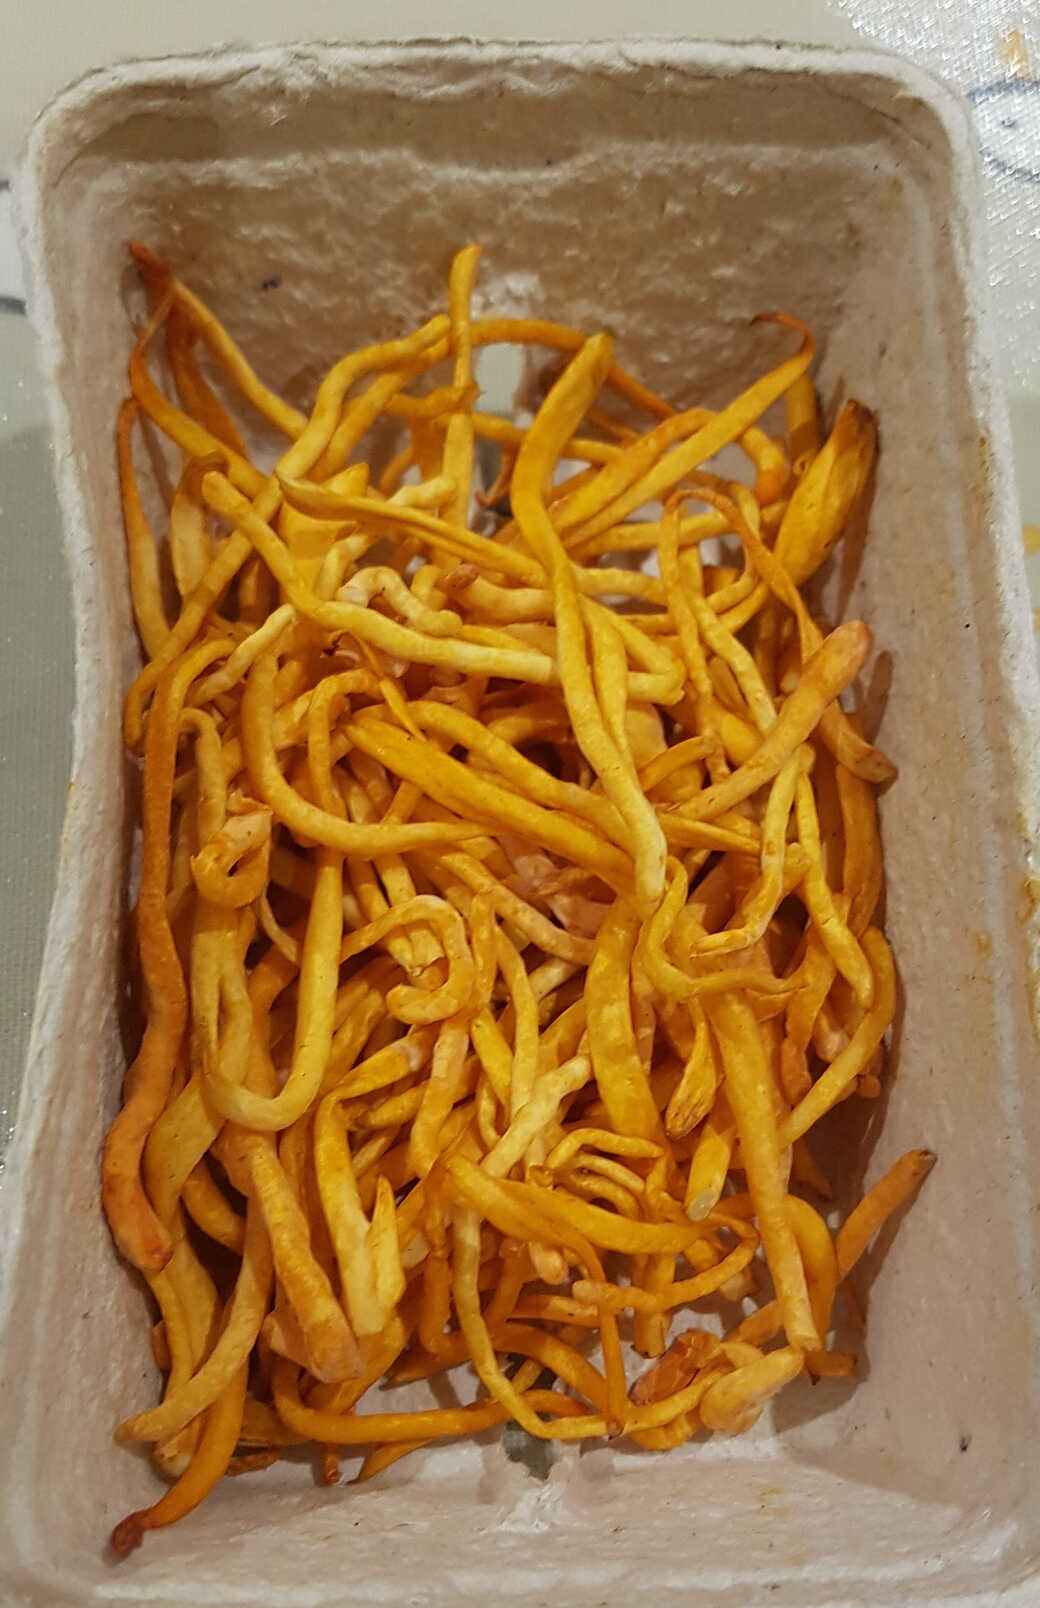
Cordyceps are thin wormy orange mushrooms.
Pretty nice tasting raw, in fact, but they have a nice mellower nutty taste when cooked too.
You might need to be warned that they are also known as the Zombie Fungus and do have an unpleasant habit of parasitising insects brains in order to operate them like a meat suit. So perhaps don't stick them in your ears.
Although you can just stir-fry them, apparently, I deep-fried mine for a fairly short time in really hot oil to crisp them up a bit.
Less than a minute.
They colour up nicely, but don't go exactly crispy, though they might if you fry them longer I suppose. I didn't experiment too much with them since they're pretty expensive.
Though not as expensive as Lion's Manes: £33 a kilo they are!
Ingredients
- cordyceps
- oil for deep frying
Heat oil.
Throw in cordyceps.
Swirl.
Remove.
Drain.
Serve.
Throw in cordyceps.
Swirl.
Remove.
Drain.
Serve.
Must. Eat. Cordyceps!
Choy Sum with Garlic and Ginger
oriental side veg vegan
The method write-up below is more-or-less verbatim from Daddy Lau.
Except for the changes required for legal fair use, of course 😉
Except for the changes required for legal fair use, of course 😉
Serves 4
Ingredients
- 1 lb choy sum
- 1" ginger, shredded
- 5 cloves garlic, minced
- 2 tblsp cooking oil
- 1 tblsp mirin
- 1 tsp sugar
- salt or soy sauce
To prepare the choy sum, you want to separate the quick-to-cook leaves and the slower-to-cook stems.
You can either make one horizontal cut to separate the leaves and clump of stems of each plant all at once, or you can separate the joined stems (at an angle for extra style points) and then cut away the leaves and set aside.
Slice the garlic: For maximum visual appeal, slice a couple of cloves and mince the rest.
Cut the (small amount of) ginger into roughly 1/8 slices. He (Daddy Lau) uses about 4 slices of ginger for 1 lb of choy sum.
Heat your wok over high heat for a bare minute. Add a dash of oil (about 1 tbsp), then turn the heat to medium low.
Lowering the heat here is important to avoid burning the aromatics.
Add the ginger and garlic.
Stir-fry for 15 seconds so that you can smell the ginger and garlic releasing their aromas.
Add the choy sum; stems first since they'll take longer to cook through. Stir-fry the stems for about 30 seconds.
Then, add the leaves. Raise the heat to high and add the mirin and sugar to balance the texture of the leaves; these ingredients help make the dish silky smooth.
Mix these in and stir-fry for another 30 seconds.
DON'T ADD THE SALT YET!
If you add salt now, all the water in the vegetables will release (thank you, osmosis) and you'll end up with less tender vegetables in a puddle of juice.
Lower the heat to medium or low heat. Cover with the lid and let it steam for about 1½-2 minutes, or until the choy sum is tender and just cooked through.
Uncover the wok and bring the heat up to the highest setting. Stir-fry on high heat for a minute, then add the salt.
Toss with the finishing oil for another 20 seconds, and then plate.
Enjoy!
You can either make one horizontal cut to separate the leaves and clump of stems of each plant all at once, or you can separate the joined stems (at an angle for extra style points) and then cut away the leaves and set aside.
Slice the garlic: For maximum visual appeal, slice a couple of cloves and mince the rest.
Cut the (small amount of) ginger into roughly 1/8 slices. He (Daddy Lau) uses about 4 slices of ginger for 1 lb of choy sum.
Heat your wok over high heat for a bare minute. Add a dash of oil (about 1 tbsp), then turn the heat to medium low.
Lowering the heat here is important to avoid burning the aromatics.
Add the ginger and garlic.
Stir-fry for 15 seconds so that you can smell the ginger and garlic releasing their aromas.
Add the choy sum; stems first since they'll take longer to cook through. Stir-fry the stems for about 30 seconds.
Then, add the leaves. Raise the heat to high and add the mirin and sugar to balance the texture of the leaves; these ingredients help make the dish silky smooth.
Mix these in and stir-fry for another 30 seconds.
DON'T ADD THE SALT YET!
If you add salt now, all the water in the vegetables will release (thank you, osmosis) and you'll end up with less tender vegetables in a puddle of juice.
Lower the heat to medium or low heat. Cover with the lid and let it steam for about 1½-2 minutes, or until the choy sum is tender and just cooked through.
Uncover the wok and bring the heat up to the highest setting. Stir-fry on high heat for a minute, then add the salt.
Now you're allowed to add the salt 🙂
Drizzle a table of oil over the leaves to finish for a smooth texture, a glossy look, and to help preserve their vibrant green color.Toss with the finishing oil for another 20 seconds, and then plate.
Enjoy!
OK, Daddy Lau's instructions are a bit of a song-and-dance for what is basically fried spinach, but the result is pleasant enough!
Lion's Mane with Garlic and Tamari Soy Sauce
mushroom side veg vegan
You could dust the mushrooms with flour before frying to try and give them a bit more of a crunchy texture.
Serves 4
Ingredients
- 8 ounces Lion's Mane mushrooms, thickly sliced
- 2 tablespoons ghee or butter
- 2 tablespoons tamari, or coconut aminos
- 1 teaspoon minced garlic
- pinch of salt
- freshly chopped parsley for garnish
Place ghee or butter in a skillet over medium-high heat.
Once hot, add the sliced mushrooms and cook until browned on both sides. Don't touch the mushrooms as they cook to let them deeply caramelize on each side.
Add the tamari and garlic to the pan and cook for an additional minute until the liquid is absorbed by the mushrooms, tossing them in the mixture.
Garnish with parsley and serve as desired.
Meh, they're not the greatest, if I'm honest. They do have a noticeable bitterness.
If you've splashed out £33 a kilo on them, you probably want something more impressive. Perhaps try them battered and deep-fried?
If you've splashed out £33 a kilo on them, you probably want something more impressive. Perhaps try them battered and deep-fried?
Pimientos de Padrón
spanish veg vegan snack
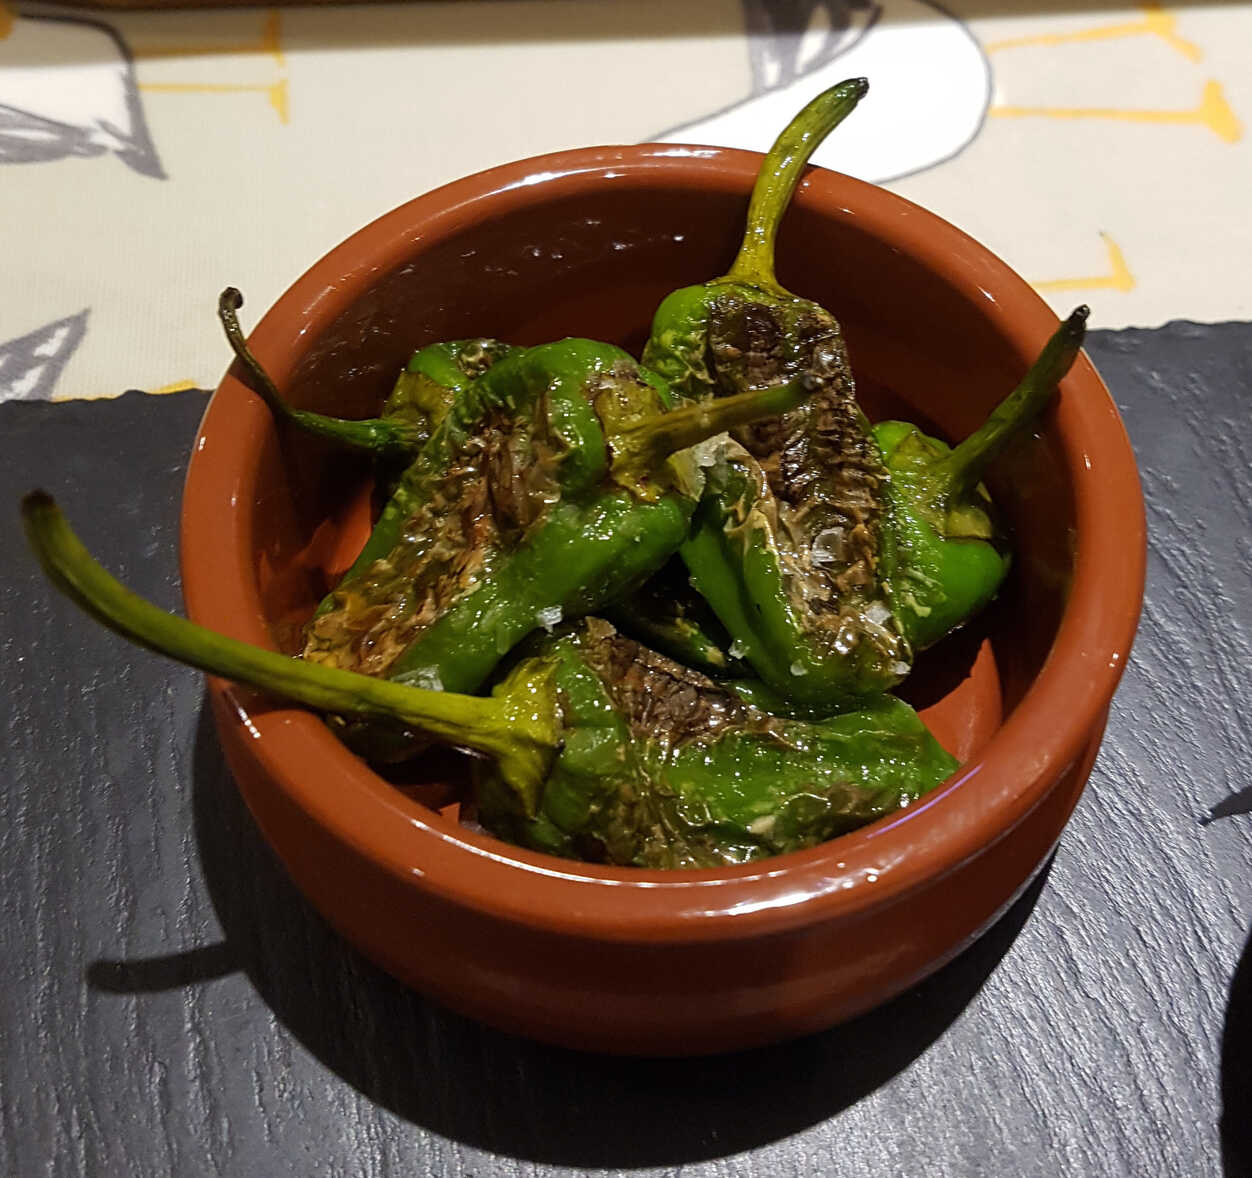
Often served as a tapas, these bright green heirloom peppers from Padró in Galicia, Spain are pretty mild for the most part.
But you get the occasional surprisingly hot one, so snacking on them is a bit like playing chilli roulette.
Enjoy!
But you get the occasional surprisingly hot one, so snacking on them is a bit like playing chilli roulette.
Enjoy!
Serves 4-6
Ingredients
- 1 tablespoon neutral oil, like canola or grapeseed
- 12 ounces Padrón peppers
- flaked sea salt
- 2 tablespoons extra virgin olive oil
Heat oil over high heat in a cast iron skillet large enough to fit the peppers in a single layer. Heat until lightly smoking, then add peppers.
Cook without moving until blistered on first side, about 30 seconds.
Flip and shake the peppers and continue to cook, turning occasionally, until well blistered all over and tender-crisp, about 1½ minutes total.
Transfer peppers to a serving plate. Drizzle with extra-virgin olive oil and sprinkle with more flaked salt. The need to be well-salted!
Serve immediately.
Cook without moving until blistered on first side, about 30 seconds.
Flip and shake the peppers and continue to cook, turning occasionally, until well blistered all over and tender-crisp, about 1½ minutes total.
Of course it would be even better to char them on a charcoal grill or barbecue instead.
But some of us have kitchens to cook in.
Season with salt.But some of us have kitchens to cook in.
Transfer peppers to a serving plate. Drizzle with extra-virgin olive oil and sprinkle with more flaked salt. The need to be well-salted!
Serve immediately.
Very tasty when you get them right.
Though they do need to be cooked to the point of collapsing or they'll be a bit stringy, and they need to be served immediately or they'll become soggy.
Though they do need to be cooked to the point of collapsing or they'll be a bit stringy, and they need to be served immediately or they'll become soggy.
Son-In-Law Eggs
oriental snack
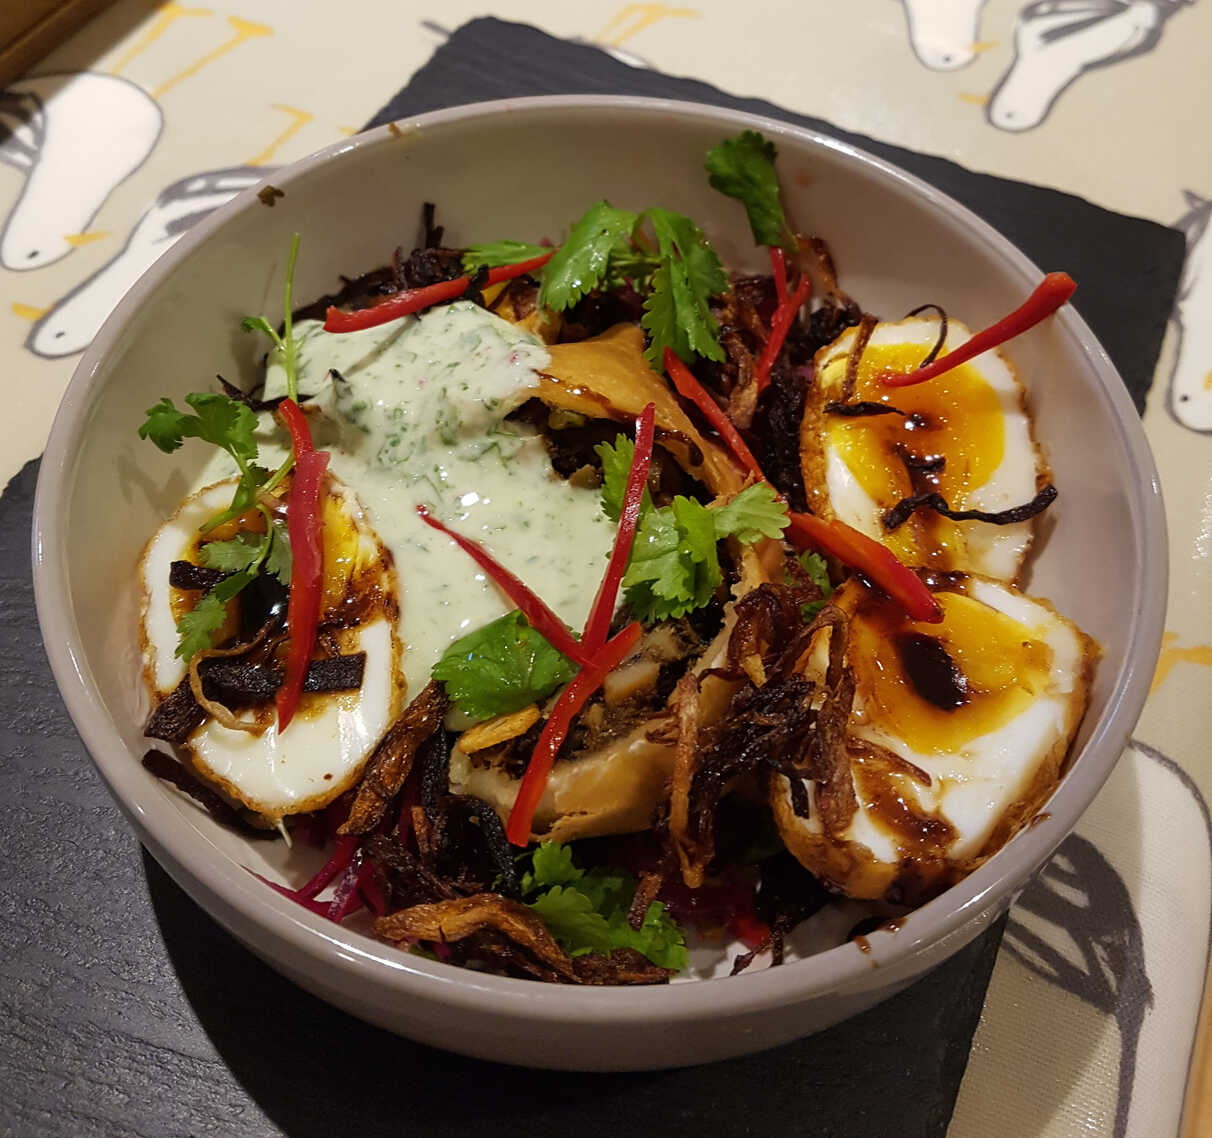
Apparently, because these eggs resemble shrivelled amputated bollocks, they are prepared as a warning to wayward sons by their mothers-in-law.
In Asia.
Well, where else?
1 tsp of tamarind concentrate is approximately the equivalent of 1 tblsp of the liquid from soaked, strained tamarind pulp.
So if using concentrate in the recipe below, substitute 2 tsps of concentrate diluted with 4 tsps water for the 2 tblsps of tamarind paste.
Well, where else?
1 tsp of tamarind concentrate is approximately the equivalent of 1 tblsp of the liquid from soaked, strained tamarind pulp.
So if using concentrate in the recipe below, substitute 2 tsps of concentrate diluted with 4 tsps water for the 2 tblsps of tamarind paste.
Ingredients
- 1 tblsp finely diced shallots optional
- 2 tblsps tamarind paste
- ¼ cup/4 tblsps palm sugar, chopped, packed
- couple tblsps water
- ¼ cup/4 tblsps fish sauce
- 4 medium boiled duck eggs, or 5 chicken eggs, peeled and cooled completely
- 2 head of shallot for fried shallots, thinly sliced lengthwise
- 3-4 cloves garlic for garlic chips (or make as much as you like and keep for miscellaneous sprinkling!)
- dried chilies optional
- coriander leaves
Make the sauce:
Add palm sugar, tamarind, water and fish sauce. Let simmer, stirring and crushing, for a few minutes until the sugar is all dissolved and the sauce is thickened slightly.
After simmering for 3-5 minutes, the sauce should have a darker colour, becomes shiny, and has the consistency of maple syrup (it will thicken slightly as it cools).
Taste and adjust seasoning, keeping in mind that the sauce will be mellowed out by the eggs.
Make fried shallots:
Thinly slice the shallots and lay them on a plate lined with paper towel. Sprinkle salt over them and let sit for at least 10 minutes.
Once it has had time to sit, press a piece of paper towel onto the shallots to absorb all the liquid that has been drawn out by the salt.
Heat just enough oil in a wok or a shallow saucepan to cover the shallots. Turn the heat on medium high and add all the shallots to the oil without waiting for the oil to become hot.
Once the shallots are bubbling, turn the heat down to low and keep them bubbling gently until they are golden browned and crispy. Keep an eye on them as they burn quickly!
Remove the shallots with a slotted or mesh skimmer and drain on paper towel. Turn off the heat.
Make garlic chips:
To the same oil you used the fry shallots, add the garlic slices THEN turn the heat back on low.
Keep frying the garlic on low heat (gentle bubbling) until the garlic has turned a light golden colour and the bubbling has stopped.
Remove the garlic chips and drain on paper towel.
Turn off the heat.
Make fried chilies:
To the same oil, add the dried chilies and fry them on low heat until they turn a maroon colour and smell smoky.
This will take less than a minute so do not walk away!
Remove and drain on paper towel.
Fry the eggs:
Add more oil to the pot so that it comes halfway up the eggs. Heat the oil on medium high heat until the oil reaches 375-400°F.
While you wait for the oil, dry the eggs really well with paper towel to prevent oil from splattering too much. Then add the eggs to the oil, one at a time and fry them until they become golden brown (it should take just less than 1 minute).
Flip the eggs and brown the other side.
Remove from heat and drain on paper towel.
To assemble:
Cut the eggs in half with a sharp knife and arrange on a plate, cut side up.
Reheat the sauce (add a little more water if it has become too thick) then drizzle the sauce over the eggs.
Top with fried shallots, garlic, chilies and cilantro. Serve immediately with jasmine rice. Enjoy!
Add palm sugar, tamarind, water and fish sauce. Let simmer, stirring and crushing, for a few minutes until the sugar is all dissolved and the sauce is thickened slightly.
You can caramelize some shallots as the base for this sauce if you like.
After simmering for 3-5 minutes, the sauce should have a darker colour, becomes shiny, and has the consistency of maple syrup (it will thicken slightly as it cools).
Taste and adjust seasoning, keeping in mind that the sauce will be mellowed out by the eggs.
Make fried shallots:
Thinly slice the shallots and lay them on a plate lined with paper towel. Sprinkle salt over them and let sit for at least 10 minutes.
Once it has had time to sit, press a piece of paper towel onto the shallots to absorb all the liquid that has been drawn out by the salt.
Heat just enough oil in a wok or a shallow saucepan to cover the shallots. Turn the heat on medium high and add all the shallots to the oil without waiting for the oil to become hot.
Once the shallots are bubbling, turn the heat down to low and keep them bubbling gently until they are golden browned and crispy. Keep an eye on them as they burn quickly!
Remove the shallots with a slotted or mesh skimmer and drain on paper towel. Turn off the heat.
Frankly, that all sounds unnecessarily complicated.
Just throw the shallots in oil over a low heat and leave them until they caramelize.
That's it!
Make garlic chips:
To the same oil you used the fry shallots, add the garlic slices THEN turn the heat back on low.
Keep frying the garlic on low heat (gentle bubbling) until the garlic has turned a light golden colour and the bubbling has stopped.
Remove the garlic chips and drain on paper towel.
Turn off the heat.
Make fried chilies:
To the same oil, add the dried chilies and fry them on low heat until they turn a maroon colour and smell smoky.
This will take less than a minute so do not walk away!
Remove and drain on paper towel.
Definitely optional - alternatively just garnish the eggs with sliced fresh red chillies to serve.
Fry the eggs:
Add more oil to the pot so that it comes halfway up the eggs. Heat the oil on medium high heat until the oil reaches 375-400°F.
While you wait for the oil, dry the eggs really well with paper towel to prevent oil from splattering too much. Then add the eggs to the oil, one at a time and fry them until they become golden brown (it should take just less than 1 minute).
Flip the eggs and brown the other side.
Remove from heat and drain on paper towel.
To assemble:
Cut the eggs in half with a sharp knife and arrange on a plate, cut side up.
Reheat the sauce (add a little more water if it has become too thick) then drizzle the sauce over the eggs.
Top with fried shallots, garlic, chilies and cilantro. Serve immediately with jasmine rice. Enjoy!
Liquorice Pudding
sweet veg
Nigella says:
I followed her advice and ordered some from Amazon. Worth every penny!
I use the tiny liquorice pellets that come, usually, from Calabria and are seen everywhere in Italy.
Outside of Italy, you can find them in Italian delis and via the internet.
I followed her advice and ordered some from Amazon. Worth every penny!
Serves 2
Ingredients
- 60 millilitres water
- 1 teaspoon pure Italian liquorice pellets (such as Amarelli Rossano)
- 2 tablespoons light brown muscovado sugar
- 175 millilitres double cream
- 2 teaspoons cornflour
- 1 tablespoon milk
- Maldon sea salt flakes (to serve)
Put the water and liquorice pellets in your smallest pan and bring to the boil, stirring or whisking frequently to help the liquorice melt.
Once it starts bubbling, turn off the heat and leave for 5 minutes, stirring or whisking every now and again.
Turn the heat back on and whisk in the sugar, then the cream, and bring to a bubble.
Remove from the heat.
Spoon the cornflour into a little bowl, cup or ramekin and slake it with the milk: which is to say, whisk in the milk until you have a smooth paste.
Pour this, whisking as you go, into the mixture in the saucepan. Still whisking, put the pan back on the heat and bring back to a bubble, whisking all the while, for 20-30 seconds, or until thickened.
Divide between 2 heatproof glasses or cups and - unless you want to eat this hot - cover, touching the surface of the puddings, with clingfilm or baking parchment that you've wet with cold water then wrung out (this is to prevent a skin forming, a thing she Ed: That's Nigella cannot tolerate), and put them in the fridge to chill for at least 2 hours or overnight.
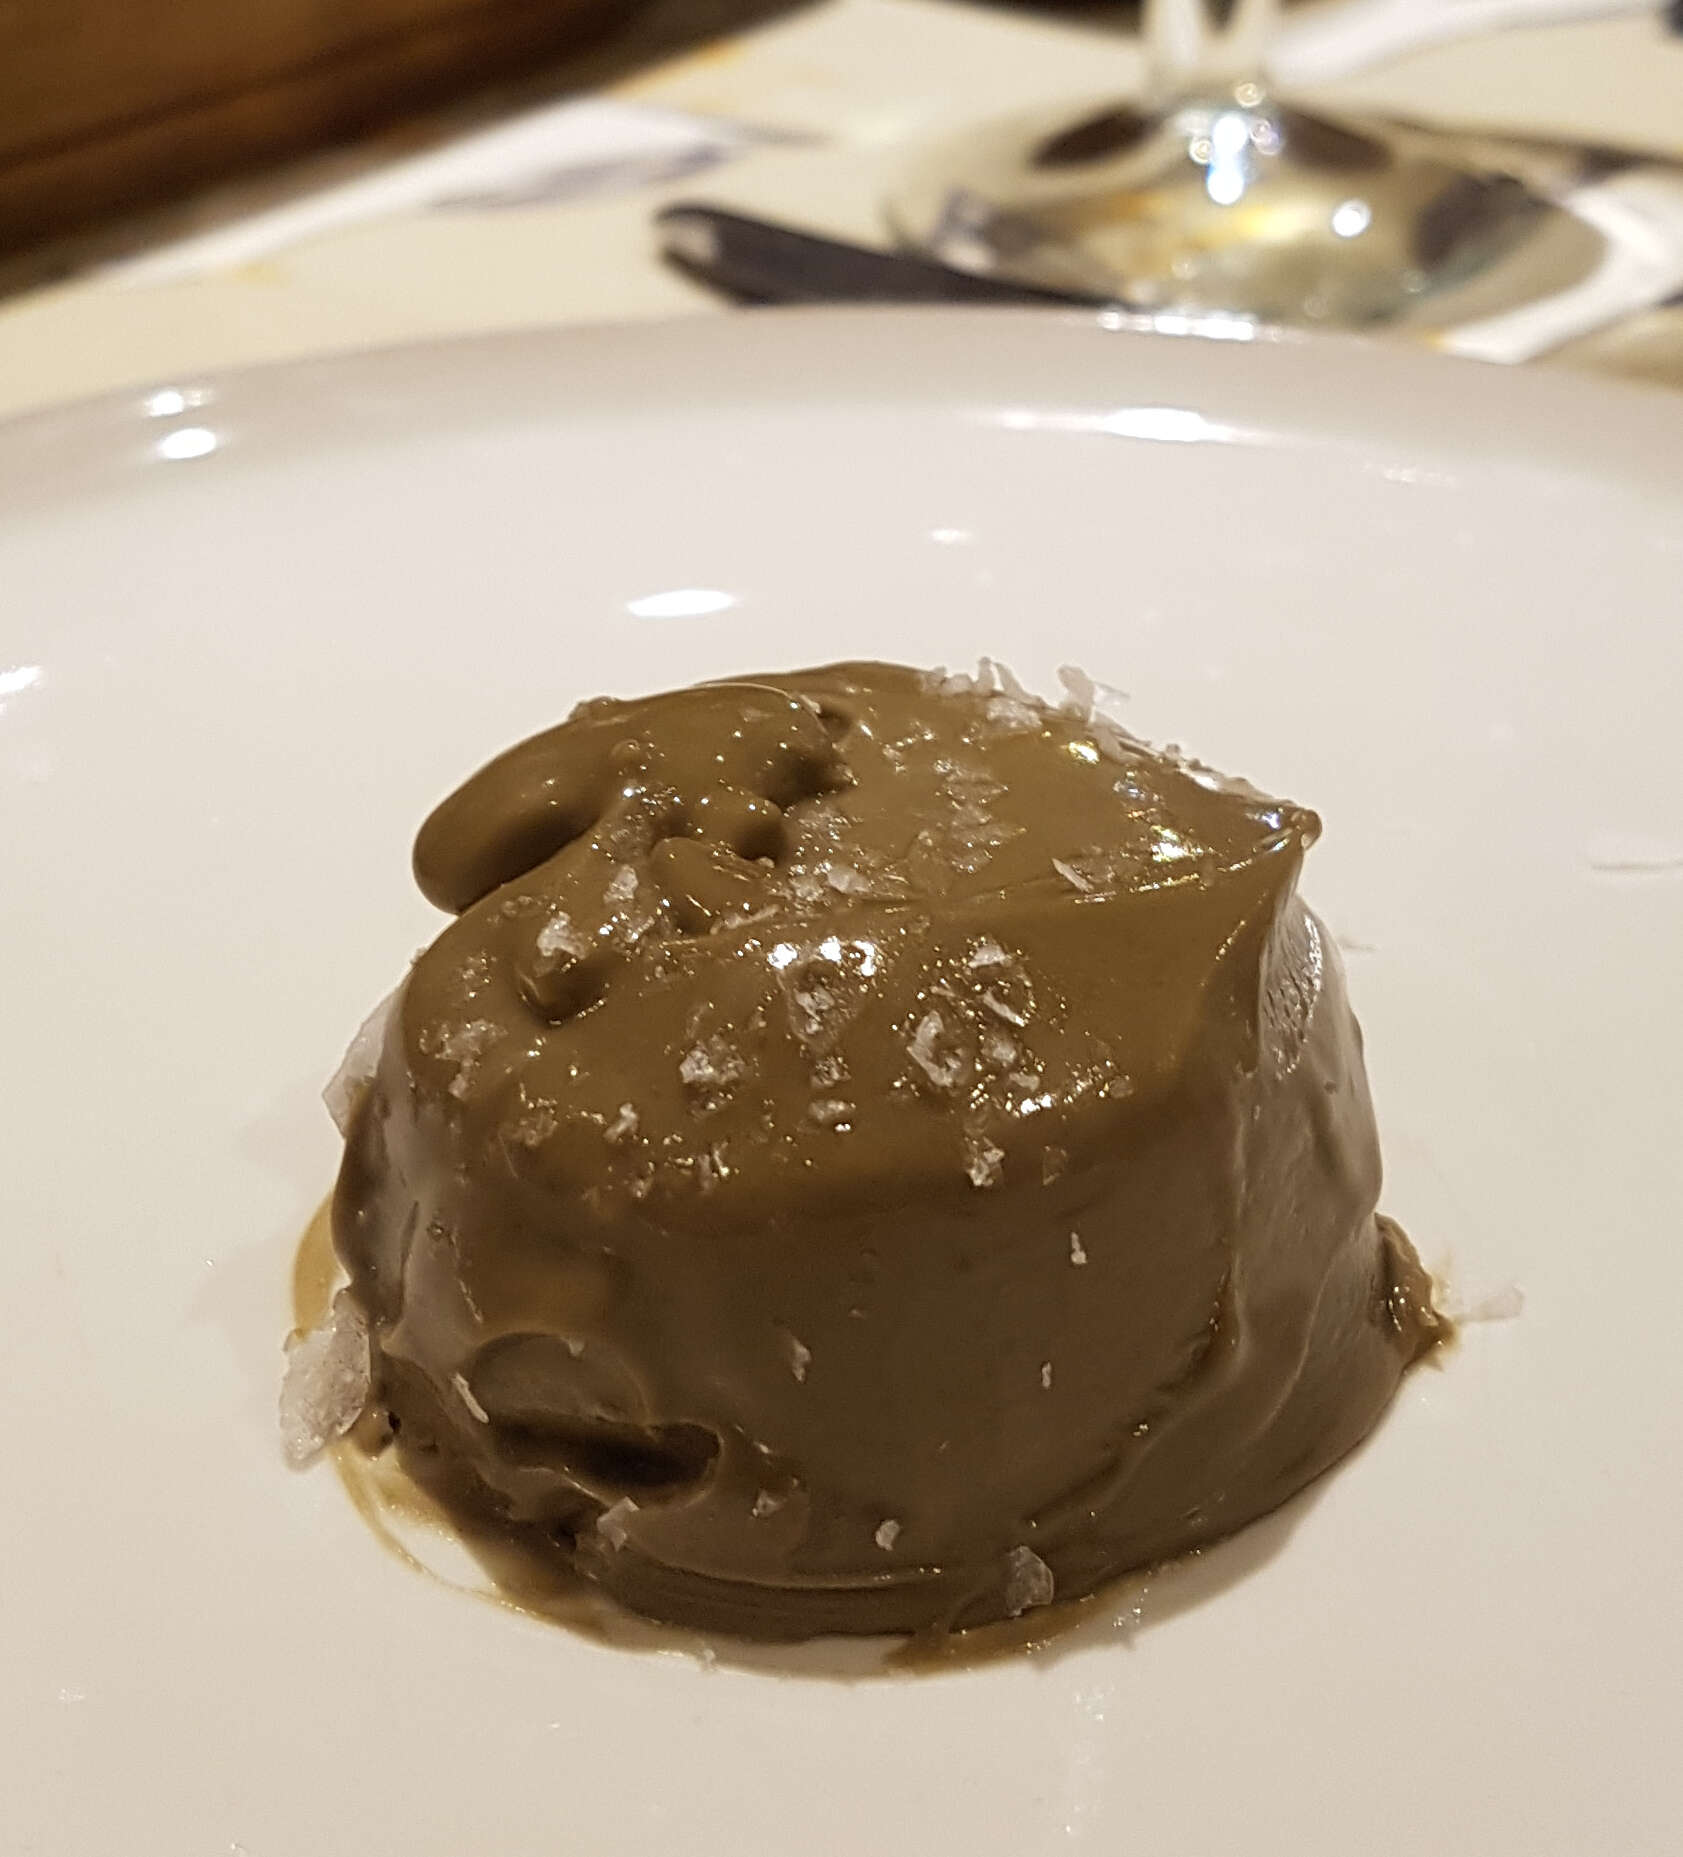
Let the puddings come to room temperature before serving, and remove the clingfilm or baking parchment and smooth the tops with the back of a teaspoon.
Put the soft sea salt on the table to sprinkle over as you eat, if wished. For those of us Ed: Like Nigella! who love liquorice, this pudding is a sheer, spine-tingling joy.
Turn the heat back on and whisk in the sugar, then the cream, and bring to a bubble.
Remove from the heat.
Spoon the cornflour into a little bowl, cup or ramekin and slake it with the milk: which is to say, whisk in the milk until you have a smooth paste.
Pour this, whisking as you go, into the mixture in the saucepan. Still whisking, put the pan back on the heat and bring back to a bubble, whisking all the while, for 20-30 seconds, or until thickened.
Divide between 2 heatproof glasses or cups and - unless you want to eat this hot - cover, touching the surface of the puddings, with clingfilm or baking parchment that you've wet with cold water then wrung out (this is to prevent a skin forming, a thing she Ed: That's Nigella cannot tolerate), and put them in the fridge to chill for at least 2 hours or overnight.
Let the puddings come to room temperature before serving, and remove the clingfilm or baking parchment and smooth the tops with the back of a teaspoon.
Put the soft sea salt on the table to sprinkle over as you eat, if wished. For those of us Ed: Like Nigella! who love liquorice, this pudding is a sheer, spine-tingling joy.
You might think that you could briefly dunk the ramekin in very hot water in order to loosen the pudding and neatly turn it out onto a plate by inverting the ramekin.
You would be wrong 🙁
The pudding will stick belligerently to the ceramic and only emerge untidily at the point of a knife.
I guess this kind of loosening only works best with gelatine-based thickeners.
You would be wrong 🙁
The pudding will stick belligerently to the ceramic and only emerge untidily at the point of a knife.
I guess this kind of loosening only works best with gelatine-based thickeners.
The result was a moderate crisping, but still with some tough, woody, spots.
I think I'm inclining to the notion that lamb breast is just not really suited to the production of crispy skin.
There really isn't much of a fatty layer compared with, say pork belly. Or even lamb's leg.