What Have the Romans Ever Done For Us?
Well spring is springin' around here - the birds are singin', the wild garlic is sproutin' and the crocuses are bloomin'.
Cue massive snow storm
😂
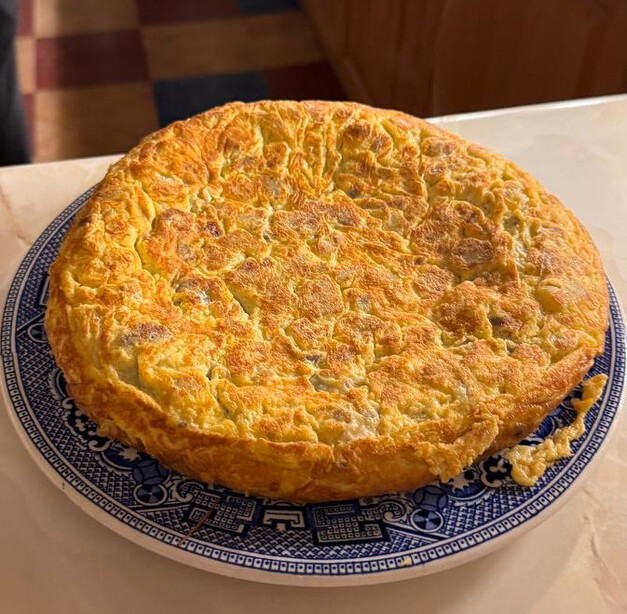
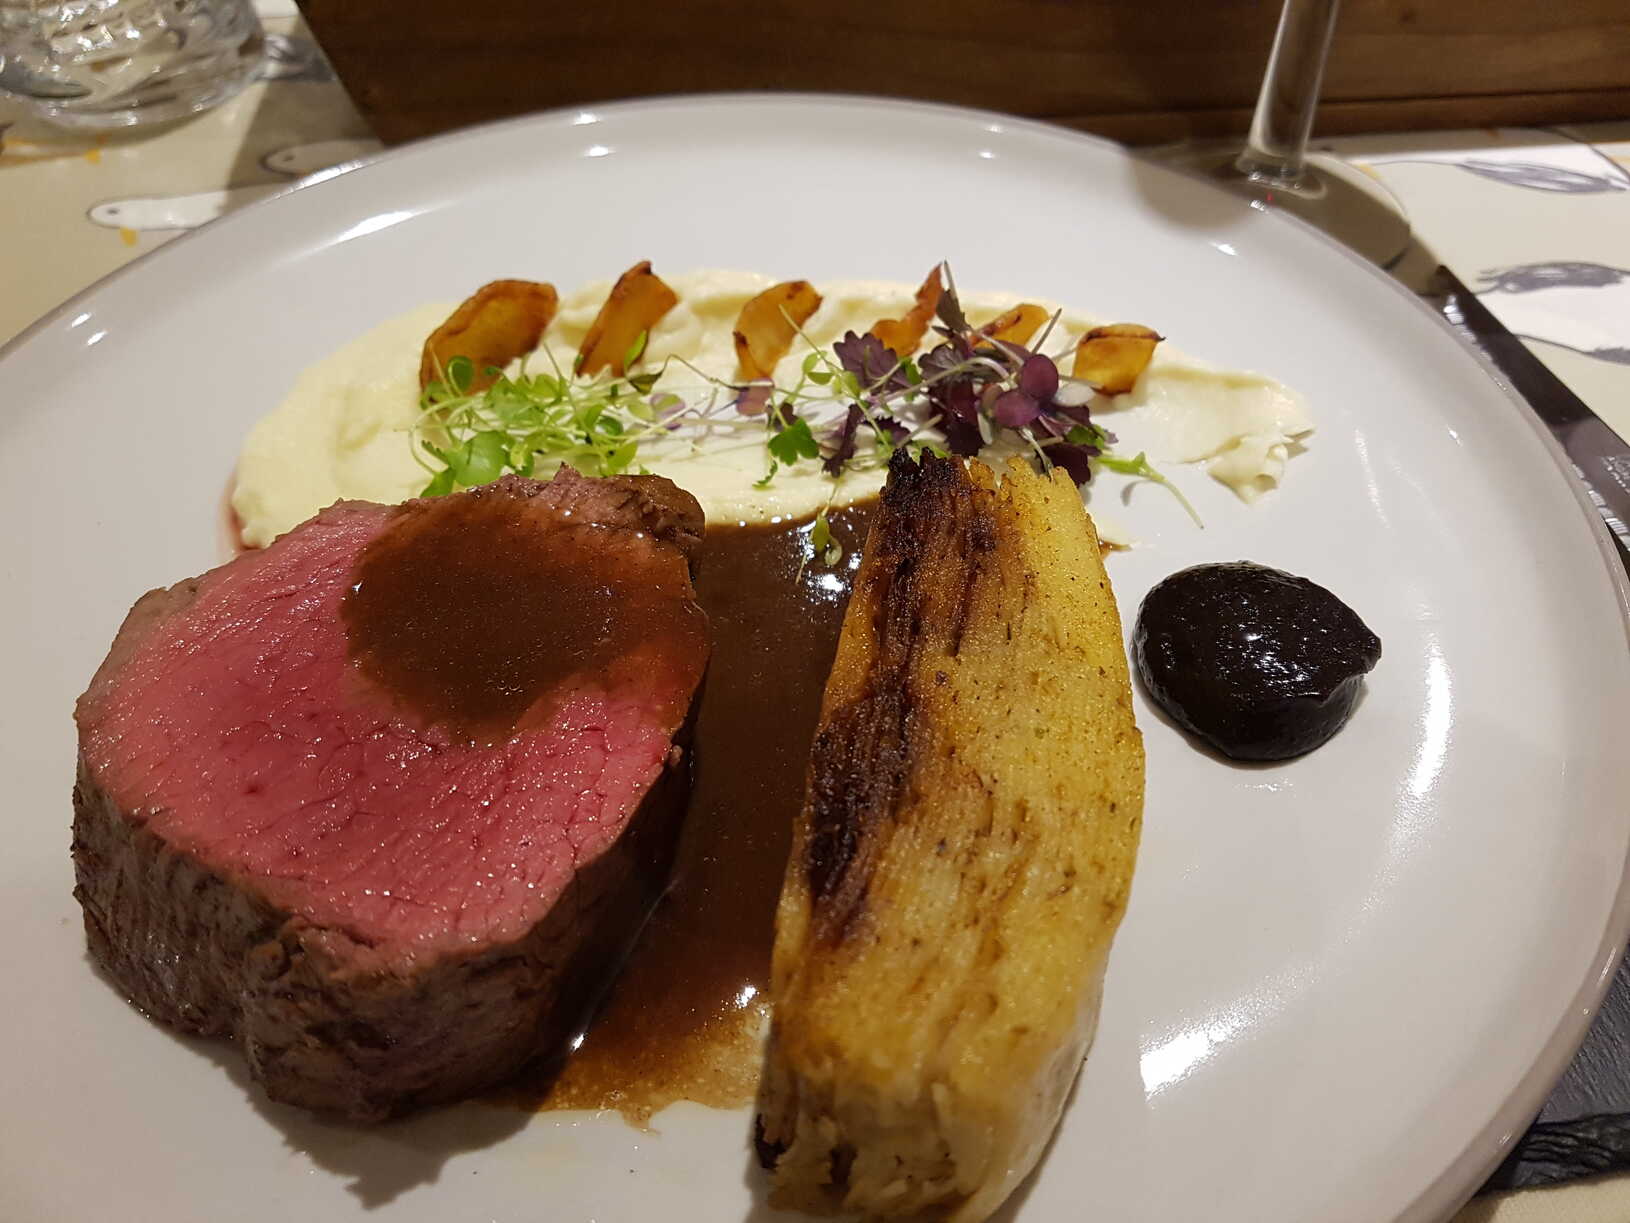
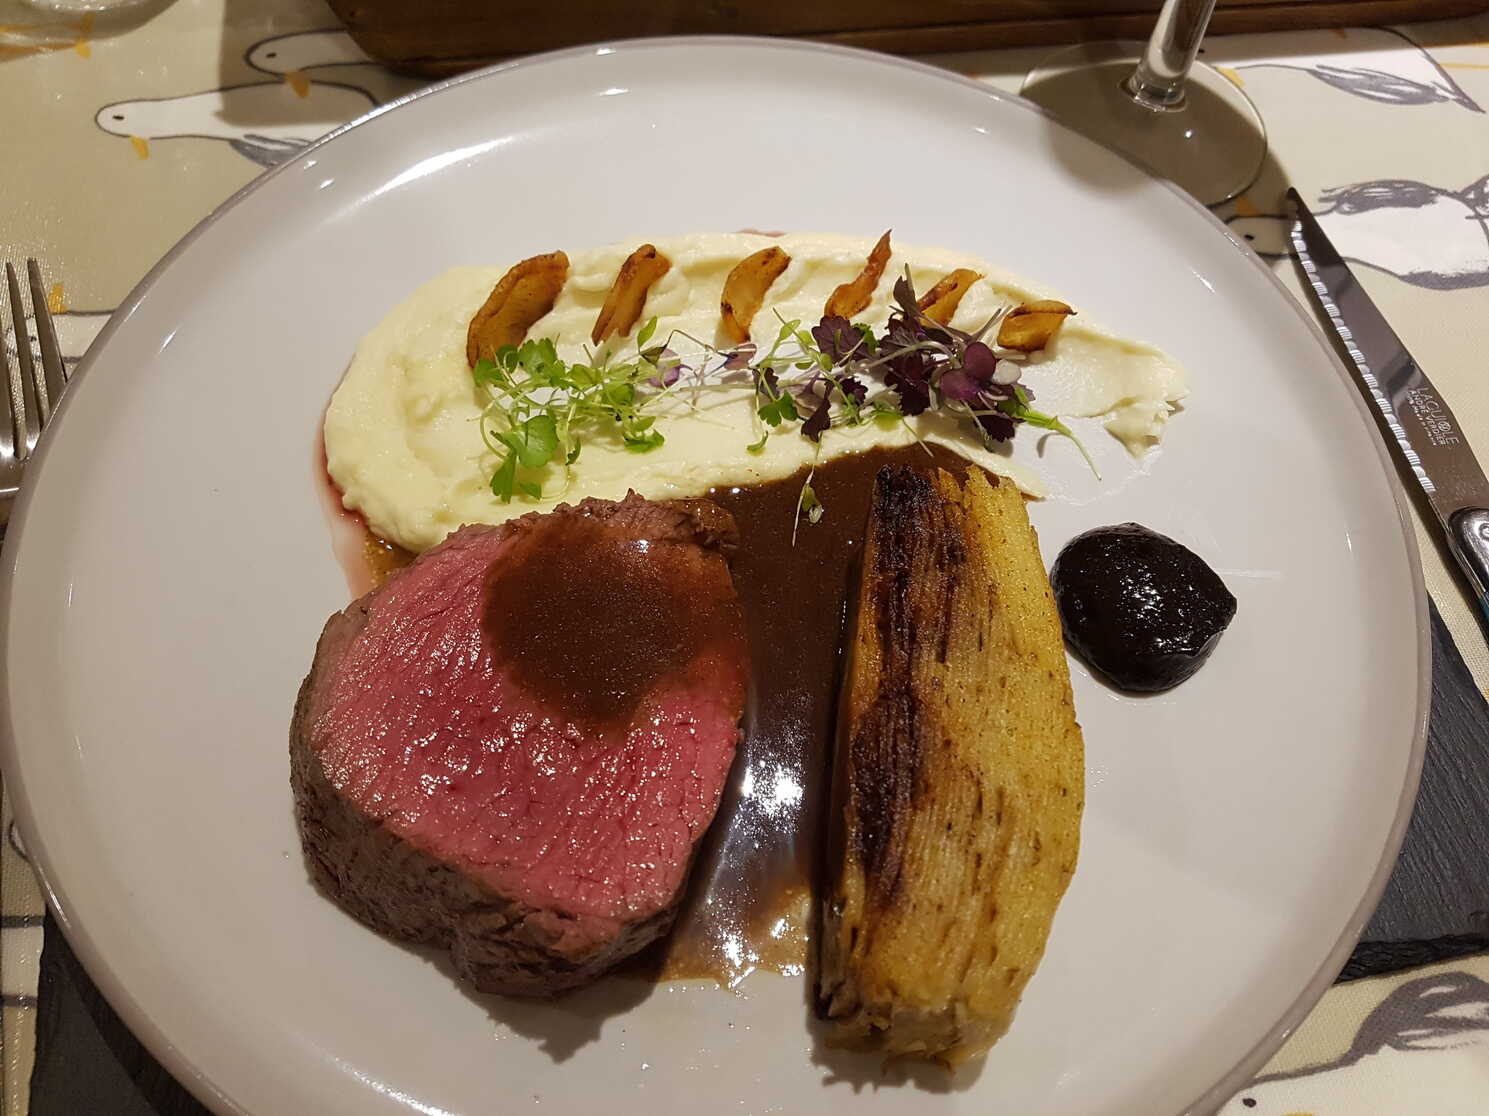
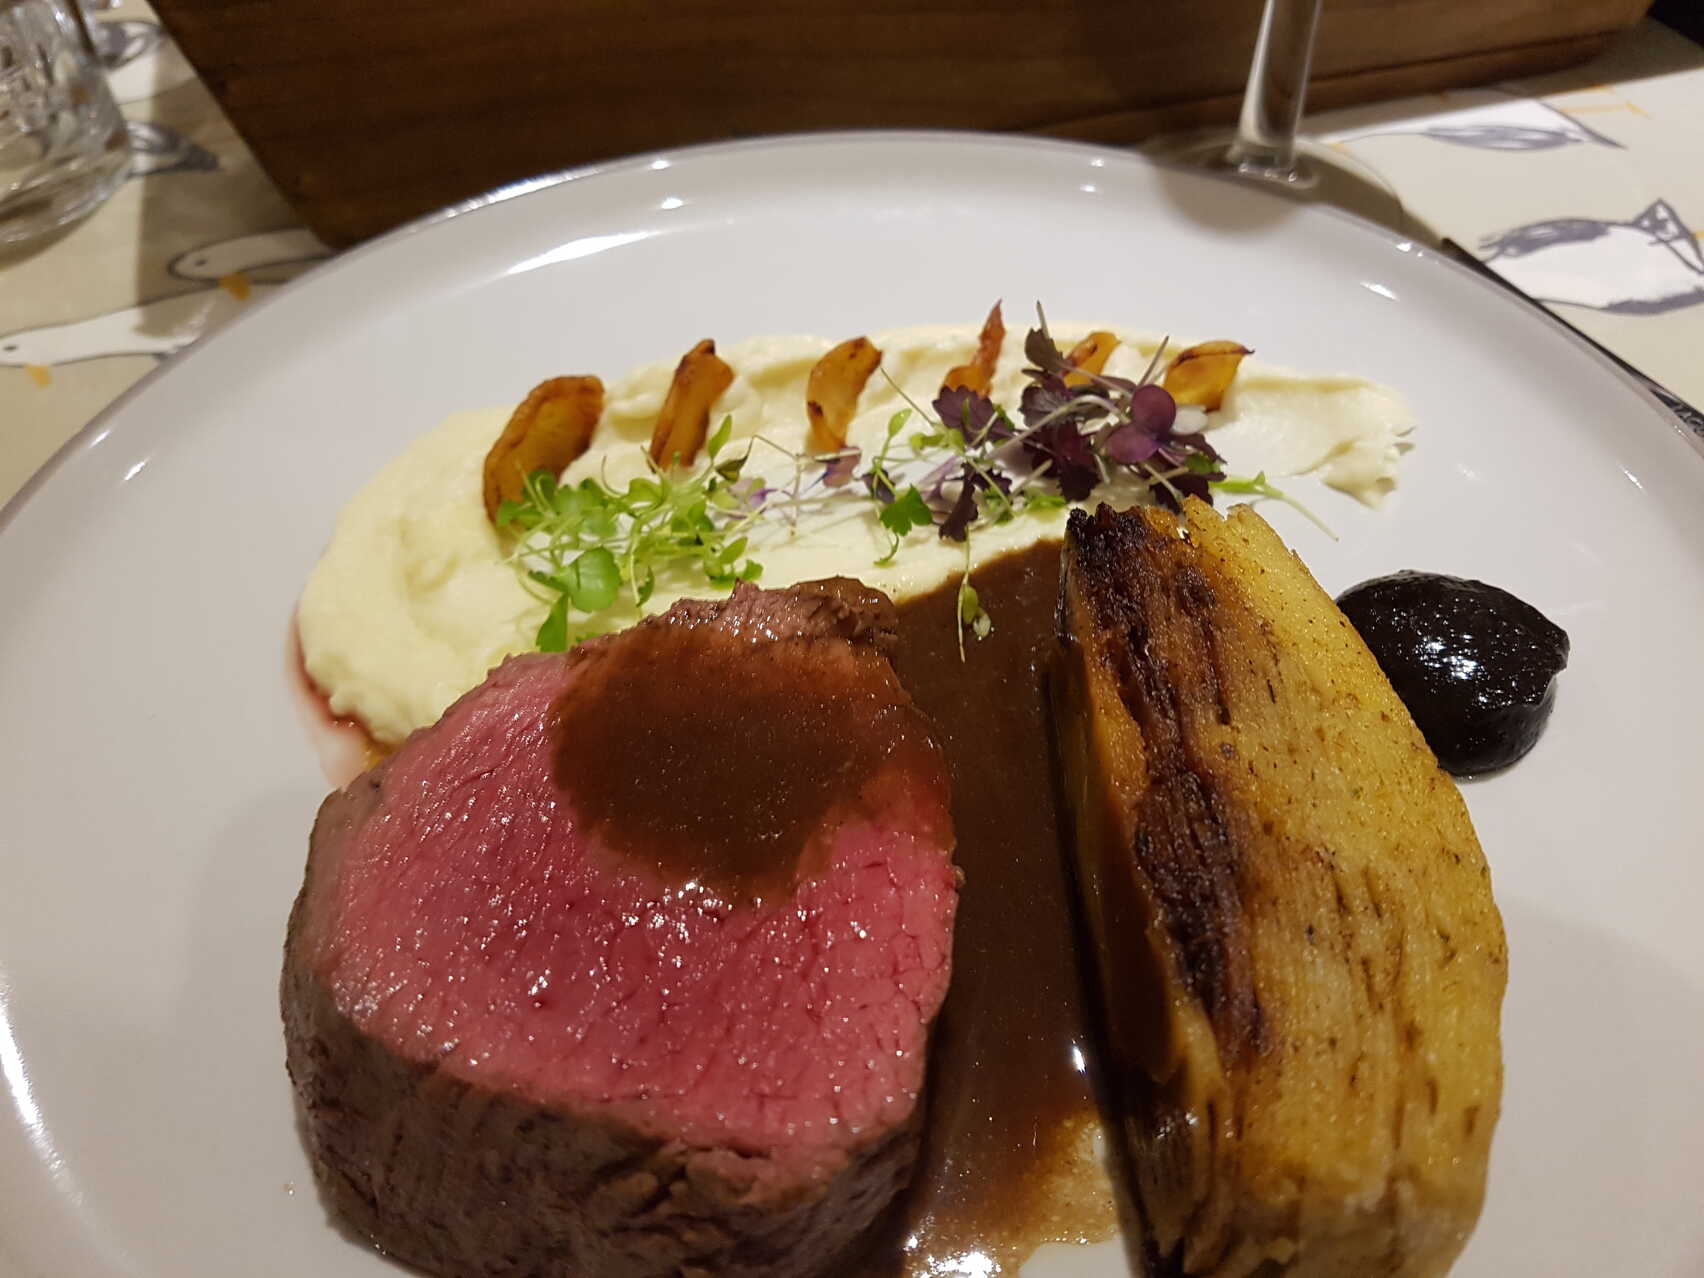
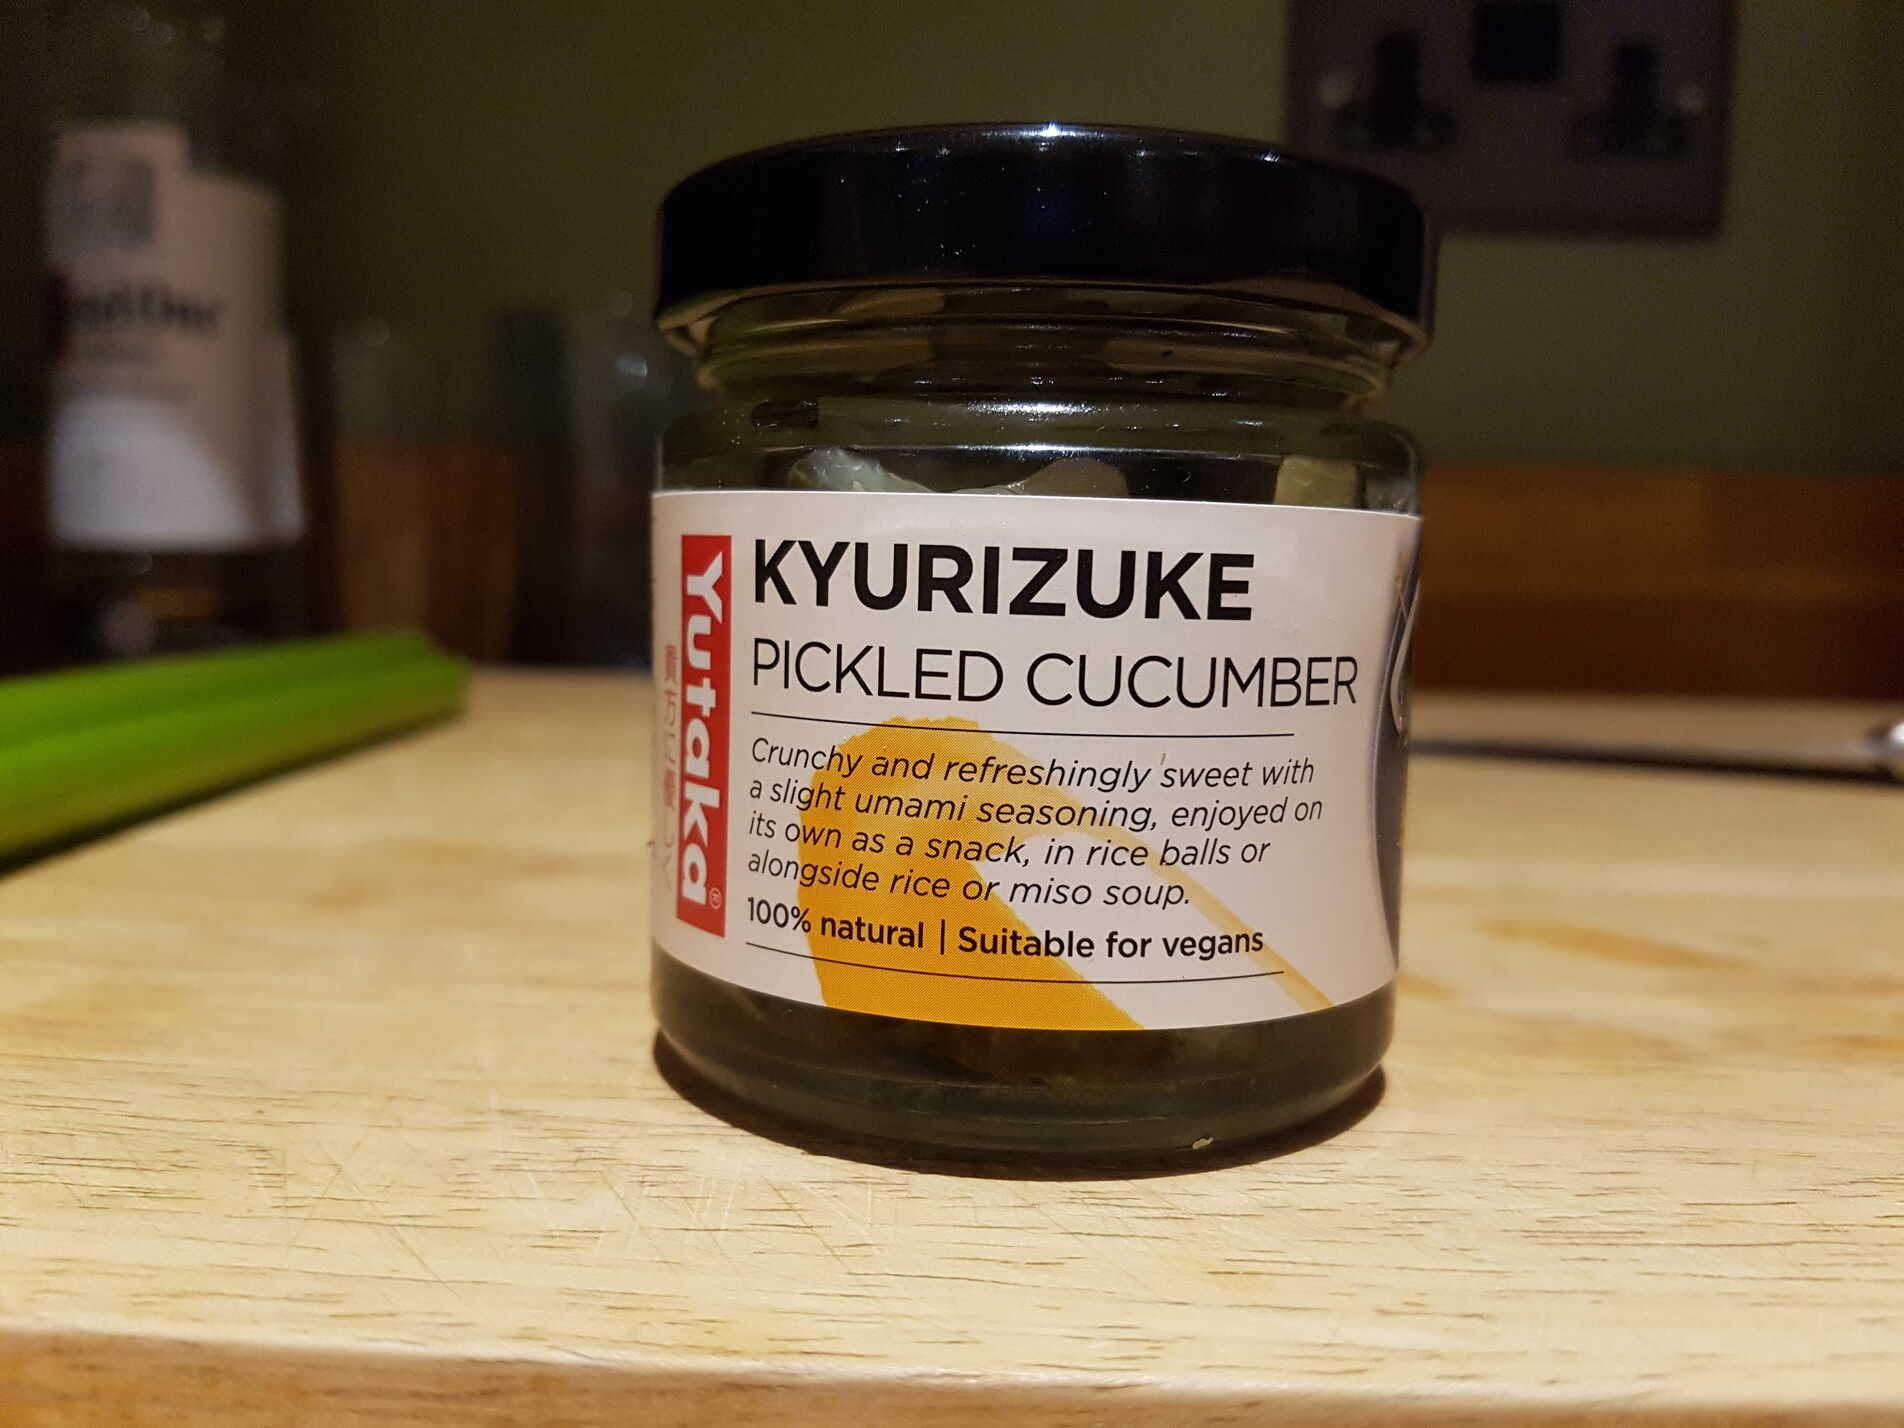
I've been experimenting a lot with guanciale - cured pig's cheek - since it appeared on limited offer at my local Lidl.
It turns out that this cured porky jowl is the basis for a series of pasta dishes from the Lazio region around Rome, elaborating on the basic
cacio e pepe pasta
(
cheese and pepper - the local Roman cheese
pecorinio romano, spiced with ground black pepper and usually served on spaghetti, bucatini or tonnarelli).
The first of these is
pasta alla Gricia - basically just the inclusion of fried guanciale.
Then we add eggs to get
carbonara, or tomato giving
Amatriciana.
Or we combine these two, throw in some sausage, and get
pasta alla zozzona. A
slutty mess -
for some reason rarely included in compendia of famous Roman pastas.
Despite the confusing order in which I presented them, Pasta all Gricia may be the oldest of this collection, perhaps going back to the 5
th Century, though it's origins are controversial and obscure.
Certainly it's older than the arrival from the Americas of the tomatoes and hot chillies (peperoncini) used in Amatriciani or zozzona.
And pepper was a fairly rare and expensive spice until relatively recently, so not something peasants would have been chucking into their pasta by the handful.
Pasta carbonara was an unknown (or at least, unrecorded) dish before the Second World War, and several origin stories implicate occupying American forces and their prolific supplies of bacon.
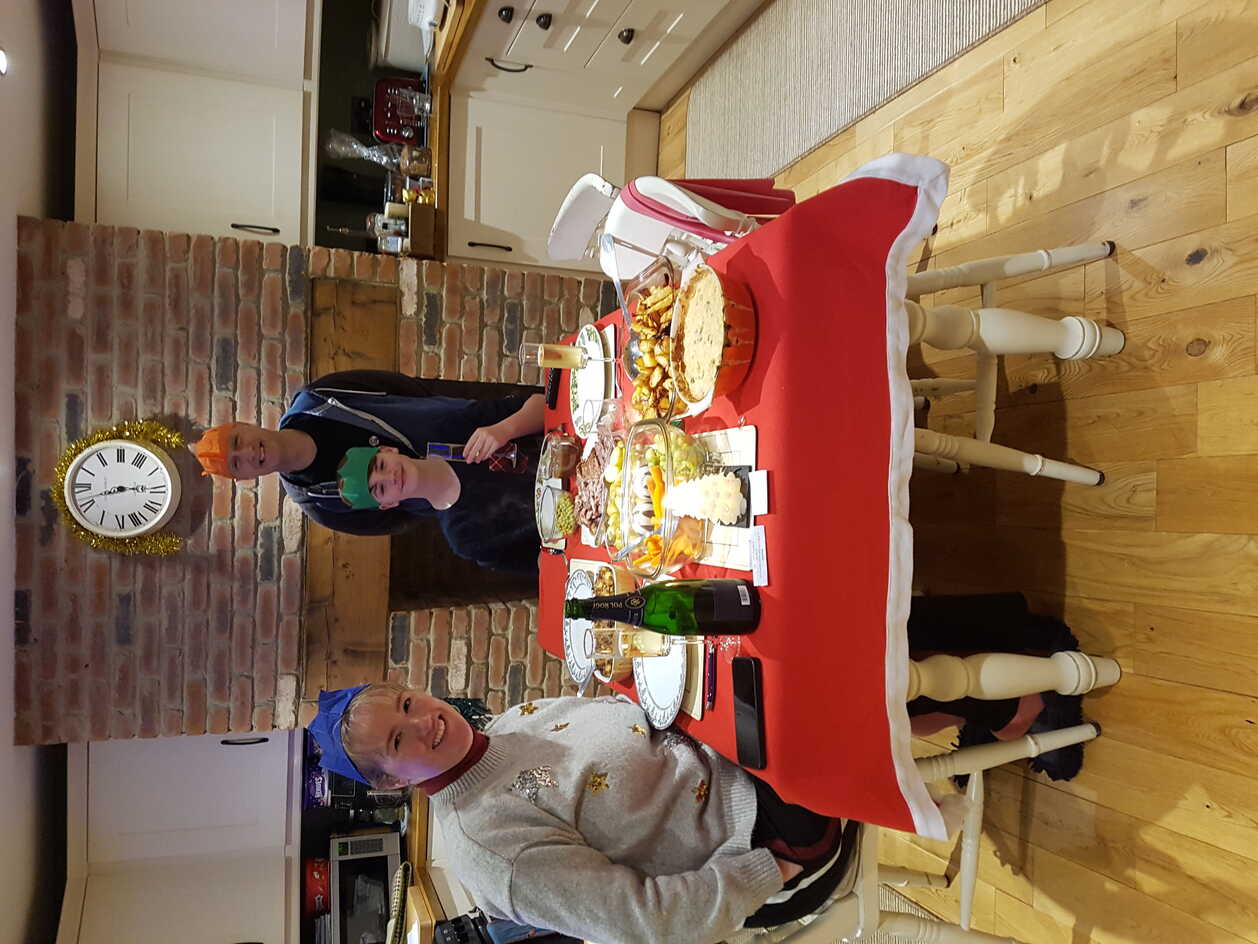
This season I will be mostly cooking these for one
😢
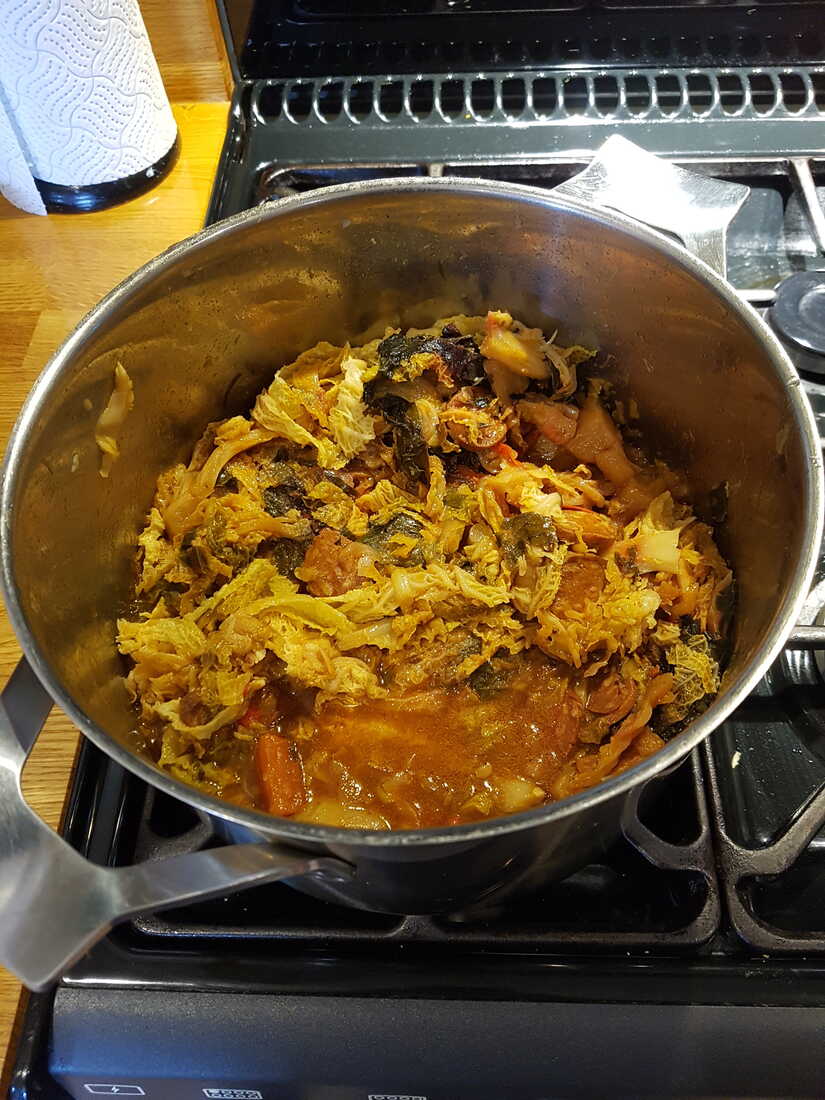
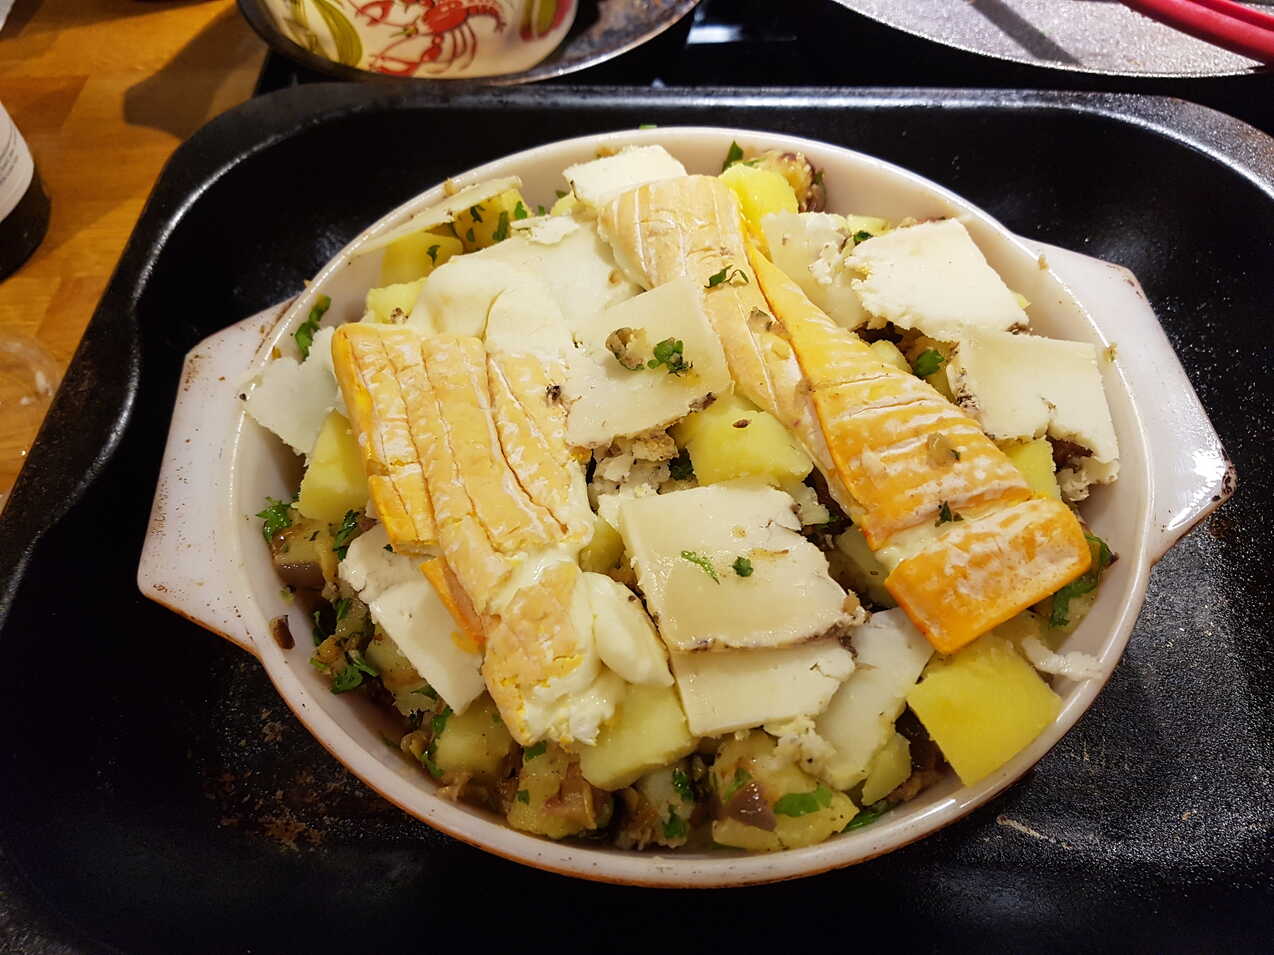
Lidl also had scamorza cheese along with their guanciale - must be Italy week or something, so I bought some of that too.
It's less interesting than pig cheek, but you can
melt it over most any cooked vegetables as an antipasto.
Potatoes, courgettes, mushrooms, asparagus, aubergines, even experimental
roast baby ones.
Most Italians seem like their scamorza sliced and pan-fried or griddled so it develops a nice crisp golden crust with a gooey interior,
though you might want to us a
very un-sticky pan or you'll be scraping off a
lot of crispy golden crust!
It's been a busy week for bargain spotting:
My local
health and wholefoods store had some weird-looking alien vegetable for sale that turned out to be kohlrabi.
Not the smooth green-skinned kind though, the cracked red-skinned kind. Didn't even know that
was a kind.
So I figured I'd look up things to do with them other than shredding in coleslaw or salad - it's refreshingly crisp, sweet and vaguely nutty like a cross between a radish and a turnip.
Which is funny because
Brassica oleracea are, in fact, a cross between a wild cabbage and a turnip, the direct translation of its German name:
Cabbage Turnip.
Or possibly they're a cross of a wild cabbage and a beet.
This is distinct from a rutabaga (
Brassica napus), also known as
swede in England,
although wrongly called
turnip or
neep in Scotland, which is definitely a cabbage-turnip hybrid.
These damn promiscuous vegetables!
Anyhoo, it's been
suggested that kohlrabi also tastes great steamed, mashed, or added to soups,
and I can now attest that it
roasts up really well too.
I thought that this would mean they would also make great deep-fried chips, but so far they haven't quite lived up to that.
You might need to do a fair bit of vigorous peeling though - they can have very thick fibrous skin.
Anyway.
I came here to talk about shipping companies.
Absolute dog shit aren't they? The lot of them.
Finding myself requiring additional guanciale, I recently ordered some from Amazon, who ordered it from Italy, who shipped it with
OOPS -
an American shipping company who's service is, you guessed it, dogshit.
OOPS' first optimistic delivery window was 08:20-10:20.
(Odd isn't it how very specific these ficitious delivery windows are?)
As usual with these predictions, they are only useful as a guide for knowing when you absolutely do not need to be in,
since this is the one period during which you can guarantee their Dogshit Delivery Drone™ will
not attempt delivery.
4 hours later, they updated their delivery prediction to
before the end of the day, whenever that is, only to revert to the original window now 14 hours
in the past around midnight.
See. Absolute dogshit.
I stopped checking with them after that.
So an interesting question is,
why are they so fucking useless? Don't they operate in a competitive capitalist environment renowned for driving innovation and efficiency?
Well the answer, my friends, is that the shipping companies don't work for you, and you aren't their customers. They work for the seller, because the seller pays them.
Have you ever tried complaining about your delivery, or lack of?
You'll find there is absolutely no mechanism for you to send them meaningful feedback, and they don't give a shit if you do.
Because they aren't competing for
your business, so quite naturally they couldn't give less of a fuck about your delivery experience.
And the sad thing is - there actually is a simple solution: Payment on Delivery.
You can bet your arse that the instant their payment depends on
your satisfaction they'd start to give a fuck about what you thought about their service.
There'd be a lot less pushing a card through your letterbox and running away if the shitbags didn't get paid for doing it.
You'd be amazed how capable a shipping company could become at delivering a parcel into your hands if their profit depended on it,
and how reluctant they would be to hide your parcel in your bin, or their depot in the next county if they suddenly weren't going to get paid for that.
You know what I want from my Dogshit Delivery Drone™? I want a notification about a day ahead, another about an hour ahead, and a final one about a minute ahead.
That's it.
You know what OOPS gave me? A detailed breakdown of the exact times my guanciale passed through all the their depots in Italy, three days ago.
You know what I don't give a fuck about? A detailed breakdown of the times my guanciale passed through their depots in Italy, three days ago.
You know what I do care about? Roughly when I'm to expect the parcel, and then a
heads up just before it arrives.
Instead my OOPS guanciale arrived without warning several days later.
Fucknuggets.
By Romans
Rigatoni Alla Gricia
meat pasta cheese
One of the origin stories of past alla Gricia references the slang name given to Swiss immigrants of the 14
th and later.
This doesn't quite accord with the claim that the source of the sauce (
🙂) goes back as far as 400 A.D. though. So who knows really.
Though just in case the dish actually came from Grisciano near Amatrice, I shall be capitalising it.
Anyway, all you need are quality ingredients and you will have a reasonable dish.
Getting the best coating sauce from the cheese dissolving smoothly into the pasta water is another issue though.
Photographs of typical servings of this dish do look quite watery, so perhaps
plenty of pasta liquor is the secret?
Although commonly served with rigatoni or the shorter mezze maniche, as always you can use almost any pasta you fancy. Spaghetti or bucatini would not be controversial.
A comedy pasta like
caccavelle or
fusilli capri will get you shot.
Serves 1
- 100g rigatoni
- 70g guanciale
- 30g pecorino romano plus extra for serving
- splash of olive oil
- salt
- freshly ground black pepper
Start a pot of lightly salted water boiling - with just enough depth to cover the pasta.
Remove the guanciale skin, and slice vertically into fairly thin slices - not the thinnest possible though, perhaps the thickness of a penny.
Slice in such a way as to have some fat and some meat running across each slice, then portion the slices into strips about 1cm x 4cm.
Pour a little olive oil into a fairly large frying pan and cook the guanciale gently until the fat is mostly rendered and the strips are turning golden and crispy.
Add a generous grinding of black pepper so it fizzes up, then remove the frying pan from the heat and scoop the meat out with a slotted spoon and set aside.
Add the pasta to the water and cook for about 5 minutes less than the recommended time.
Return the frying pan to a high heat and add about ¼ cup of the pasta water to the frying pan and swirl it around to emulsify with the fat.
Drain the pasta, keeping the rest of the water, and add it to the frying pan. Swirl, stir or toss to coat the pasta until the sauce thickens and the pasta is cooked through to al dente.
Add more reserved pasta water if required.
Now off the heat stir in half the pecorino. You want it to dissolve as much as possible, so it's best to clear a space in the pasta and stir it rapidly into the sauce, then mix the pasta through the emulsified cheese.
Reheat, add the rest of the cheese and repeat.
Adjust the sauce consistency, season if necessary, mix in the guanciale and serve immediately.
Provide more grated cheese for people to add as desired.
By Romans
Bucatini all'Amatriciana
meat pasta cheese
Although there's some argument about the exact origin of this slightly spicy Roman sauce Amatriciana (or matriciana in the local Romanesco patois),
it can hardly be a coincidence that there's a (fairly) nearby town called Amatrice, so I'm going with that.
The eagle-eyed among you will have already intuited this from my clumsy attempt to retain consistent Capitalisation in deference to foods named after proper place nouns.
I like slicing the guanciale into thin strips for this sauce, as with pasta alla gricia.
You can purée the tomatoes if you like a particularly smooth sauce, but I rather like the rustic qualities of just mashing them up with a fork.
But use San Marzano tinned tomatoes if you can find them. They are especially succulent.
Bucatini pasta, with it's hollow strands, is particularly nice, and the traditional Roman accompaniment, but you can use any shapes you like.
Spaghetti, particularly favoured in Amatrice itself, rigatoni or even penne wouldn't be a disgrace.
Serves One
- a splash of olive oil
- 50-60g guanciale, cut into thin slices about ¾"x¼"
- a pinch red pepper flakes
- 20ml dry white wine
- 200g tinned whole peeled tomatoes, hand-crushed
- freshly ground black pepper
- salt
- 120g bucatini pasta
- 30-50g pecorino romano, grated
Crush the tomatoes with a fork or masher, or blend them up.
Heat a splash of olive oil in a large frying pan over medium heat until shimmering and add the guanciale and the pepper flakes.
Cook, stirring, for about 5 minutes until golden and crisping at the edges then scoop it out and reserve it for later .
Return the frying pan to the heat, add a good grinding of pepper so it blooms, then add the wine.
Evaporate the wine for a few minutes, scraping up all the browned goodness from the bottom of the pan, then add the crushed tomatoes and bring to a simmer.
Meanwhile, boil pasta in salted water until just shy of al dente, about 1 minute less than package recommends.
Using tongs or a pasta spider, transfer the pasta to the sauce, along with a good splash of the cooking water.
Cook over high heat, stirring and tossing rapidly, until the pasta is al dente and the sauce thickens and begins to coat the noodles. Add more pasta water if required.
Remove from the heat, add back the guanciale, add cheese, and stir rapidly to incorporate.
Season to taste with more salt and pepper.
Serve immediately, with extra cheese at the table.
By Romans
Spaghetti Carbonara
meat cheese pasta
Don't over-salt the pasta water since the cheese and cured meat will already be fairly salty.
You can, of course, use whatever pasta you like - spaghetti, linguine, rigatoni, penne. Bucatini is nice too.
I first made this following the traditional recipe using guanciale , only pecorino romano cheese, and one egg and one yolk.
And if I'm honest I didn't think too much of it.
Perhaps it's the slightly underwhelming cheesiness - I think adding some parmesan might be an improvement,
perhaps it's the mildness of the guanciale which might be better replaced by pancetta, or even (gasp) bacon,
or maybe it's the slight lack of unctuous richness that might be helped by a adding a little cream or only using egg yolks?
Of course, since there's little evidence that this dish existed before the Second World War, and may have been invented by American servicemen posted to Italy, traditional is a bit of a stretch.
Serves One
- 120g spaghetti, linguine or bucatini
- 50g guanciale, pancetta or bacon
- 1 tblsp olive oil
- 2 egg yolks
- 20g pecorino romano
- 20g parmesan
- ground black pepper
- a splash of double cream
- extra grated cheese
- torn basil leaves or chopped parsley
- a grating of nutmeg
Cut the meat into batons, cubes or slices. If you're using pancetta you probably don't want them too thick.
Grate the cheese, about half-and-half pecorino and parmesan works well.
In a large heatproof bowl, mix together the eggs, a grinding of pepper and most of the cheese .
Heat a tablespoon of olive oil in a large skillet or frying pan, add in the guanciale and cook, stirring occasionally, over medium heat until the fat has rendered out and the guanciale gets crisp and golden, 5-10 minutes.
Add a good grinding of black pepper so it blooms in the oil.
Meanwhile bring a pot of salted water to a boil. Add the pasta and cook, stirring, until nearly al dente - a minute or two under the recommended time.
Using tongs or a pasta spider scoop the pasta into the frying pan, add a splash of pasta water and toss to coat nicely in the fat.
Dribble about 2 tablespoons of the pasta water to the egg mixture and stir it in.
You now have a choice of finishing cooking the eggs and pasta to perfection in the frying pan or in the heatproof bowl adapted as a double-boiler. Either:
- Empty the egg mixture into the pasta in the frying pan and, tossing and stirring constantly over a fairly low heat, cook until the sauce thickens nicely and you begin to see trails as you stir.
Add extra pasta water if the sauce seems too thick. Don't over-cook and turn it into scrambled eggs.
-
- Scrape the pasta mixture into the bowl with the eggs and cheese, set it over simmering water in the pasta pan (without touching the water) and stir it in the bowl instead until the sauce thickens as above.
Immediately remove the pasta from the heat, and stir through a spoonful or two of double cream to help quickly halt the cooking process if you fancy.
Serve with extra grated cheese, more pepper, and a grating of nutmeg if you like.
I've not had any particular difficulty just tossing off the pasta to a finish in the frying pan, but I suppose the double-boiler method would make it easier to get
just the right custardy consistency to the sauce.
Your choice.
Pasta Alla Zozzona
pasta meat cheese
The recipe calls for the meat of salsiccia - Italian sausage; it being an Italian recipe.
The
notable features
of Italian sausages being their relatively coarse grind and their lack of non-meat filler.
Unfortunately I couldn't find any Italian sausage in my neighbourhood. Because my neighbourhood sucks.
But my Local Fucking Supermarket™ stocks both
Harrogate Original sausages (97% pork!)
and raw
chorizo cooking sausages. Which are at least spicy and almost entirely pork.
So I used those. I used
both of those - one of each sausage, which was about double the recipe quantity. And it worked just fine.
I note that some people use fresh cherry tomatoes rather than passata, and some deglaze the fried sausage with red wine.
1 Large Serving
- 1 egg yolk
- 20g pecorino romano, grated
- 40g guanciale or pancetta, cubed
- 60g sweet or hot Italian sausage
- 2 shallots or ¼ onion, finely chopped
- pinch red pepper flakes
- ⅔ cup/170g tomato passata or crushed tinned tomatoes
- 120g rigatoni
- grated parmesan
- parsley
In a small bowl, beat egg yolks and Pecorino Romano together with a fork until they form a homogeneous thick paste, about 1 minute. Season with a few grindings of black pepper. Set aside.
Cut the guanciale into batons or small cubes (about ¼"/½cm).
In a large skillet, cook the guanciale over medium-low heat, stirring occasionally, until the fat has rendered and the guanciale is golden brown and crisp, about 15 minutes.
Remove from heat. Using slotted spoon, transfer guanciale to a plate. Set aside.
Remove the sausage skin and add the meat to the skillet by pinching off ¾-1" pieces and arranging in a single layer in the pan.
Cook over medium heat, undisturbed, until bottom side is light golden brown, about 1 minute.
Add the minced shallot, season lightly with salt, and, using a thin metal spatula, turn sausage pieces onto uncooked side.
Continue to cook, stirring occasionally, until sausage is cooked through, onion is softened, and fat in the pan is clear and no longer cloudy, 5 to 7 minutes;
lower heat at any point if sausage or onion threaten to scorch.
Add pepper flakes (if using) and bloom in rendered fat until aromatic, about 30 seconds.
Add tomato passata and bring to a simmer. Cook, stirring occasionally, until sauce has thickened slightly and fat has emulsified into sauce, about 10 minutes.
Meanwhile, in a pot of lightly salted boiling water, cook pasta until softened on the exterior, but well shy of al dente, and still uncooked in the center (about 3 minutes less than the package directs).
Using a spider skimmer, transfer pasta to sauce, along with ½ cup (120ml) pasta cooking water.
Add an additional ¼ cup (60ml) of the pasta cooking water to the bowl with reserved egg yolk-Pecorino Romano paste, and stir with a rubber spatula until smooth and well-combined; set aside.
Alternatively, if you don't have a spider skimmer , drain the pasta using a strainer, making sure to reserve at least 1½ cups (355ml) pasta cooking water,
before proceeding with above instructions.
Increase heat to high and cook, stirring and tossing rapidly, until pasta is al dente and sauce is thickened and coats noodles, about 2 minutes,
adding more pasta cooking water in ¼ cup (60ml) increments as needed.
Remove skillet from heat, add cooked guanciale and egg yolk mixture, and stir and toss rapidly until fully incorporated and pasta is glossy, 15 to 30 seconds. Season with salt and pepper to taste.
Serve immediately, passing more grated cheese at the table.
Roast Baby Aubergines with Red Onions
veg side cheese
My usual grocers had some little
graffiti aubergines, which I'd never heard of.
So I bought them to try out.
I
read about a southern Italy antipasto
that roasted
roughly chopped aubergines with copious quantities of red onions, so I thought I might give this method a try,
but the result was oily, rather tasteless and overall disappointing.
I think aubergines, even small ones, might really need to be grilled, fried or roast
hard to develop their flavour.
Also, with the vinegar and the onion, the garlic does turn a weird blue colour and I'm not sure contributes a great deal to the taste.
I'd probably skip either the vinegar or the garlic.
Having said all this, it did fry up very nicely afterwards - crisping up the onions and browning the split aubergines really helps,
and makes a great filling for a sausage sandwich with mustard and crème fraîche.
It makes me wonder if the original dish might have worked if I'd just left it roasting long enough to really caramelize the ingredients.
Nigella does mention optionally dressing the dish with ricotta salata (aged and salted ricotta), or feta cheese.
And as I happened to have some scamorza I decided to try that.
- baby aubergines
- red onions, sliced
- garlic, sliced
- dried oregano
- olive oil
- red wine vinegar
- scamorza cheese, sliced thickly
Slit the small aubergines from tip to almost stem, leaving them still attached at the base.
Finely slice the onion and garlic.
Mix everything in an oven-proof dish, drizzle with a little red wine vinegar ,
a generous amount of olive oil and dried oregano, and season well.
Put in a Gas Mark 4 oven for 1½-2 hours until the onions are nicely caramelised and the aubergines shrivelled, turning occasionally.
Slice the scamorza quite thickly. Heat a frying pan until very hot, drizzle in a tiny layer of olive oil, turn down the heat and lay in the scamorza slices.
Let them bubble until they melt with hopefully a nice brown crust on the underside.
Scrape the cheese over the aubergine dish, return to the oven for a few minutes, then serve.
By Italian Jews
Carciofi alla Guidia
side snack veg vegan
Apparently the Jews my be responsible for spawning much of the world's deep-fried comestibles,
perhaps even including the venerated
British Fish and Chips.
And in a plot twist may also be guilty of originating the seat of the Holy Roman Empire's fried artichokes.
Called, appropriately (in Italian) the
Artichokes made by those damn Jews.
In the 16
th Jewish ghettoes around Rome they developed the now-famous dish of carciofi all guidia, or Jewish artichokes.
In Rome they typically use a choke-free variety of artichoke called cimaroli or mammole. Which means they can be fried whole, with little trimming.
You might be able to do the same with undeveloped baby artichokes, but if all you can get are big fat British artichokes you'll have to remove their hairy chokes before you cook them.
It's easiest to do this if you first cut them in half. Use water acidified with lemon juice to prevent them from browning while you work.
You don't need to completely submerge the artichokes while you fry them, but otherwise you will have to keep turning them.
However, this does mean you could use olive oil for a more authentic flavour without going bankrupt.
Otherwise use a neutral oil like sunflower, and as much as you like.
Have 1 or 2 per Person
- globe artichokes
- olive or neutral oil for deep-frying
- salt
- lemon
Fill a large bowl with water and squeeze in the juice from two lemon halves then throw them all in too.
Remove the tough outer leaves of the artichokes (about half a dozen layers). Keep going until you reach the more soft and tender leaves.
Use a sharp knife to cut an inch off the top of the bulb where the hard or thorned bits of leaf are.
Peel the tough outer layer of the stem with a vegetable peeler or a paring knife and trim the stalk to a reasonable length.
Slice the artichoke in half lengthwise (if large). Use a small knife or spoon to scoop out the fuzzy center choke.
Immediately place the artichoke halves in the lemon water, submerging them on all sides to keep them from browning.
Heat your chosen oil to about 138°C (280°F). Pat the artichokes dry and lower them into the oil.
Cook them fairly gently (they should stream out bubbles steadily) until they are easily pierced with a fork - 10 to 15 minutes.
Turn them every few minutes if they aren't fully submerged in the oil.
Remove to drain on kitchen towel. When cool enough you can pry the leaves open to give them their signature flower appearance.
Bring the oil up to 177°C (350°F) and return the bloomed artichokes to the fryer.
They will fry quickly now - remove them after only a minute or two when browned and crispy.
Drain on paper towels and salt immediately while they are still hot.
Serve with lemon wedges.
By Karl
Wild Garlic Pesto
veg cheese pasta sauce
The local greengrocer had wild garlic for sale. And I thought But it's growing all along the canal, right there!
So I picked a bunch and made pesto.
Makes about 1 Cup
- 60g wild garlic leaves
- juice of ½ lemon
- 40g pine nuts
- 50g grated parmesan
- salt
- pepper
- about 100ml olive oil
The easiest way to make this pesto is to throw everything but the oil into a blender or food processor, and then drizzle the oil into the resulting paste.
But this can create more of a sludge than a rough paste and even generate bitterness from the violent mechanical dispersal of phenols from the olive oil. It may also be unkind to the parmesan.
The best way to make pesto is with a lot of chopping followed by a damn good pounding in a giant pestle and mortar. But not everyone has one of those.
So if you want to compromise on a textured pesto that isn't too smooth, or too much trouble, you can blend up the wild garlic leaves with only as much lemon juice and olive oil as necessary to get the paste moving.
Then grind the pine nuts in a pestle and mortar (which is quite manageable), finely grate the parmesan, and beat these with the rest of the olive oil into the mixture by hand.
Adjust the quantities and season to taste.
By Karl
Roast Kohlrabi and Jerusalem Artichokes with Wild Garlic Pesto
veg starter side
So I'd seen
people claiming
that roasted kohlrabi was crispy and delicious. And they were right!
I'd actually only had it raw before (they eat a fair bit of it in Scandinavia).
Serves 4
- 1 kohlrabi
- half a dozen jerusalem artichokes
- a squeeze of lemon juice
- bunch asparagus spears
- 1-2 cloves garlic garlic, sliced or minced
- salt & pepper
- olive oil
- pecorino or parmesan cheese, grated
- grated lemon zest
- wild garlic pesto
Preheat the oven to Gas Mark 7/230°C/450°F.
Mince or slice a little garlic .
Peel the kohlrabi . Wash or peel the jerusalem artichokes.
Cut them all into wedges, or slices about ¼" thick.
Season the slices with salt & pepper, add the garlic and generously coat them in olive oil.
Lay them out in more-or-less a single layer in an oven dish and roast them for about 30 minutes until they brown nicely.
Give them a prod and maybe a turn half way through.
Meanwhile blanch asparagus spears for a minute or two, then drain.
Add the asparagus to the dish, give everything a stir, grate over a light sprinkling of grated parmesan or pecorino, and return to the oven for 5-10 minutes until the cheese melts and coats the vegetables.
Serve with a dressing of wild garlic pesto. Add a scattering of lemon zest if you like.
Wild Garlic Velouté with Marinated Feta
veg soup
I was surprised how magnificently this soup turned out.
It's a combination of a Great British Chefs'
Wild Garlic Velouté
and Anna Hansen's
Wild garlic, new potato and black onion seed soup with marinated feta
with a few improvements of my own.
I happened to have some kohlrabi which I'd read was a common thickener for soups so I threw that in. And it really helped.
I didn't have any dried
Urfa chilli (who does?) so I just used regular chilli pepper flakes.
I also only had old, dried, curry leaves so I also threw in a good pluck of dried fenugreek leaves. Which I think is
definitely advised.
Serves 2-4
- 500ml of strong chicken stock
- ½ kohlrabi, peeled, chopped
- 150g of wild garlic
- 50g of spinach
- 50ml of double cream
- 20g of butter
- salt & pepper
- lemon juice
- extra olive oil, for drizzling (optional)
- 200g of feta, cut into 1cm cubes
- 150ml of extra virgin olive oil
- 10 curry leaves
- large pinch dried fenugreek leaves
- ½ tsp fennel seeds
- ½ tsp caraway seeds
- ½ tsp black mustard seeds
- ½ tsp Urfa chilli flakes
- generous ½ tsp onion seeds
- 6 basil leaves, shredded
Measure 100ml of olive oil into a small pan over a moderate heat and add the curry leaves, fenugreek leaves and dry spices.
Fry for a minute or 2 until the spices become aromatic and begin to pop , then remove from the heat and leave to cool.
Mix cooled spiced oil over the feta along with the remaining 50ml oil and the minced basil leaves.
Gently toss the feta in the oil then refrigerate in an airtight container until ready to use.
Peel the kohlrabi, making sure to remove all the tough stringy outer layers, then roughly chop.
Simmer the kohlrabi for 10-15 minutes in the stock in a large pan until it softens.
Add the wild garlic and spinach, wilt, and cook for a few minutes. You want to cook the garlic through to eliminate the raw punchy flavour but not so much that it loses its bright green colour.
Stir in the double cream, cook for a minute more and then transfer to a blender. Blitz until very smooth.
Return the blend to the pan, reheat, and enrich it by whisking in the cold butter.
Season with salt and pepper and a squeeze of lemon juice.
Ladle into bowls and dress with a pile of the marinated feta cheese and a further drizzle of oil if necessary.
Abondance Mousse with Kohlrabi, Walnut Pesto and Pear Salad, Dill Dressing
starter cheese
A recipe from
Adam Smith, if that's even a real name,
who apparently serves it with a Comté biscuit on the side.
As if the dish wasn't already complicated enough!
Anyway, he makes his mousse with
Aged Comté, but I used Abondance, a rather nice, nutty, fruity French cheese from the Alps, because it was on offer at my Local Fucking Supermarket™.
And because it's quite like Comté.
Now, I completely miscalculated how much time would be involved in creating this marvel when I originally planned it as a Saturday dinner starter. It's not just the vacuum-packing-pickling, or the mousse-chilling.
Or the walnut roasting. Or the pear-juicing. (Actually I might have made that rod for my own back - I could always have bought pear juice. I should think.)
It's also quite fiddly to prepare, using the star-shaped cookie cutter you bought especially from that pound shop that stocks
everything in plastic or tin tat.
I found the proportions in Adam's recipe to be completely out-of-wack. His ingredients are supposed to serve 6 people, but there's no way you could use up 3 kohlrabis and 6 pears as a garnish.
I mean, you've only got 450g of mousse. And that's a
WHOLE PEAR EACH! Madness.
I think you'd struggle to stretch the mousse out to 6 people, and there'd be too much pickled kohlrabi, and too many candied walnuts.
So feel free to adjust the measures below accordingly.
Serves 6 Theoretically
- 130g of dill
- 200g of vegetable oil
- 2g of salt
- 150g of walnuts
- 200g of caster sugar
- 500ml of water
- 4 star anise
- 200g of kohlrabi, thinly sliced
- 36g of rapeseed oil
- 18g of Chardonnay vinegar
- 5g of flaky sea salt
- 2g of cane sugar
- 150g of aged Comté
- 300g of whipping cream
- 2 bronze gelatine leaves
- 1g of flaky sea salt
- 100g of walnuts
- 3g of flaky sea salt
- 20ml of walnut oil
- 50ml of pear juice
- 20ml of sherry vinegar
- 100ml of walnut oil
- salt and pepper
- 3 about 1 kohlrabi
- 6 about 2 pears
- 400g about 100g of Comté cheese , thinly sliced and cut into rounds
- mixed salad leaves, such as nasturtium, watercress or chicory
For the dill oil, blend the dill with the vegetable oil and salt in a Thermomix at 62°C, or else in a regular blender until thoroughly blended.
Strain through a triple later of muslin, hanging in the fridge overnight.
Begin by making the candied walnuts. Place the walnuts into a heatproof bowl.
Bring the sugar, water and star anise to the boil in a heavy saucepan. Simmer for 3–4 minutes then pour the syrup over the walnuts.
Let cool at room temperature until lukewarm then chill in the fridge overnight.
The next day, preheat the oven to 170°C fan.
Drain the walnuts from the syrup and place them onto a lined baking tray. Cook for 8–12 minutes until deep golden brown.
Set aside to cool at room temperature while you prepare the other components.
Whisk together the rapeseed oil, vinegar, salt and sugar until emulsified.
Pour the vinaigrette over the kohlrabi and compress in a vac pac machine or simply cover tightly. Chill in the fridge for 2 hours.
Finely grate the cheese, then place it into a pan with the whipping cream.
Bring the cream up to 85°C, stirring to melt the cheese.
Bloom your gelatine in water. Once it's soft, remove it and squeeze out any excess water.
Add the gelatine to the cheese and cream mixture and whisk until smooth. Season with salt.
Pass the cream through a fine sieve and set in the fridge for at least 2 hours.
Once set, beat the mix with a spatula until light and creamy. Transfer to a piping bag and set aside until needed.
While the cream cools, preheat the oven to 170°C fan.
Place the walnuts for the pesto onto a baking tray. Season with the sea salt and mix with half (10ml) the walnut oil.
Bake at 170°C for 10–12 minutes until deep golden brown, then remove from the oven.
Coarsely chop a quarter of the walnuts by hand. Set aside.
Pulse the remaining walnuts in a food processor while slowing adding the second half (10ml) of the walnut oil.
Combine the hand-chopped walnuts and walnut oil mixture together and set aside until needed.
Whisk together all the dressing ingredients together with 100ml dill oil and season well with salt and freshly ground black pepper.
Use a mandolin to thinly slice the pear and raw kohlrabi. Adam chooses to then cut the slices out into little stars as seen in the image above, but you can cut them into rounds if it's easier.
Cut the pickled kohlrabi into rounds or stars.
Pipe the cheese mousse onto a plate and create a well on top. Fill the well with the walnut pesto and top with the rounds of cheese.
Arrange the raw kohlrabi, pickled kohlrabi and pear over the mousse. It should be completely covered.
Place some nuggets of candied walnuts over the top and garnish with leaves and herbs of your choice.
Finish with the dressing and serve with some crusty bread.
By Karl
Wilted Spinach and Wild Garlic
veg side
A wonderful addition to my collection of
wilted spinaches.
You could probably skip any of the flavourings if you prefer it without the cream, or the parmesan.
You could even miss out the wild garlic, but then it would be just another wilted spinach after all.
Serves 4
- 200g spinach
- 200g wild garlic leaves
- handful parsley leaves
- zest of 1 lemon
- juice of ½ lemon
- about 30g of butter
- ½-1 tsp ground nutmeg
- splash of double cream
- grated parmesan
- salt & pepper
Roughly chop the spinach and the wild garlic. Finely slice the parsley. Remove any massive stalks from all of these.
Melt a generous amount of butter in a large saucepan over a low heat, then throw in the chopped leaves and cover.
Stir occasionally until they have collapsed down, then uncover and turn up the heat a little.
When the excess liquid has cooked off, throw in the lemon zest and the nutmeg. Stir them through, then loosen with a splash of double cream and mix in the grated parmesan until it melts into a nice thick coating.
Season with salt & pepper, if required , drizzle with a squeeze of lemon juice, and serve.
Pickled Wild Garlic Buds
veg vegan ingredient
I pickled my buds using white wine vinegar in a ratio of 3:2:1 vinegar:water:sugar following a suggestion by
Galloway Wild Foods.
They also recommend salting the buds first, which I did for a day or so, before pickling.
It's supposed to intensify their flavour and contribute to softening them up, but most other sites skip it, so we'll just have to see I guess!
Flavour with whatever you like - I used mixed peppercorns and coriander seeds.
Makes a Big-Jar-Load
- 500g wild garlic buds
- 300g cider or wine vinegar
- 200g water
- 100g sugar
- red peppercorns, black peppercorns, coriander seeds, allspice
First pick your garlic buds.
Just before they all start to flower is the best time so they're plump and ripe.
At this stage they should have started visibly pushing themselves out of the mass of garlic leaves. Don't wait too long though,
I don't think it hurts to pick the buds a little early (they'll be there hiding under the leaves for weeks before they flower) and they do flower in only a day or two.
Put them in a bowl and scatter 2-3 teaspoons of salt flakes over them.
Leave them for anything from a day to a week, turning them occasionally, and draining and re-salting if required.
Wash the salt off and dry them before pickling.
Make the vinegar mixture by mixing vinegar:water:sugar in the weight ratio 3:2:1 and heating until the sugar dissolves.
Allow the mixture to cool.
Loosely pack the garlic buds into a jar and cover them with the vinegar mixture.
Keep them in the fridge for a few days or a week before eating, for best results.
They may safely keep for 6 months.
By Karl
Chorizo Carbonara
meat pasta cheese
Hardlly authentic. But then neither is carbonara, arguably, and this does seem like a natural union.
I've seen a few online recipes for chorizo carbonara, but they mostly use fresh, mexican cooking chorizo which can just be crumbled in, rather than the cured spanish kind which must be sliced fairly thinly.
They might work better I suppose.
You could also use some whole egg in with your yolks, but I think it's better with pure yolk.
- olive oil
- cured chorizo, chopped or julienned
- garlic, crushed
- smoked paprika
- black pepper
- parmesan, grated
- egg yolks
- frozen peas
- pasta
- couple tablespoons double cream
- lemon juice or sherry vinegar or balsamic vinegar
- splash of double cream
Mix the egg yolks and the grated parmesan.
Peel and chop or julienne the chorizo and sweat gently in olive oil in a large frying pan until it renders beautiful red fat and crisps just a little at the edges.
Add a generous amount of crushed garlic and a sprinkle of ground black pepper and smoked paprika and sweat the garlic until soft.
Meanwhile boil the pasta in a small quantity of salted water according to the packet instructions.
If the garlic is ready early, halt the cooking process with a ladleful of the pasta water.
When the pasta is ready throw in handful of frozen peas or chopped spring onion , return to a boil, then scoop everything out or drain it,
and add to the frying pan along with a ladle of cooking water and over a low heat toss to coat.
Add a couple of tablespoons of the pasta water to the eggs and cheese and mix through, then mix this through the pasta off the heat.
Return to a very low heat and toss or stir continuously until the sauce thickens and coats the pasta nicely, bearing in mind that the sauce will thicken further as it cools.
Season to taste.
Now you can finish the pasta with a splash of double cream, a sprinkle of sherry or balsamic vinegar, or a squeeze of lemon juice.
Whichever floats your boat.
Pasta with Creamy Prawns and Chorizo
pasta fish meat
I took inspiration from
Sarah Tuck, but drastically reduced the amount of chorizo she used.
You could substitute two or three tablespoons of mascarpone or sour cream for the double cream.
Or you could skip the dairy completely and replace it with a tablespoon of red wine vinegar.
Feel free to include some grated lime zest.
Serves 2
- 250g pasta
- olive oil
- 16 king prawns, peeled, de-veined
- 90g chorizo, sliced
- 1 small red onion, or shallots, minced
- ¼-½ tsp chilli flakes
- ½ tsp paprika
- 4-6 cloves garlic
- 2 tomatoes or half a dozen cherry tomatoes, roughly chopped
- 100ml white wine
- 50ml double cream
- salt & pepper
- squeeze of lime juice
- parsley, or basil, chopped
Peel the chorizo and slice it into prawn-sized rounds about the thickness of a pound coin.
Chop the onion or shallot quite finely.
Crush or mince the garlic.
Roughly chop the tomatoes: cut cherry tomatoes into eighths.
Heat olive oil until shimmering in a large frying pan and add the chilli flakes, and the prawns.
Toss to fry them quickly, until red and opaque, but not overcooked, then scoop them in to a bowl.
Add the chorizo and the onion to the pan and stir fry over medium heat until they begin to colour, then add the garlic.
Turn down the heat and sweat the garlic for a few minutes, then add the paprika and stir it through.
Meanwhile, start cooking the pasta according to the packet instructions until al dente.
Toss in the chopped tomatoes, then de-glaze the pan with the white wine, and bubble it off until reduced to a third.
Add the cream and stir through.
Scoop out the cooked pasta with tongs or a pasta spider and dump it into the frying pan, along with a splash or two of pasta water.
Swirl and toss everything together until the pasta is well coated and finishes cooking. Add the prawns towards the end so they heat through.
Season with salt and pepper. Finish with a squeeze of lime juice and half the chopped parsley or basil.
Serve immediately dressed with chopped herbs.
After the Fireworks
After the fireworks... The Cheese!
We kick off the New Year with a cheese soup, and a cheese sauce to go with a leftover mincemeat pie. Flora's
home-made mincemeat mind you,
which would have been sacrilege to discard.
And then on to a particularly nice fillet steak meal with pommes anna, parsnip horseradish purée, black garlic gel, and red wine tarragon sauce lifted from various
Great
British
Chefs.
You may spot one or two photos of the meal below
😉
Thanks Chefs!
In other news...
We had the usual media-bedwetting apocalyptic snowfall of a couple of inches over the second week of January to usher in the new year.
And I began experimenting with my sous vide Christmas present. It does a
really nice fillet steak.
It's success with
duck breasts is still in question though.
I started a new cookery class at Kirklees College - an
Introduction to Pâtisserie this time, for a change.
And I managed to squeeze in another
meal with friends to celebrate my brother and nephew being away .
So a Happy New Year to all my reader
😘
Celery and Gorgonzola Soup
cheese soup
I needed to use up some Gorgonzola so I substituted that for the Stilton in Rachel Kelly's
original recipe.
Celery and Wensleydale is a recognised combination, so I suppose a blue cheese is not too far off.
I had slightly more celery than the original recipe called for, which I don't think does any harm, boiled potato to thicken the soup, and I included a little bit of apple too, which seemed like a nice addition.
Serves 4
- 50g butter
- 1 English onion, finely chopped
- a few garlic cloves, finely chopped
- 1-2 heads of celery (including the leaves) or a medium celeriac (about 750g to 1kg), peeled and roughly chopped
- 1 carrot, roughly chopped
- 1 small apple, peeled, cored, chopped
- 1-2 boiled potatoes
- 1 litre chicken stock
- 100ml white wine
- 1 bay leaf
- a sprig of thyme
- about 1 cup double cream
- 250ml milk
- 200g gorgonzola or other blue cheese, crumbled
- salt and freshly ground black pepper
Melt the butter in a heavy-based saucepan and add the onion. Cook over a gentle heat for 5 to 10 minutes, until softened.
Add the celery (or celeriac) and carrots. Stir and cook for a further 5 minutes. Add the garlic and apple and cook until softened.
Add the white wine and bubble off.
Add the stock and bring to the boil.
Reduce to a simmer and add the bay leaf and thyme . Cover with a lid and simmer for 25 minutes.
Leave to cool, remove the bay leaf and if using a sprig of thyme; the woody stem, and blend. Pass through a sieve for extra smoothness.
Return the soup to a clean saucepan and bring back to a simmer. Add some cream and milk and warm through.
Add the blue cheese and stir continuously until the cheese has melted into the soup. Do not let the soup boil as it may curdle.
Check the seasoning. It is unlikely you will need any salt as the cheese will be quite salty.
Serve with a little of the blue cheese crumbled over each bowl
or a sprinkling of snipped chives or sliced spring onion.
Traditional Mince Pie with Caramel Cheese Sauce
dessert meat
I have previously made
meaty mince pies and thought them rather good, but I'm not so sure about this one.
I was inspired by
Onemina's recipe, but to be fair to her (them?)
I fried my mince rather than just including it in the mincemeat preparation.
Feeds 8
- 500g mince
- 2 cups mincemeat
- 1" ginger, grated
- 1-2 courgettes, peeled, chopped
- 1 stick celery, chopped
- 1 cup white wine
- 1 cup stock
- puff pastry
- Caramel Cream Cheese Sauce
Fry the mince to brown lightly, then add the grated ginger and the celery and cook them out.
Add the courgette and then deglaze the pan with the white wine. Add the mincemeat and moisten with as much stock as required.
Line a pie dish with the puff pastry, fill with the, er, filling, and roll puff pastry across the top. Cut slits on the crust. Brush with milk, cream or beaten egg if you like.
Trim and crimp the edges and bake for about 45 minutes at Gas Mark 4-5/350-375°F/175-190°C.
Black Garlic Purée
veg side sauce
I made the purée, or gel as I'm calling it, with about 6 cloves of black garlic - amounting to ⅒ of the amounts below.
Which does make weighing, measuring and blending the ingredients something of a challenge!
Serves 6 - You Don't Need Much
- 190g of black garlic, peeled
- 85ml of water
- 15g of xanthan gum
- 2.5g of salt
- 15g of white wine vinegar
- 15g of caster sugar
Place all the ingredients in a Thermomix set at 60°C and blitz until smooth.
Alternatively, place all the ingredients in a blender, but with boiling instead of cold water.
Pass through a fine sieve and set aside to cool
Parsnip Horseradish Purée
side veg
The
original uses celeriac, but parsnip is just a nice, or nicer.
I also used peeled, grated horseradish root instead of the horseradish sauce.
You'll need perhaps 100g. Adjust to your taste.
Serves 4
- 70g of horseradish sauce
- 200g of parsnip, peeled and diced
- 120ml of milk or milk and cream
- 1/4 lemon, juiced
- 20ml of olive oil
- salt
Sweat the celeriac parsnip down in a pan with the salt and oil until soft and tender.
Add the milk and horseradish sauce and bring the whole lot to the boil.
Take off the heat once boiled, squeeze in the lemon juice and blend into a smooth purée using a stick blender.
Pass through a fine sieve
Red Wine and Tarragon Sauce
meat sauce
A rather complicated, but quite satisfying and very rich sauce.
The xanthan gum is extremely effective, so you need to add it a little at a time to avoid over-thickening.
To prevent the gum clumping you need to whisk continuously as you slowly scatter in the powder. Preferably using an electric whisk or immersion blender to maintain a vortex.
Apparently you can also mix the powder with oil first to help disperse it through the liquid without forming lumps.
The small amount of milk is an interesting touch.
Use any old meat trimmings to get the sauce started.
Serves 4
- beef trimmings
- 300g of mushrooms
- 1.5l chicken stock
- 700ml of red wine
- 20ml of milk
- 5g of xanthan gum
- 20ml of Cabernet Sauvignon vinegar
- 5 sprigs of tarragon
- salt & pepper
Sweat the beef trimmings until golden brown, add half of the mushrooms and sweat for 10 more minutes.
Add the stock, red wine, the rest of the mushrooms and milk. Bring to the boil and cook for 45-50 minutes, skimming all the time.
Sieve the sauce and add the xanthan gum and the vinegar and season with salt and pepper. Now add the tarragon and simmer for 2-3 minutes before passing again through a sieve.
Pommes Anna
Or Pressed Potatoes with Onion
veg side
Basically Pommes Anna with fried onions pressed between the layers.
You'll need a surprisingly large quantity of onion to start with before it reduces down to golden crisps.
Though if they're crisp you've probably gone too far. Soft and golden is the description given!
Serves 4
- 100g of butter
- 1kg onion, finely sliced
- 2kg Maris Piper potatoes
- 2 sprigs of thyme
- salt
Place a large pan over a medium heat and add the butter. Once melted, add the onions with a pinch of salt and the thyme and cook until soft and golden – this will take at least 10 minutes.
Preheat an oven to 180°C/gas mark 4 and line a 20x15cm terrine mould with baking paper.
Peel and very finely slice the potatoes (use a mandoline if you have one).
Place the potatoes neatly into the terrine mould in layers. After the first two layers, alternate with a layer of the cooked onion.
Season between each layer and ensure the final top layer is potatoes.
Cover with a sheet of baking paper followed by a layer of tin foil and cook for 40 minutes, or until completely cooked through when a knife is inserted.
Once the terrine is cooked through, remove the tin foil and place something heavy on top of the potatoes. Place in the fridge to chill and set overnight.
Turn out the set potato terrine and carefully carve into thick slices. Ensure the oven remains on at 180°C/gas mark 4.
Place the slices of potato terrine in the oven to warm through as well.
Serve arranged with the potato slices vertically for best effect on the plate.
Caldo Verde Vermelho
Cabbage Stew
meat soup
I had a
lot of stuff left over that I needed to use up. Mostly cabbage.
So I started with this largely inauthentic
Hairy Bikers recipe for Caldo Verde (Portuguese
green broth)
and just started chucking things in.
Though by the time I'd added the tomato and beetroot the stew was extremely red. So not Caldo
Verde at all then.
I had recently bought 2 bunches of beetroots to make a purée with but they were so small that the bunches were more tops than roots.
So after making the purée I had a
lot of beetroot leaves to eat
so they went in. Along with a handful of sad tomatoes, the stalks of a cauliflower I'd riced, some lonely carrots, shriveling sprouts, a withered apple, a few orange segments,
and some of the juice from a jar of
pickled chillies.
If I hadn't eaten all the pickles some of
them would have gone in too.
In fact, the only thing I actually needed to buy in for the stew was the chorizo!
Makes a LOT!
- ¼ cup olive oil
- 2 large onions roughly sliced
- half a head of garlic, peeled cloves crushed
- leaves from a bunch of thyme
- 1 chorizo, peeled, sliced
- 4 large potatoes
- 1 litre strong stock
- 2 small carrots, peeled, quartered lengthways
- head of cabbage, sliced
- beetroot greens, sliced
- 1 tablespoon paprika
- tinned tomatoes or passata
- the cabbage stalk, roughly chopped
- 1 cauliflower stalk, roughly chopped
- a dozen brussels sprouts, halved
- 1 apple, peeled, cored, roughly chopped
- ½ an orange, segmented
- 2 red chillies, de-seeded, sliced
- a few tablespoons of pickled chilli liquor
- a dozen halved cherry tomatoes
- smoked paprika and olive oil, for dressing
Peel the onions and shallots and slice them fairly thickly lengthways.
Heat a very generous quantity of olive oil in a large pot and start sweating the onions over medium/high heat.
Peel a lot of garlic cloves, lightly crush them with the side of a knife and throw them in.
Strip the leaves away from the thyme stalks and throw the leaves in.
Peel and slice the chorizo fairly thickly, and throw it in.
Wash and chop the potato into fairly decent chunks and throw them in.
Mix in a tablespoon of smoked paprika to help out the chorizo.
Roughly chop any sturdy spare vegetables you have lying around and throw them in.
Cover with a strongly flavoured stock.
Cook until the vegetables soften up, then add any other less sturdy extras you have lying around like a couple of red chillies, seeded and sliced fatly, those aging sprouts, trimmed and halved,
an apple or two, peeled, cored and roughly chopped, a handful of halved cherry tomatoes, even those spare orange segments.
Add a glug or two of passata or some tinned chopped tomatoes.
And you might as well throw in some of the liquor from that empty jar of pickled chillies, because why not?
Finally slice up all the greens you have as thinly as you like and throw those in.
Adjust the seasoning, cover and simmer until the greens are done.
Serve with some rustic bread and possibly dressed with olive oil mixed with smoked paprika, as the Barey Hikers suggest.
It's Cheesemas!
'Twas the night before Christmas, when all through the house.
Not a creature was stirring, except for the chefs...
Frantically stuffing the goose and prepping the starters.
This year featured the long-overdue return of Flora:
We're Getting the Goose-Gang back together again
😀
Which means I needed to buy extra cheese. And then Flora brought extra cheese.
Plus Flora brought the specially ordered cheese that I had her sister bring back from Spain.
I'd read about this amazing Spanish cheese called
Torta del Casar.
That it hails from the remote Extremadura region - roamed by wild black Iberian pigs from which also comes Spain's magnificent jamón ibérico ham.
How its curiously runny insides are coagulated by thistle pollen giving it a uniquely rich, salty bitterness.
So I tried to buy me some. To absolutely no avail.
It turns out to be practically impossible to get any around the North of my country, and I phoned a
lot of cheesemongers. And no, I would not have cared how fucking runny it was. I would have liked it runny
🤣
So I resorted to asking Flora to have her sister bring some back from one of her many Spanish trips.
Unfortunately the cheese
cake we got showed no sign of running despite being kept for nearly a month,
and while the flavour was distinctive, I wouldn't call it particularly impressive.
I'll say this for the cheese though - it does dissolve extremely readily in cream to make a nice smooth
sauce.
Anyway, all that's by way of explaining that I ended up with
waaay too much cheese. As is traditional.
Unlike the
coffee kisses that Mum used to make. Next year I should make double.
Despite the threat of limited goose sizes from our
unreliable supplier, a full-sized bird turned up and all was well in the world.
Other things of note this Christmas:
- Vodka and Maltesers make an ideal gift for the alcoholic Malteser-lover in your life.
- Flora introduced us to puff pastry mince pies in the shape of turtles. Or was it dinosaurs?
- Shots of Salmon and Crème Frâiche make fine, if filling, starters.
- My local Wine'n'Cheese finally came through with a bottle of Pol Roger's Cuvée Winston Churchill Champagne for the dinner.
Expensive but probably the last, since the store is shortly due to close. Sigh. Where will I get my wine 'n' cheese now?
Salmon and Crème Fraîche Shots with Watercress Purée
fish starter
I rather thought that this starter would be light and airy so I bought larger cocktail glasses to serve portions in, but it's actually pretty dense and filling,
so you really will get 12 servings out of the recipe, even served as a starter rather than a canapé.
Buy small shot glasses!
I also had to go to Newcastle for the Kyurizuke pickled cucumber!
Well, in fact I was there on business, but they did stock them at one of their large Chinese supermarkets, and I hadn't been able to find them anywhere else closer to home. So it was a handy visit.
Their Christmas market wasn't bad either.
Serves 12
- 300g of salmon fillet
- 150g of crème fraîche
- 150g of watercress, roughly chopped
- 2 lemons, 1 juiced, 1 sliced
- 50g of Japanese pickled cucumber Kyurizuke
- 1 bunch of dill, finely chopped
- olive oil
- salt & pepper
Preheat the oven to 180°C/gas mark 4.
To begin, take your salmon fillets and lay them on some foil, approximately 25cm square.
Drizzle with some of the olive oil and season liberally with the salt and pepper then place a few lemon slices on top.
Wrap the foil around the fish to create a bag that is sealed at the edges and place in the oven for 12–15 minutes, or until the salmon is just cooked through.
Take out the salmon and leave it to cool, then flake into a bowl using a fork.
Mix in 100g of the crème fraîche and stir in the dill.
Finely chop half of the pickled cucumber and add to the bowl, along with a dash of lemon juice and salt and pepper to taste.
Cover and refrigerate for 1 hour.
For the watercress purée, bring a saucepan of salted water to the boil and add the watercress.
Cover and bring to the boil again (this should take about 1 minute maximum) then drain and plunge the leaves into a bowl of iced water.
Drain the watercress again, reserving just a couple of tablespoons of the water, then place in a blender and blitz to a purée.
Use the leftover water to thin the purée if necessary and season with salt and pepper.
To serve, divide the salmon between glasses then top with a layer of the watercress purée.
Finish by dotting some of the remaining crème fraîche in the centre and add half a slice of pickled cucumber to each glass.
Maltesers Vodka
drink veg
Makes about 70cl
- 350ml vodka
- 2x110g boxes Maltesers
Put the Maltesers into an empty bottle that has been sterilised.
Pour in the vodka.
Place the lid on and shake vigorously.
Shake regularly over a couple of days until the Maltesers have dissolved - this procedure can be sped up by placing the bottle in a bowl of warm water. Or on a radiator.
By Matt Toynbee
Dinosaur Mince Pies
or Are They Turtles?
sweet veg
As enjoyed by Flora's friend Matt Toynbee.Requiescat in pace
Thanks to Flora for the transcription.
No Quantities are Provided
- sultanas
- currants
- dried cranberries
- dates, cut up small
- dried apricots, cut up small,
- apple, grated or chopped small
- lemon rind, grated
- lemon juice
- orange juice
- mixed spice
- cardamom
- cinnamon
- brandy/armagnac
- puff pastry
Put the mincemeat ingredients in a small pan, add some water as needed and stew on a low heat making sure it doesn't dry out.
Put in big sterilised jar for making any extras - to use before New Year.
Grease a cupcake tray. Preheat the oven to 180°C.
Using a dinosaur-shaped cookie cutter cut out puff pastry shapes and press into each cupcake dimple.
Add the mince meat (in the cupcake depression).
Cut small circles for the dino bellies, or invent shapes like stars or crosses, and place them over the mincemeat piles.
Put an egg in a ramekin for glazing before putting in the oven for 5 minutes or until fluffy and golden brown.
By Karl
Caramel Cream Cheese Sauce
cheese sauce
Torta del Casar dissolves surprisingly easily into simmering double cream. Which is handy.
Generally when you make a caramel sauce you add the cream directly to the boiling caramel to cook the milk solids slightly, but I didn't want to do that with the cheese,
so I blended in the butter first. Be sure to beat the mixture vigorously to avoid curdling as you do this.
You might, I suppose, consider keeping some unmixed cream to add to the boiling sugar first, before adding the cheesed cream and finishing with the butter.
In the likely event you have no Torta del Casar you could probably use Philadelphia Cream Cheese mixed with cream
a là
Rebecka
There seem to be three approaches to turning your sugar into caramel:
- Pour the sugar into a pan and heat it directly over a fairly low heat, until it all melts into a brown puddle.
You might have to swirl or stir carefully if the heating is uneven and you start to get the melting in isolated spots.
- Add just enough water to moisten the sugar so it resembles wet sand and proceed as above.
- Add the same quantity of water as sugar, set it over a very high heat, stir a little at first to dissolve the sugar, then boil furiously without touching it until it reaches the caramel point (180°C).
You'll need to watch it like a hawk at this point as it browns quickly, though you can turn the heat down once it reaches the crack stage.
The third method is preferred by my
Introduction to Pâtisserie class tutor,
and I have had the most success with it.
The first two methods are very similar and always seem to end up with lots of unmelted sugar crystals all around the edge, or big chunks of un-melted sugar in the caramel when I try them.
The general opinion is that you shouldn't use brown sugar for this since
- The non-sugar molasses type elements will only burn at the temperatures you'll be raising the sugar to and turn it bitter.
- The colour of the sugar will make it difficult to tell exactly how much caramelisation you have produced - which is essential to controlling the process.
The caramel cream cheese sauce also goes quite nicely on scrambled egg - about 1 teaspoon per egg!
Makes About A Pint
- 200ml double cream
- half a Torta del Casar
- 250g sugar
- 60g butter
Chop or break the cheese into chunks, discarding the rind. Heat the cream in a small saucepan, drop in the cheese, and stir until it dissolves.
Set it aside.
Dissolve the sugar in an equal quantity of water then bring rapidly to the boil over high heat and allow it to reach caramel temperature untouched.
It will brown rapidly at this point - so watch it carefully.
Remove from the heat ,
then whisk in the cold butter a little at a time, then beat in the creamed cheese.
Winter Filth
Ah,
Winterfylleth.
The ancient
Anglo-Saxon month that marked the beginning of winter - as recorded by the Venerable Bede.
Roughly corresponding to October in the modern Gregorian calendar.
Starting this year on the New Moon of the 3rd of October and wrapping around the first full moon of winter on the 17th.
Not to be confused with Tolkien's
Winterfilth - the tenth month of Shire-calendar.
Running from 22nd September to 21st October if you are a hobbit.
Best appreciated with strong liquor.
Speaking of which, ever since I went to Finland to sample Fazer's
chocky eggs (and visit
Moomin World)
I've been a great fan of the Finnish salty liquorice flavour sal ammoniac (ammonium chloride), which they call
salmiakki.
Fazer hide surprise bursts of it in many of their sweeties.
So I was delighted to discover, the other day, that you can get a salty liquorice flavoured vodka called
Salmiakki
on
Amazon.
From there, it's just a short step to combining a Japanese salmon preparation technique with a strongly flavoured Finnish vodka to create an obvious pun-based dish.
And thus was
SALMONIAKꞰI born.
By Karl
Salmoniakki
main fish
I couldn't resist this
Finnish salmiakki-flavoured vodka. I thought it might make a great flavour for salmon en papillote.
Or possibly teriyaki-style, bubbled into a sauce with maple syrup perhaps? Maybe some vinegar.
Fry the salmon coated in potato starch, or tapioca starch.
The problem I had was that the sauce wasn't thickening the way a teriyaki does - probably the lack of soy sauce, which I don't want to add.
Nor do I want any more maple syrup since the sauce is sweet enough. So I thought I'd try adding a thick beer - Barley Wine .
I know that the Finns do drink a barley-based beer called
sahti so it doesn't seem inappropriate,
and in fact the flavour does blend well, mellowing the more aggressive sal ammonia notes, but it doesn't actually thicken things terribly much.
So after much experimentation I gave in and whisked in a few pinches of xanthan gum. Add cautiously - and whisk furiously lest it clump.
So now, what to serve it with?
I started with Flora's Samphire and Creamed Chanterelles (because Finns like their mushrooms), a Japanese Cucumber Salad (because Finns like vinegar), and some rice with spring onion slices (because teriyaki!).
I'm not sure about the mushrooms (maybe add some pickled anchovies?), but the cucumber salad worked very well.
I'm wondering about potato, or a potato purée (since the Finns like potatoes and after all, they don't eat rice),
and perhaps a beetroot and horseradish puree (because they also seem like the kind of things Finns eat)?
Beetroot and horseradish agar-agar caviar seems like it might be nice.
I might even make a
meal out of it.
Serves 2
- 2x2" slices of salmon fillet
- potato or tapioca starch
- 3 tblsps Salmiakki flavoured vodka
- 2 tblsps barley wine
- 1 tblsps maple syrup
- pinches of xanthan gum
So. After some experimentation, here is what you do:
Clean de-bone and descale the salmon. Cut and trim neat pieces.
Mix all the sauce ingredients in a small pot, and bring to the boil.
Stir to dissolve the maple syrup, then simmer until reduced by ½ or ⅔.
Whisk in a couple of pinches of xanthan gum to thicken it if you want - it probably won't coat the fish well without it.
Sift potato or tapioca starch over the fish fillets.
Heat a little oil in a frying pan and fry the fillets skin-side down over medium heat until the fillets colour about a third of the way up.
Flip the fillets and again colour them about a third of the way up.
Transfer the salmon to a plate and clean the pan with kitchen towels.
Pour some of the salmoniakki sauce into the frying pan, return the salmon pieces, and flip them in the sauce to coat and glaze.
Serve the glazed salmon with extra sauce drizzled over it.
By Flora
Flora's Samphire and Creamed Chanterelles
veg side
Flora boasted about her successful combining of samphire, creamed chanterelles and scallops.
I didn't have any chanterelles, so I first made this using thinly sliced oyster mushrooms, which are frankly less than ideal.
Then I tried matchsticks of regular mushrooms, which were an improvement, but I think cordyceps would be even better - they even resemble samphire in shape and size.
I also made the mistake of flavouring the cream with cognac instead of calvados, which would have been a definite improvement.
Neither did I have any scallops, but I think you can safely skip those.
Serves 2
- two handfuls of samphire
- handful of chanterelles
- small knob of butter
- splash of olive oil
- 1 tblsp calvados
- 2-3 tblsps double cream
Throw the samphire into boiling water, return to the boil then drain the samphire and dump into iced water to refresh.
Fry the chanterelles until lightly browned in a little butter and olive oil.
Deglaze the pan with calvados, bubble it off, then add double cream to coat the mushrooms and stir until the sauce thickens.
When ready to serve, bring another pot of water to the boil, drop the samphire in and bring to the boil again.
Drain, mix with the creamed mushroom, and serve.
Japanese Cucumber Salad
Sunomono
salad veg vegan
Salting the cucumber slices leaves them surprisingly crisp in this simple Japanese salad.
I skipped the wakame seaweed, since I didn't have any,
and used the Thai pineapple and fish sauce dressing from my
Lemongrass and Pineapple Beef Vermicelli Stir-Fry as the pickling liquid and it was
still good!
The salting process is so effective that you could easily munch your way through an entire dessicated cucumber.
Serves 4
- 2 Japanese cucumbers (or 3 Persian cucumbers - about 300g)
- 1-2 tsp fine salt
- 1 tblsp dried wakame seaweed (3g dried, 20-30g rehydrated)
- ½ tblsps toasted white sesame seeds
- 4 tblsps unseasoned rice vinegar
- 2 tblsps sugar
- ½ tsp salt
- ½ tsp soy sauce
- 1 red chilli, minced
In a saucepan combine the rice vinegar, sugar, soy sauce and salt.
Heat over medium heat and whisk it well together. When the sugar is dissolved completely, remove the saucepan from the heat and let it cool.
If the vinegar flavour seems too strong then dilute it with a small amount of dashi or water.
Soak the dried wakame seaweed in water and let it rehydrate for 5 minutes.
Meanwhile, peel the skin of 2 Japanese cucumbers, leaving some skin on to create stripes. Then, slice them very thinly into rounds, best done using a mandoline.
Sprinkle fine sea salt on the slices as you go, then gently massage it all in. Set aside for 5-15 minutes.
The salt helps draw out the moisture from the cucumbers (so it does not dilute the salad dressing after mixing).
Squeeze out the liquid from the rehydrated wakame seaweed and add it to a medium bowl.
Squeeze out the liquid from the cucumbers.
Add them to the bowl, mix them with the dressing and toss it all together.
Lightly toast the sesame seeds in a dry frying pan and add them to the cucumber, mixing everything together.
Thai Green Curry Squash
main curry thai veg vegan
I made the mistake of buying some attractive French gourds to decorate the kitchen for a few days, before cooking with them - a twofer!
Unfortunately, it turns out that decorative squash, whilst definitely edible, have incredibly thick skin and surprisingly little flesh.
Should have gone with the butternut squash! As recommended in the
recipe I (mostly) followed.
I fancied trying their soy-sauce-frying technique for cooking the squash, and it was mostly successful (though it does make the squash
very salty).
I did make the mistake of adding peanut butter to the green curry paste in an attempt to turn it more padan-y. But to be honest that didn't really work well.
It might have been better to base the paste around red curry paste, rather than the green.
The flavours mostly clashed, rather than working together.
Serves 4
- 2 tblsp sunflower oil
- 1 medium (about 800g) butternut squash, peeled and cut into bite-sized cubes
- 3 tblsp light soy sauce
- 1 lime, wedged to serve
- a handful coriander, roughly torn, to serve
- 1 red chilli, deseeded and finely sliced, to serve
- 1 spring onion, finely chopped to serve
- jasmine rice, to serve
- 1 stalk lemongrass, bruised
- 2 tblsp Thai green curry paste
- 2 tblsps peanut butter
- 2 x 400ml tins coconut milk
- a handful sugar snap peas, halved
- a handful asparagus spears, tough ends removed
- a handful green beans, trimmed
- 2 tbsp frozen or fresh edamame beans
Heat 1 tbsp of sunflower oil in a wok while you toss the butternut squash cubes into the soy sauce.
Put the soy-coated butternut squash in the wok and cook over a medium heat for 10 minutes or until softened and browned, stirring frequently.
For the green curry base, heat the remaining sunflower oil in a separate large frying pan.
Add the lemongrass and Thai green curry paste , and fry over a high heat for 1 minute.
Stir in the coconut milk, then reduce the heat slightly and simmer for 8 minutes.
Remove and discard the lemongrass stalk.
Throw the sugar snap peas, asparagus, green beans and edamame beans into the curry sauce
and cook for 4-5 minutes or until the vegetables are cooked but still have some bite.
Ladle the curry into bowls and spoon in the softened soy-glazed butternut squash.
Top each bowl with a squeeze of lime juice, sprinkle with the coriander, add a few slices of chilli and a scattering of spring onion.
Serve with bowls of jasmine rice.
By Karl
Soy-Glazed Sirloin
main meat
Lacking a sous-vide device myself I improvised one -
I discovered that if I filled my slow cooker with water at 51°c and set it on low it would hold the temperature pretty well without the lid on.
So that's what I used instead.
I call it my slow-vide 🤣
The lack of a water circulator didn't seem to matter much since the entire sleeve of the machine heats the water fairly uniformly.
Serves 4
- 12oz/350g piece of sirloin
- 2 tblsps soy sauce
- 2 tsps toasted sesame oil
- 2 tsps rice vinegar
- 2 tsps fish sauce
- 2 tsps mirin
-
Pour the marinades into a freezer bag with the steak.
Lower the open bag carefully into a large bowl of water and use the pressure of the water to squeeze all the air out before sealing the top shut.
Put the bag into a sous-vide device, weighing its contents down with a plate or something, and cook for 2-3 hours at 53.9°C, or between 50°c and 55°C depending on your device's capabilities.
When ready to eat, lift the bag out of the sous-vide and the steak out of the bag.
Dry the steak thoroughly with kitchen paper. Lubricate it lightly with a neutral high smoke point oil.
Heat a cast-iron skillet until scorching hot, then quickly sear the outside of the steak.
It is now ready to slice and serve.
By Karl
Celeriac Purée with Mustard and Goat's Cheese
veg side
Another celeriac purée, but this one offsets some of the bitterness introduced by the mustard (especially if you accidentally use Dijon) with some honeyed goat's cheese that I happened to have lying around.
Adding some potato would help make the purée smoother too.
- celeriac
- cream
- whole grain mustard
- salt
- butter
- goat's cheese
Chop the celeriac into fat chunks and simmer them for about 15 minutes until they soften.
Warm the softened pieces with cream and goat's cheese, then blend with whole grain mustard.
Season and blend in some pieces of butter to enrich the mixture.
By Valencians
Valencian Paella
main meat fowl
Well, it may be rather late in the year, but my butcher had a rabbit. So paella it would be...
Despite
intense scholarly study of the permissible ingredients in a (definitely non-seafood)
Paella Valenciana,
there remains significant authentic local variation.
So don't sue me for adding some asparagus!
According to these researchers the only ten ingredients generally agreed upon are:
- rice
- water
- olive oil
- salt
- saffron (or food colouring)
- tomato
- flat green beans
- Garrafó beans, a Spanish variety of Lima beans, also widely known as butter beans
- chicken
- rabbit
Whereas in reality just about anything goes. If you look far enough back in time, or widely enough in the region. And yes, even chorizo!
Snails used to be quite a common ingredient, and you will also find little meatballs being added.
If you like you can blanch the sliced green beans and lay them on top for decoration rather than stirring them through.
In which case best to cut them in strips.
I've also seen professional chefs from a mountainous area fry up some strips of long sweet red peppers with the meat, then lay those in a star pattern on top to finish.
Apparently they are known as , due to the shortage of actual shrimp there.
The
official
30cm (rim-to-rim) paella pan, which happens to be the size of my frying pan, is meant to hold 2-3 main course servings.
Generally a paella serving is considered to be 100-125g of rice, and the accepted water:rice ratio for paella rice is 3:1 or possibly 2.5:1.
I may have made my paella a little too thick -
it's reckoned it should be only about the thickness of a finger
un ditet,
or no deeper than 2cm (¾").
The reason being that if the rice is too deep it will not dry out evenly resulting in overcooked rice at the bottom.
And that's going to be my excuse for failing to produce a decent succotash, sorry, I mean
socarrat. Except for at the very centre of my pan.
I figured that might preclude cooking with the much thicker pieces of flesh which I had, but looking at photos of authentic paellas I see that they too have hefty lumps of meat sticking up from the bed of rice,
so perhaps it would be sufficient to just make sure the tops were cleared of rice while cooking.
The
D.O.P certified Valencian rice varieties available for paella making are
Bomba,
J Sendra or Senia and
Albufera.
Though for the non-purist,
Calasparra, Marisma or
Maratelli might also be acceptable.
Feeds a Fiesta
- extra virgin olive oil
- paella rice
- salt
- rabbit
- chicken
- Ferradura or Bajoqueta large flat green beans
- Garrofón or lima or butter beans
- tomato, grated
- sweet smoked paprika
- saffron
- chicken stock
- rosemary
- garlic, minced
- artichoke hearts
- snails of the Xonetes species
- asparagus
Cut the artichoke stems short above any wooden section, then peel their rough skin .
Cut away the tough outer leaves, then quarter them vertically and remove the hairy choke with a paring knife.
Keep them in water acidulated with lemon juice until needed.
Remove the tough end of the asparagus stalks and boil them for a minute, before plunging them into iced water to cool.
Grind the saffron lightly in a pestle and mortar. You can toast it first in a foil wrap in the hot pan for 2-3 minutes if you like, to help release the flavour.
Heat the pan of stock and keep it simmering.
Slice the flat green beans on a bias either lengthways or across, as you like.
Mince the garlic .
Grate the tomato on the coarser side of a box grater or similar .
Joint the rabbit and the chicken. Separate the leg sections and the chicken wings discarding the tips of both.
I have no idea what you'd do with the snails - you're on your own there!
Pour a small puddle of olive oil into your paella pan and sprinkle in salt.
Over high heat fry the pieces, turning them only occasionally, until they colour a deep rich golden brown and you're getting a nice build-up of fond in the bottom of the pan.
Push the meat to the edges, or remove them to a bowl and add the beans. Continue frying and stirring occasionally.
After a couple of minutes clear a space in the middle and add the garlic , and for a minute or two without burning.
Next add the paprika and almost immediately after the crushed or grated tomatoes. Stir-fry until the water is cooked out of the tomatoes and they darken in colour a little,
return any meat you removed, then add the hot stock.
Bubble for 10-20 minutes or so then add any pre-cooked vegetables
and the saffron ,
check for seasoning, then distribute the rice and stir.
From now on there will be no more unnecessary stirring to avoid breaking up the rice. We are not making risotto!
Continue to cook over high heat for 5-10 minutes until the rice begins to appear through the stock.
Lower the heat slightly until the surface of the paella dries off, then lay on any decorative vegetables you might have prepared, decorate with several fresh rosemary sprigs, lower the heat right down and cover the pan with foil.
Cook on low for another 5-10 minutes until the rice is al dente.
Remove the foil, and the rosemary and turn the heat up for a minute or two just to try and develop a layer of that precious caramelised socarrat on the bottom.
Keep sniffing it and testing with a fork or spoon to make sure you aren't burning it though.
Let the paella sit for 5 minutes now before serving with slices of lemon on the side.
By Karl
Fried Courgettes with Dill
veg vegan side
You could dress the courgettes with spring onions, lemon juice or grated Parmesan if you don't have any dill.
You could also chop the courgettes into round slices or chunks, but I like the way you can plate the long slices in little pleats.
- butter
- olive oil
- courgettes, sliced lengthways
- garlic, minced
- dill, chopped
Slice the courgettes fairly thinly lengthways.
You can discard the ends, and the first and last crusts which are just skin.
And avoid the seedy centres if you like, which are very watery.
Fry both sides in a single layer in olive oil and butter until they begin to colour.
Add chopped or minced garlic and sweat until the garlic softens without burning.
Season with salt and pepper and dress with roughly chopped dill fronds.
In Which Karl Solves Pastry
My
Wine 'n' Cheese Man™ sold me so very much oozy Gorgonzola Dolce that I was struggling to eat it all, so I thought I'd put some of it in a pie.
Now I like a steamed suet pudding as much as the next Yorkshireman, but I'm not soo keen on the stodginess of baked suet pastry,
and being too lazy to go to all the trouble of blind-baking a shortcrust pastry so it doesn't go all limp and soggy, I thought someone should invent a new pastry.
One which is light and airy enough to rival shortcrust, but robust enough to crisp up even when filled with watery content.
And here it is!
Finally!
By Karl
Karl's MAGIC™ Suet Shortcrust Pastry
ingredient
So I invented a new pastry. Or I think I did. Which deserves its own page!
I wondered if it might be possible to cross a lard-based shortcrust pastry with a suet pastry to get some of the crispness of the shortcrust, the robustness of the suet
and avoid any need to blind-bake the casing.
And here it is!
The pastry swells and browns quite nicely, a bit like puff. And crisps well when filled without becoming soggy.
It's almost possible to soft-bake an egg in it!
Serves 6-8
- 600g self-raising flour
- 200g lard, diced
- 100g suet
- salt
- egg yolk loosened with a little milk
- 2 tsps mustard powder
- handful of fresh herbs
- 1 tblsp dried herbs
- garlic
- citrus zest
- 200g hard cheese, grated
- spices
- toasted nuts
- seeds (sesame, cumin, fennel, caraway, etc)
Sift the flour into a bowl with a little salt.
Add any flavour options you fancy.
Chop the chilled lard into small pieces and cut into the flour to make breadcrumbs without over-working it.
Add the suet, then cut in just enough ice cold water to bring the dough together into a ball.
Separate about a third, make a flattened ball of each part, cover them in clingfilm and refrigerate for an hour or so.
Pre-heat the oven to Gas Mark 5.
Mix an egg yolk with a little milk to loosen.
Roll out the larger ball on a floured surface and line a baking dish.
Spoon in your chosen, cooled, filling.
Brush the pastry edges with the egg wash.
Roll out the smaller ball to cover, crimp the wetted edges and trim tidily with a knife.
Decorate with shapes cut from the spare pastry , and make a couple of slits to let out the steam,
then brush the top with egg wash and bake for about 45 minutes or until the pie is nicely browned and cooked through.
Steak and Gorgonzola Pie
meat main cheese
I thought I'd try my MAGIC™ Suet Shortcrust pastry with one-third suet and two-thirds lard.
I didn't bother blind baking it, but the bottom turned out crisped and well-cooked without being soggy.
Although I do rather like a soggy bottom myself!
In case you were wondering, the decoration on the pie was meant to be an impression of a beef's nose and horns, with steam slits for nostrils.
Unfortunately the horns were much too long to fit on the pie horizontally, so now it looks more like a mushroom and a couple of whale's jaw bones.
Ah well, I never claimed to be an artist.
Serves 6-8
- 1 kg beef chuck, shoulder or shin
- 5 tblsps flour
- 1 tblsp mustard powder
- pepper
- oil for frying
- 250g bacon lardons
- 2 carrots, chopped small
- 2 onions, chopped small
- 1 head garlic, pressed
- thyme
- bottle red wine
- 500ml beef stock
- handful parsley, roughly chopped
- 200g button mushrooms
- a dozen baby onions, peeled
- 250g gorgonzola, cubed
- 600g self-raising flour
- 200g lard
- 100g suet
- 2 tsps mustard powder
- salt
Cut the beef into ½" chunks.
Shake in a bag or a bowl with the flour, mustard powder, ground pepper and a little salt.
Fry in batches over high heat in a little sunflower or rapeseed oil to brown nicely.
Transfer to a large pot.
Fry the bacon lardons until beginning to brown and add them to the pot.
Add more oil and fry the carrots and the onions until they begin to caramelise nicely.
Mince, purée, or crush a head of garlic or push it through a garlic press and add to the frying pan for a few minutes.
Decant everything to the pot.
Deglaze the frying pan with red wine and bubble until reduced by half, then add the reduced wine and the stock to the pot.
Cook for two hours until the meat is tender.
Meanwhile heat a little oil over high heat and char the baby onions a little. Set aside.
to add to the pot about 15 minutes before finishing.
Add a knob of butter and fry the button mushrooms to give them colour, then add them to the pot.
Simmer for another 15 minutes so there is very little sauce remaining, then stir in the parsley and the gorgonzola to melt it through.
Allow to cool.
Sift the flour into a bowl with the mustard powder and a little salt.
Cut the chilled lard into small pieces and cut into the flour to make breadcrumbs without over-working.
Add the suet, then cut in just enough ice cold water to bring the dough together into a ball.
Separate about a third, make a flattened ball of each part, cover in clingfilm and refrigerate for an hour or so.
Pre-heat the oven to Gas Mark 5.
Mix an egg yolk with a little milk to loosen.
Roll out the larger ball on a floured surface and line a baking dish.
Fill with the cooled stew.
Brush the edges with the egg wash.
Roll out the smaller ball to cover, crimp the wetted edges and trim tidily with a knife.
Decorate with shapes cut from the spare pastry , make a couple of slits to let out the steam,
then brush the top with egg wash and bake for about 45 minutes or until it is nicely browned and cooked through.
Adjust the oven temperature as required to prevent burning or speed up the cooking.
Give the top another couple of egg washes after the first 30 minutes.
Celeriac and Mustard Mash
side veg
The addition of potato gives a smoother result than just celeriac which can be quite grainy. I had about 25%.
Add more potato if you prefer.
Serves 4
- 1 celeriac, peeled, chunked
- 2 small potatoes, chunked
- 2 tsps wholegrain mustard
- large knob butter
- 100ml double cream
- salt & pepper
Peel the celeriac and potato and cut into fairly large, even chunks.
Add the celeriac to boiling water, return to the boil and simmer for 5 minutes.
Add the potatoes, return to the boil and simmer for another 10 minutes or until the vegetables are quite soft.
Drain them, then mash with butter and cream.
Season and mix in the wholegrain mustard.
By Karl
Peas with Minted Chardonnay Gastrique
veg side
This is a bit tricky, but can be quite a tasty way of jazzing up some peas if you get it right.
Make sure the gastrique is quite thick. If it's too watery it will just turn the peas wet and disappointing.
Whisking butter in at the end helps.
Serves 2
- 1 tblsp honey
- water
- 1 tblsp Forvm chardonnay vinegar
- 1 tblsp mint, minced
- knob of butter
- 1 cup shelled peas
Dissolve the honey in a little water
then cook it in a small pan until the water is boiled off and the honey begins to bubble and caramelize.
Once it has darkened to your liking add the vinegar and reduce until it becomes sticky.
Take off the heat and throw a knob of butter into the gastrique. stir to make a smooth sauce.
Shell the peas and boil them in salted water for a minute, then drain and dress them with the sauce.
Stir through finely minced mint leaves to serve.
Love. Age. Die.
Chris from my
Culinary Master Class brought a whole bunch of lovage to class.
So I offered to give it a good home.
When life gives you lovage... Make love?
Speaking of leafy plants, as we were, it's
Prairial - wild garlic season, and around here the spring woodlands become carpeted with them.
First you get their distinctively odoriferous
versatile young leaves which you can just throw into a leafy salad,
then as these turn heavy and coarse you get the flower buds, which you can pickle,
apparently
Then come the flowers.
Then you get the seeds. Which you can also
pickle.
My God, perhaps I could live off them?
Chilled Cucumber and Lovage Soup
soup veg
Not a bad soup - surprisingly rich. The boiled egg garnish really works well.
Serves 4
- 3 long cucumbers, peeled
- 3 tbsp of crème fraîche
- 350ml of natural yoghurt
- ½ lemon, juiced
- 75ml of olive oil, good-quality
- 3 sprigs of fresh lovage, leaves picked
- salt
- ground white pepper
- hard-boiled eggs, chopped
- chives, chopped
- lemon zest
Cut the cucumbers in half lengthways and scrape out the seeds with a teaspoon.
Discard the seeds.
Roughly chop into chunks and place in a blender.
Add the rest of the ingredients (except the garnish, if using) to the blender and season with salt and pepper.
Start initially with 12 lovage leaves.
Blend until completely smooth — the soup should have a pleasing, pale green colour.
Taste.
Is there a good balance of acidity and mellowness from the yoghurt? Add more lemon if it seems too creamy-tasting.
Can you taste the lovage enough? It should be defined but not overpowering.
Add the lovage leaves cautiously, a little at a time so as not to overpower the delicate cucumber flavour
Once you’re happy you’ve achieved a balanced flavour, place the soup in the fridge for at least 2 hours so that it is well-chilled before serving.
Sprinkle with chopped hard-boiled egg, minced chives, and lemon zest to garnish, if desired.
Mackerel and Lovage Tarts
fish starter snack
You can use shop-bought puff pastry. I know I did!
Though a 320g pack of ready rolled puff pastry is not enough. You'll need slightly less than twice that to make 6 or 7 10cm x 12cm tarts.
I mostly followed
Hugh Fearnley-Whittingstall
but adjusted the oven temperatures a bit to encourage the blind pastries to rise.
I also think the 2cm potato cubes are a little on the large side.
You won't hear me say this very often, but it could have done with more mackerel!
I cooked my mackerel under the grill, skin-side-up. Which make it easy to peel the blistered, crispy skin off when they're cooked through.
Plus you can decorate the finished tarts with shards of their skin to serve.
They also freeze well.
Serves 6
- 2 tbsp olive oil
- 2 onions, finely diced
- 2 bay leaves
- 3 soft lovage stems (about a stick of celery's worth), finely sliced
- 350g potatoes, peeled, cooked and cut into 2cm cubes
- 4 mackerel fillets, cooked, skinned and flaked
- 1 small handful lovage leaves, finely shredded, plus extra for serving
- 2 tbsp finely chopped dill fronds, plus extra for serving
- 3 tbsp crème fraîche
- Salt and freshly ground black pepper
- 250g unsalted butter, chilled and cut into small cubes
- 500g plain flour
- Pinch of salt
- About 150ml iced water
- 1 egg, lightly beaten with 1 tsp of milk, for glazing
- Freshly ground black pepper
First make the pastry:
Toss the butter in the flour with the salt until coated, then add just enough water (you may not need it all) to bring it together into a fairly firm dough.
Form this into a rectangular shape with your hands and, on a well-floured surface, roll it out in one direction, away from you, into a 1cm-thick rectangle.
Fold the two short ends into the middle so they overlap, like folding a letter. Give the pastry a quarter turn, repeat the rolling out five more times, then wrap in cling-film.
Rest in the fridge for an hour.
Heat the oven to 220°C/425°F/Gas Mark 7.
Put the oil in a frying pan over medium-low heat, add the onion and bay, and sauté gently until soft, about 10 minutes.
Add the lovage stems, fry for a couple of minutes, then tip into a bowl with the potato, flaked fish, lovage leaves, dill and crème fraîche.
Remove the bay, season and cool.
Roll the pastry into a rectangle about 35cm x 45cm. Cut into six smaller rectangles. Cut a 1cm strip from the edge of each and reserve.
Place the rectangles on a large baking sheet lined with parchment, and lightly brush the edges with egg wash.
Place the strips around the edges to make a border, and brush lightly with egg wash.
Prick the bases of the tarts with a fork.
Bake for 10-15 minutes until they're starting to turn golden, remove from the oven and divide the filling between the tarts, piling it up quite high.
Reduce the oven to 200°C/400°F/Gas Mark 6. Bake for five to 10 minutes until warmed through.
Scatter over dill and lovage, and serve hot or warm.
Salted Pickled Wild Garlic Seeds
pickle
A sort of poor man's caper.
Unless capers are consumer-man's pickled wild garlic?
The seeds always seem to be salted before pickling.
This will draw any moisture from the seeds, keeping them firm and giving better subsequent vinegar penetration to increase the pickling effect.
Perhaps it also helps to prevent them from spoiling?
Fills 1x300ml jar
- 200–250g green wild garlic seedheads (to yield approximately 150g picked seeds)
- 40g fine sea salt
- 300ml cider vinegar or white wine vinegar
- a bay leaf or two
Pick the individual seeds from the seedheads.
This requires a bit of patience, but you can speed things up with a small pair of scissors or by using a fork to strip a whole head of seeds from the main stem in one movement.
It's best to do this in a large bowl or a plastic bag - the seeds will shoot all over the place.
Don’t worry too much about any fine stems that remain attached to the seeds.
Wash the seeds thoroughly in several changes of water.
Pick out any spiders or grass stalks that survive the process, then strain them into a sieve and leave to drain well.
Put a heaped tablespoon of the dry seeds into the sterilised pickling jar, and sprinkle over some of the salt.
Continue layering seeds and salt until the jar is full and all of the salt is used up. (Don’t worry too much about the salt being evenly distributed.)
Fasten the lid onto the jar, and put the jar into the fridge. Leave it there for three weeks, shaking the jar every day or so.
Once the three weeks is up, tip the salted seeds into a sieve and rinse them well. Spread them out on a clean tea towel and leave them to dry again. Meanwhile, wash and sterilise the jar again.
Put the dry wild garlic seeds back into the jar. Pour over enough vinegar to cover, fasten the lid and leave to mature for at least one month, but preferably three.
Stored in the fridge, the pickled seeds should keep for around twelve months.
Spring Roll
As the action hero Super-Ram says:
It's Lambin' Time!. Probably.
I had another go at rolling some baby lamb's breasts and roasting them, and discovered the delicious glory of a slow-braised lamb's shoulder.
I really dunno why my kitchen is now covered in spare lamb parts?
And then I carried on cooking for the next 3 months.
And here it all is...
Mostly by Karl
Slow Cooked Braised Rolled Lamb Breast
Round Three
main meat
Round 3 of my experiments with rolled lambs' breasts.
So far I've produced them
succulent with leathery hides,
or
crispy with (more) leathery insides.
I thought I'd try them in the slow cooker this time - and they turned out soft and succulent throughout.
So hurrah!
Either it was the longer cooking (8 hours in the slow cooker), or more likely the increased amount of liquid I used.
This time the rolls were almost covered, and I basted them a couple of times too.
Now, if I could only figure out how to get crispy skin
and succulent insides I'd have covered everything.
Unfortunately if you just take the rolls from the braise and roast them for 10 minutes at Gas Mark 8 they do crisp, but it's a bit on the stringy, chewy side.
Perhaps better fat larding?
Watch this space...
Serves about 2 per breast
- olive oil
- rolled lambs' breast(s)
- garlic
- onions
- hot-smoked anchovies
- thyme
- rosemary
- couple of tablespoons of tomato purée
- red wine
- zest of a lemon
- bay leaves
- splash balsamic vinegar
- water
First buy the rolled lamb breasts. Or, you know, buy lamb breast and roll it up yourself.
In which case you can salt the inside and cover it with the anchovies, lemon zest and herbs first. I guess.
Roughly chop the onions. Halve the head of garlic.
We're going to strain the sauce before using it, so you can leave the peel on these.
Sear the rolled lamb breast(s) all over in olive oil in a large frying pan. Put them into the slow cooker.
Add thickly sliced onions, halved garlic cloves, anchovies, rosemary and thyme to the pan with more oil if required and fry until they soften and begin to colour up.
Stir through the tomato puée and cook down for a few minutes, then add the red wine and bubble the alcohol off.
Pour the contents of the pan into the slow cooker and add the bay leaves, lemon zest and a splash of balsamic vinegar.
Maybe a tiny pinch of chilli flakes for some gentle warmth?
Rinse the frying pan with water or stock, using enough to cover ⅔ of the rolled breasts.
Cook in the slow cooker on low for 8 hours.
Decant the rolls and set them to rest for 10 minutes while you strain the liquid into a pan and boil hard to reduce to a nice jus.
Or you could thicken the liquid with cornflour slurry if you prefer.
Slow Braised Lamb Shoulder
main meat
Because of the amount of collagen and connective tissue in a lamb shoulder you can't cook it rare like you might for a leg.
Long and slow is the only way to go.
Following
Nagi more-or-less exactly
except for adding some grated lemon zest after the initial roast, before sealing.
Since I had a 2lb shank-side half-shoulder I only added 1 cup of liquid, half of which was white wine (and some of it was stock - just because I had some to use up).
I super-sealed the roasting dish before slow-roasting:
- Covered the joint with baking parchment, to stop it sticking, and prevent the bone from poking through the next layers.
- Wrapped air-tight in several layers of cling film.
- Covered again with baking parchment, to stop the cling film melting.
- Wrapped tightly in a couple of layers of tin foil.
Then roast it at my gas oven's lowest (
¼ or
S) level, which registered 90°C on my oven thermometer,
for 15 hours.
Since I cooked mine overnight, the joint was ready many hours before dinner.
So I just left the still-sealed dish untouched on the side, then reheated it for an hour at 150°C/300°F/Gas Mark 2-3, before opening it up to reduce the jus and serve.
I suppose I could have opened it immediately to check it and prepare the jus, and then reheated just the meat and veg, covered, in the roasting tin to serve at dinner time?
Serves exactly 5. Apparently
- 1.5-2.5kg / 3-4.5lb lamb shoulder, bone-in
- 2 cups water
- 4-6 large banana shallots, halved
- a few large garlic cloves, peeled
- zest from ½ lemon, grated
- 1 tblsp fresh rosemary, finely chopped
- 1 tblsp dried oregano
- 2 large garlic cloves, minced
- 1 tsp salt
- ½ tsp black pepper
- ¼ cup extra virgin olive oil
- 1 tsp cornflour
Mix the Marinade ingredients in a small bowl. Rub thoroughly all over the lamb surface. You can do this in the roasting tin.
Leave the lamb to marinate for a couple of hours, or 24 hours in the fridge.
Preheat oven to 210°C fan/230°C/450°F/Gas Mark 8.
Peel and halve the shallots (or onions) lengthways.
Peel a few large garlic cloves.
Make a bed for the meat using these and lay the lamb shoulder on top.
You can throw in a few extra rosemary sprigs too if you like.
Pour the water into the pan.
Roast uncovered for 45 minutes until nicely browned.
Turn down the oven to 100°C/210°F/Gas Mark ¼ or as low as your oven will go.
Cover lamb with baking paper, then a double layer of foil and seal very tightly to avoid water evaporation.
Braise for 12 hours.
Check the meat - test the side of lamb with two forks. The meat should be fall-apart tender. If not, cover and return to oven.
Remove lamb to a large dish. There will (should!) be a lot of liquid pooled under the lamb in the roasting pan.
Cover loosely with foil to keep warm. It will stay warm for 2 to 3 hours.
Strain the liquid into a small pan. Retain the vegetables.
There will tons of rendered fat which you will want to remove somehow.
Let the juices settle or cool to scoop it off, or suck the juice from underneath with a turkey baster.
Now you can either reduce the liquid to a decent syrupy jus by hard boiling, or you can thicken it to gravy by heating with a teaspoon of cornflour added in a slurry.
Season to taste.
Tear the meat apart with tongs or forks. Dress with the jus and serve with the well-braised shallots and garlic cloves, if you like.
By Karl
Gratin de Dattes
Potato Gratin with Dates
side
I had some fresh dates which needed eating, so I thought I'd invent a new gratin.
I used a rich chicken stock as the liquid, but I'm sure you could use cream instead.
It might even be better - the stock makes the gratin rather sloppy unless you cook it all off, and that risks mis-timing the cooking and burning the gratin.
- dates, stoned, thinly sliced
- potatoes, thinly sliced
- chicken stock
- butter
- rosemary leaves, finely minced
Thinly slice your potatoes into a bowl of cold water using a mandolin.
Fill a casserole dish with alternate layers of potato and a filling of sliced dates ssprinkled with finely minced rosemary and dots of butter.
Pour in stock until it almost comes to the top.
Cook uncovered in the oven at Gas Mark 3-4 for a couple of hours until the stock has mostly bubbled off. It will take a while.
By Karl
Crushed Broad Beans with Mint and Lemon
side veg
Depending on the quantities of ingredients you use this can basically become mostly gremolata thickened with beans.
But first a history lesson:
Fava or Faba beans, from their latin name Vicia Faba, are a broad bean
indigenous to North Africa and have been been consumed for several thousands of years during which time they have migrated throughout Europe.
The pods are the typical long green furry bean sleeves, which you can eat raw whole like mange-tout when (very) young. Or just grilled.
When they are mature the beans themselves inside grow a thick fibrous skin which many people also prefer to remove before eating.
You (or most people anyway) can eat fava beans raw.
Broad bean, on the other hand, is a description of the shape of the bean, rather than their species, and are generally flattened - the bean not the pod.
Usually in Europe Broad Beans means Fava beans, but might sometimes be used to refer to Lima beans. Also known as Butter beans.
These younger varieties come from the Americas and indeed are named after Lima - the capital of Peru where they were first cultivated a couple of thousand years ago.
They are best not eaten raw since they are wont to contain small amounts of cyanide and various other toxins.
If you plan on double-podding your fava beans it's best, if you can, to choose pods containing either beans large enough to easily remove their skins,
or small enough not to bother.
Otherwise you're going to be spending a lot of time popping hundreds of fiddly piddling-sized beans.
Be aware, especially if you're double-podding, that there is an enormous amount of wastage from these beans
- you'll need bushels of the things to finish up with anything more than a handful of kernels.
- broad beans, podded
- fresh mint leaves, minced
- garlic, crushed
- parmesan, grated
- lemon zest, grated
- lemon juice
- olive oil
- salt & pepper
Pop the broad beans out of their long outer sleeves.
Drop them into salted boiling water, bring back to the boil and simmer for a bare 30 seconds.
Strain them immediately into iced water to cool.
With a paring knife, slit one end of each bean's thick outer skin or rind
and pop out the bright green, tender kernels.
Keep these in the iced water until required, then blanche them briefly in salted boiling water to reheat before using.
Drain the double-podded beans and roughly mash with chopped mint, grated lemon zest, lemon juice, puréed garlic, grated parmesan and olive oil to taste.
Season if necessary.
By the Japanese
King Oyster Mushroom Tempura
mushroom oriental side veg
Yes, I still have leftover King Oyster mushrooms and tamarillo salsa.
These fat mushrooms are also pretty tasty halved, tempura'd and deep-fried.
I'm sure you could fry regular oyster mushrooms too the same way.
The batter flour proportions are not too critical but I mostly tried to follow my favourite
tempura batter number 8.
Add whatever spices you like to the dry mixture. You could even try some dried herbs like oregano.
- king oyster mushrooms, halved
- vegetable oil for deep-frying
- 1 tsp onion powder or salt
- 1 tsp garlic powder
- 2 tsps wheat flour
- ½ tsp cumin
- ½ tsp paprika
- 2 tblsps rice flour
- 2 tblsps cornflour
- 1 tblsp wheat flour
- vodka
- ice cold water
- salt
Mix together the dry mix in a plastic bag .
Mix the tempura batter flours, season, then stir briefly with a splash of vodka and iced water (or iced soda water) to make a usable slurry.
Don't overmix - it's fine for the batter to have floury lumps.
Halve the mushrooms lengthways and make a pattern of shallow slashes in the cut surfaces.
Shake the mushrooms in the dry mix bag, then roll them in the wet batter mix to coat thickly.
Deep-fry the battered mushrooms in 350°F/175°C oil for 3-5 minutes until they are nicely crisped and coloured.
Drain on kitchen paper and serve with
smoked salmon dip ,
or aïoli, or maybe Sriracha or wasabi mayonnaise.
By Karl
Smoked Salmon and Cream Cheese Salad Dressing. Or Dip.
dressing sauce fish cheese
I wanted to make a
smoked anchovy salad dressing
but the
Wine 'n' Cheese didn't have any hot smoked anchovies and I didn't have any Boursin.
So I made this version with hot smoked salmon and Philadelphia instead.
It makes quite a good substitute for Hollandaise sauce on an Eggs Royale, Eggs Hemingway, Eggs Atlantic, Eggs Pacifico,
or whatever you like to call Eggs Benedict with smoked salmon.
I made the dressing without any anchovies to begin with, but it didn't seem quite fishy enough for me, so I added a half-dozen of the regular kind.
Your fishy-sense may vary!
Some sun-dried tomato or red pesto blended in might go quite well too. It would certainly look the part.
Serves 2-4
- piece of hot smoked salmon
- 100g cream cheese
- 2-3 garlic cloves
- dollop of cream or crème fraîhe
- juice of 2-3 clementines
- ½ red chilli
- olive oil
- half a dozen anchovies
- splash of red wine vinegar
- teaspoon mustard
- paprika
- sun-dried tomatoes
Remove the salmon skin.
Blend the salmon, garlic, chilli ,
anchovies, sun-dried tomatoes , cream and orange juice to a smooth paste.
Blend in as much cream cheese as needed to enrich the mixture, season,
then drizzle in olive oil whilst beating or running the food processor until you have a consistency like mayonnaise.
Sweetcorn Velouté
sauce veg
A velouté is technically a stock thickened with blond roux, but blended sweet corn is pretty much thick enough on its own.
The
recipe which inspired me for this uses crème fraîche, but I don't think the sourness really works.
Go for regular cream.
It also adds turmeric, which seems too coarse for the sauce, so I went with saffron.
I used my velouté to lubricate some Culinary Masterclass
spinach and mascarpone tortellinis (no, that's not an idle boast!)
and served them dressed with red pepper slices and artichoke hearts.
You don't get a lot of edible heart out of an artichoke though, especially considering the effort involved
🙁
Serves 2
- 2 corn cobs
- 2 tblsps double cream
- 1 large banana shallot
- ½ small fennel
- 2 garlic cloves
- glass white wine
- pinch saffron
- light chicken stock or water
- salt & ground white pepper
- butter
- artichoke hearts
- red pepper, charred, skinned and sliced
- a few corn kernels, toasted if you like
Simmer the corn cobs in a large pot of salted water for 10 minutes or so until it softens.
Drain, allow to cool enough to handle, and slice the kernels off the cobs. Reserve some for decoration.
Meanwhile sweat the shallots, garlic and fennel slices in olive oil and butter in a small pan until they soften.
De-glaze with white wine and bubble off.
Add the corn kernels to the pan with enough water or light stock to cover.
Add a pinch of saffron strands with the water/stock.
Cook until the corn is well-softened, then blend until smooth and pass through a seive back into the pan.
Reheat, season with ground white pepper and salt, and stir in cream, and perhaps a knob of butter until the sauce is thick and glossy.
Add lemon juice to the pot of boiling salted water.
Pull off the artichoke's larger outer leaves and trim the stalk.
Use a Y-shaped vegetable peeler to peel off the fibrous outer layer of the stop of the stalk and the bottom of the artichoke bulb.
Cut the stalk away leaving an inch or two attached to the bulb.
Cut the top of the globe off somewhere below the mid-point.
Using a paring knife remove leaves and coarse skin from the bottom of the artichoke and right in to the hairy choke.
Now quarter the artichoke base vertically and cut away the choke with the paring knife, which you can now easily access.
Add to the boiling water and cook for 10-15 minutes until softened. Strain and keep in acidulated water until required.
Core and quarter a red pepper and char the skin over a flame or under the grill. Let them rest in a plastic bag to soften the charred skin, then peel it off and slice them thinly.
Toast a handful of corn kernels in a hot, lightly oiled frying pan.
Boil up some
spinach and mascarpone tortellinis, if you like,
and serve them with the artichoke hearts dressed with the corn velouté and the red pepper slices and toasted corn kernels.
By Karl
Minted Pea Purée
side veg cheese
One of very
many pea purées on this site,
though perhaps more complex than most.
- peas
- mint leaves, roughly chopped
- lemon zest
- olive oil
- crème fraîche
- parmesan, grated
Blanch the peas then shock them in iced water.
Drain and blend them with the other ingredients, adding enough crème fraîche to lubricate the blender without diluting the purée too much.
Heat gently when required.
Pickled Jerusalem Artichokes
pickle veg vegan
Although
Thyme Farm does not specify how long you should leave this pickle to mature before using it,
most other sites recommend leaving it for a week or longer.
Mind you, they don't thinly slice their artichokes. So up to you I guess.
I don't believe I left mine for very long at all!
Serves 2
- 6 Jerusalem Artichokes
- ½ juice of a lemon
- 3tbsp water
- 250ml good quality vinegar
- 25g sugar
- pinch salt
- ½ teaspoon fennel seeds
- ½ teaspoon mustard seeds
- Sprig rosemary
Add all the pickling ingredients to a heavy pot and bring to the boil.
Peel the artichokes under running water or using a large bowl of iced water.
Slice them straight into the pickle using a mandolin.
Return the pot to the boil, then immediately set aside to cool.
Press the artichokes to keep them submerged.
Pheasant Normandy
fowl main
On a visit to Edinburgh, Flora and I cooked this Two Fat Ladies recipe from their
Gastronimic Adventures cookbook,
which seems to be just about the only place to find it. I've scoured their TV series but it's just not in there.
Which is a pity because it's pretty good.
Here's what they have to say about it:
This is a sumptuous way of preparing pheasant.
It also makes the birds go quite a long way due to the richness of the sauce
and the fact that it arrives fully prepared at table so there is no waste from badly carved carcasses.
Serves 2
- a brace of young pheasants
- 4 sweet apples (Cox's or similar)
- 115g/4 oz butter
- 1 tsp brown sugar
- 150ml/¼ pint Calvados
- 660ml/1 pint thick cream
- salt and freshly ground pepper
Peel and core the apples, slice into rings and fry in 55g/2 oz of the butter.
Add the sugar and cook until golden brown and slightly caramelised. Reserve.
Melt the rest of the butter in a flameproof casserole large enough to take the birds.
Brown the creatures on all sides, turning and coating with the butter.
Cover with the lid and place in a preheated oven at 190°C/375°F/Gas 5 to cook for 40 minutes;
or you can cook them on top of the stove, turning at half time.
Carve the birds into good-size pieces and lay them in a shallow gratin dish.
Make sure to pick every little piece of meat from the bones.
Place the legs at either end. Keep warm.
Scrape any morsels from the carving into the casserole juices and heat until bubbling then pour in the warmed Calvados.
Set fire to the mixture, but take care not to singe your eyelashes.
Roll the juices round and round until the flames subside.
Add the cream and continue cooking, stirring the while with a wooden spoon, until the sauce thickens.
Season to taste.
Place the apple rings over the pheasant pieces, then pour the sauce over the whole dish and bring to the table.
If you prefer, you can serve the apple rings separately.
Wild rice with fried celery would be excellent with this dish, and a watercress salad should suffice.
By Roslyn's Friend
Roslyn's Kebabs
meat snack
Roslyn passed along this masala paste recipe from a friend of hers, with which she coated some field mushrooms for barbecueing.
And said were delicious!
I'm ashamed to say that I have yet to try it out.
Incidentally, she also barbecued aubergine slices dressed with tamarind paste, which sounded interesting too.
- diced chicken
- oil
- 2 tblsps soy sauce
- 2 tblsps Worcestershire sauce
- 1 tblsps tomato purée
- 1 tsp turmeric
- 1 tsp coriander powder
- 1 tsp garam masala powder
- 1 tsp chilli powder
- 1 tsp paprika
- 1 tsp green masala
- ½ tsp salt
- dash of lemon juice (optional)
Mix well and marinate for a minimum of half an hour, the longer you leave it the better the taste!
(Marinate overnight for best results.)
Put on skewers and cook in oven under grill or barbecue.
By Roslyn's Friend
Roslyn's Green Masala
sauce veg vegan
This green masala is an ingredient in Roslyn's friend's kebab recipe.
According to her friend's notes:
A teaspoon of Green Masala can be added to any Indian dish to give it flavour and a kick.
The idea is that it is pre-made to save you making it every time you make a curry.
It only has 3 ingredients, balanced as follows:
Makes about 4 teaspoons
- 4-5 green chillies (preferably birds eye chillies)
- 1 clove garlic
- 1 inch ginger
Cut the stem off the chillies and take the skin off the garlic and ginger.
Throw into a food processor and mix until it becomes a finely minced paste (not liquified!).
You can chop by hand if you do not have a food processor.
The above is how much a curry should contain.
If you are making a small batch then times the above by 5 or more and consume with a week.
The key thing my parents told me is that it should be greener than it is white, so if your paste isn't that green, then add more green chillies.
If you wish to make a larger batch that will cover you for a longer period of time then add a tablespoon of oil and a teaspoon of salt into your Green Masala to extend its life.
Keep your Green Masala in a pot in the fridge, or keep half of it in the fridge and freeze the other half for another time.
You can even put your Green Masala into an ice cube tray (one teaspoon per ice cube hole) and use one cube per curry, which will extend the life of your Green Masala hugely!
By Nature
Cordyceps
mushroom ingredient veg vegan
Cordyceps are thin wormy orange mushrooms.
Pretty nice tasting raw, in fact, but they have a nice mellower nutty taste when cooked too.
You might need to be warned that they are also known as the
Zombie Fungus
and do have an unpleasant habit of parasitising insects brains in order to operate them like a meat suit.
So perhaps don't stick them in your ears.
Although you
can just stir-fry them,
apparently, I deep-fried mine for a fairly short time in really hot oil to crisp them up a bit.
Less than a minute.
They colour up nicely, but don't go exactly crispy, though they might if you fry them longer I suppose. I didn't experiment too much with them since they're pretty expensive.
Though not as expensive as Lion's Manes: £33 a kilo they are!
- cordyceps
- oil for deep frying
Heat oil.
Throw in cordyceps.
Swirl.
Remove.
Drain.
Serve.
Choy Sum with Garlic and Ginger
oriental side veg vegan
The method write-up below is more-or-less verbatim from
Daddy Lau.
Except for the changes required for legal fair use, of course
😉
Serves 4
- 1 lb choy sum
- 1" ginger, shredded
- 5 cloves garlic, minced
- 2 tblsp cooking oil
- 1 tblsp mirin
- 1 tsp sugar
- salt or soy sauce
To prepare the choy sum, you want to separate the quick-to-cook leaves and the slower-to-cook stems.
You can either make one horizontal cut to separate the leaves and clump of stems of each plant all at once,
or you can separate the joined stems (at an angle for extra style points) and then cut away the leaves and set aside.
Slice the garlic: For maximum visual appeal, slice a couple of cloves and mince the rest.
Cut the (small amount of) ginger into roughly 1/8 slices. He (Daddy Lau) uses about 4 slices of ginger for 1 lb of choy sum.
Heat your wok over high heat for a bare minute. Add a dash of oil (about 1 tbsp), then turn the heat to medium low.
Lowering the heat here is important to avoid burning the aromatics.
Add the ginger and garlic.
Stir-fry for 15 seconds so that you can smell the ginger and garlic releasing their aromas.
Add the choy sum; stems first since they'll take longer to cook through. Stir-fry the stems for about 30 seconds.
Then, add the leaves. Raise the heat to high and add the mirin and sugar to balance the texture of the leaves; these ingredients help make the dish silky smooth.
Mix these in and stir-fry for another 30 seconds.
DON'T ADD THE SALT YET!
If you add salt now, all the water in the vegetables will release (thank you, osmosis) and you'll end up with less tender vegetables in a puddle of juice.
Lower the heat to medium or low heat. Cover with the lid and let it steam for about 1½-2 minutes, or until the choy sum is tender and just cooked through.
Uncover the wok and bring the heat up to the highest setting. Stir-fry on high heat for a minute, then add the salt.
Drizzle a table of oil over the leaves to finish for a smooth texture, a glossy look, and to help preserve their vibrant green color.
Toss with the finishing oil for another 20 seconds, and then plate.
Enjoy!
Lion's Mane with Garlic and Tamari Soy Sauce
mushroom side veg vegan
You could dust the mushrooms with flour before frying to try and give them a bit more of a crunchy texture.
Serves 4
- 8 ounces Lion’s Mane mushrooms, thickly sliced
- 2 tablespoons ghee or butter
- 2 tablespoons tamari, or coconut aminos
- 1 teaspoon minced garlic
- pinch of salt
- freshly chopped parsley for garnish
Place ghee or butter in a skillet over medium-high heat.
Once hot, add the sliced mushrooms and cook until browned on both sides. Don't touch the mushrooms as they cook to let them deeply caramelize on each side.
Add the tamari and garlic to the pan and cook for an additional minute until the liquid is absorbed by the mushrooms, tossing them in the mixture.
Garnish with parsley and serve as desired.
Pimientos de Padrón
spanish veg vegan snack
Often served as a tapas, these bright green heirloom peppers from Padró in Galicia, Spain are pretty mild for the most part.
But you get the occasional surprisingly hot one, so snacking on them is a bit like playing chilli roulette.
Enjoy!
Serves 4-6
- 1 tablespoon neutral oil, like canola or grapeseed
- 12 ounces Padrón peppers
- flaked sea salt
- 2 tablespoons extra virgin olive oil
Heat oil over high heat in a cast iron skillet large enough to fit the peppers in a single layer. Heat until lightly smoking, then add peppers.
Cook without moving until blistered on first side, about 30 seconds.
Flip and shake the peppers and continue to cook, turning occasionally, until well blistered all over and tender-crisp, about 1½ minutes total.
Season with salt.
Transfer peppers to a serving plate. Drizzle with extra-virgin olive oil and sprinkle with more flaked salt. The need to be well-salted!
Serve immediately.
Son-In-Law Eggs
oriental snack
Apparently, because these eggs resemble shrivelled amputated bollocks, they are prepared as a warning to wayward sons by their mothers-in-law.
In Asia.
Well, where else?
1 tsp of tamarind concentrate is approximately the equivalent of 1 tblsp of the liquid from soaked, strained tamarind pulp.
So if using concentrate in the recipe below, substitute 2 tsps of concentrate diluted with 4 tsps water for the 2 tblsps of tamarind paste.
Serves 4
- 1 tblsp finely diced shallots
- 2 tblsps tamarind paste
- ¼ cup/4 tblsps palm sugar, chopped, packed
- couple tblsps water
- ¼ cup/4 tblsps fish sauce
- 4 medium boiled duck eggs, or 5 chicken eggs, peeled and cooled completely
- 2 head of shallot for fried shallots, thinly sliced lengthwise
- 3-4 cloves garlic for garlic chips (or make as much as you like and keep for miscellaneous sprinkling!)
- dried chilies
- coriander leaves
Add palm sugar, tamarind, water and fish sauce. Let simmer, stirring and crushing, for a few minutes until the sugar is all dissolved and the sauce is thickened slightly.
After simmering for 3-5 minutes, the sauce should have a darker colour, becomes shiny, and has the consistency of maple syrup (it will thicken slightly as it cools).
Taste and adjust seasoning, keeping in mind that the sauce will be mellowed out by the eggs.
Thinly slice the shallots and lay them on a plate lined with paper towel.
Sprinkle salt over them and let sit for at least 10 minutes.
Once it has had time to sit, press a piece of paper towel onto the shallots to absorb all the liquid that has been drawn out by the salt.
Heat just enough oil in a wok or a shallow saucepan to cover the shallots.
Turn the heat on medium high and add all the shallots to the oil without waiting for the oil to become hot.
Once the shallots are bubbling, turn the heat down to low and keep them bubbling gently until they are golden browned and crispy. Keep an eye on them as they burn quickly!
Remove the shallots with a slotted or mesh skimmer and drain on paper towel. Turn off the heat.
To the same oil you used the fry shallots, add the garlic slices THEN turn the heat back on low.
Keep frying the garlic on low heat (gentle bubbling) until the garlic has turned a light golden colour and the bubbling has stopped.
Remove the garlic chips and drain on paper towel.
Turn off the heat.
To the same oil, add the dried chilies and fry them on low heat until they turn a maroon colour and smell smoky.
This will take less than a minute so do not walk away!
Remove and drain on paper towel.
Add more oil to the pot so that it comes halfway up the eggs.
Heat the oil on medium high heat until the oil reaches 375-400°F.
While you wait for the oil, dry the eggs really well with paper towel to prevent oil from splattering too much.
Then add the eggs to the oil, one at a time and fry them until they become golden brown (it should take just less than 1 minute).
Flip the eggs and brown the other side.
Remove from heat and drain on paper towel.
Cut the eggs in half with a sharp knife and arrange on a plate, cut side up.
Reheat the sauce (add a little more water if it has become too thick) then drizzle the sauce over the eggs.
Top with fried shallots, garlic, chilies and cilantro.
Serve immediately with jasmine rice.
Enjoy!
Liquorice Pudding
sweet veg
Nigella
says:
I use the tiny liquorice pellets that come, usually, from Calabria and are seen everywhere in Italy.
Outside of Italy, you can find them in Italian delis and via the internet.
I followed her advice and ordered some from
Amazon. Worth every penny!
Serves 2
- 60 millilitres water
- 1 teaspoon pure Italian liquorice pellets (such as Amarelli Rossano)
- 2 tablespoons light brown muscovado sugar
- 175 millilitres double cream
- 2 teaspoons cornflour
- 1 tablespoon milk
- Maldon sea salt flakes (to serve)
Put the water and liquorice pellets in your smallest pan and bring to the boil, stirring or whisking frequently to help the liquorice melt.
Once it starts bubbling, turn off the heat and leave for 5 minutes, stirring or whisking every now and again.
Turn the heat back on and whisk in the sugar, then the cream, and bring to a bubble.
Remove from the heat.
Spoon the cornflour into a little bowl, cup or ramekin and slake it with the milk: which is to say, whisk in the milk until you have a smooth paste.
Pour this, whisking as you go, into the mixture in the saucepan.
Still whisking, put the pan back on the heat and bring back to a bubble, whisking all the while, for 20-30 seconds, or until thickened.
Divide between 2 heatproof glasses or cups and - unless you want to eat this hot - cover, touching the surface of the puddings, with clingfilm
or baking parchment that you've wet with cold water then wrung out (this is to prevent a skin forming, a thing she cannot tolerate),
and put them in the fridge to chill for at least 2 hours or overnight.
Let the puddings come to room temperature before serving, and remove the clingfilm or baking parchment and smooth the tops with the back of a teaspoon.
Put the soft sea salt on the table to sprinkle over as you eat, if wished. For those of us who love liquorice, this pudding is a sheer, spine-tingling joy.
The Week After the Morning After The Week Before
And is there runny cheese still for tea?
Yes, dear reader, yes there is!
About a month later I'm finally chewing through the last of the Christmas cheeses - mostly Gorgonzola.
I
rolled some into a surprisingly long puff pastry log, which I then struggled to fit into the oven.
In the end I had to slide it in at a diagonal, and keep rotating it to limit the scorching of the ends.
I combined the finished, and impressively glossy, cheese roll with some colourful celeriac and pea purées and experimented with different presentations.
What do
you think?
The Tête de Moine, or
Monk's Head cheese, with which I
creamed some kale, was believe it or not, a post-Christmas purchase.
It's a fine-grained semi-hard Swiss cheese which coincidentally originated from Bellalay Abbey near Berne, and is usually scraped or pared for serving, rather than being cut or sliced.
In fact there's a whole device called a
Girolle which is sold for scraping this conveniently cylindrical cheese into beautiful rosette-like swirls.
You
can manage to produce similarly attractive curls with a regular cheese slicer, or if you are particularly skilled, a sharp knife.
So after that, it's back to my habitual weekly steak, obtained at the end of my
meat walk into Brighouse.
Now serving with a
fruity liquorice sauce.
Chestnut, Gorgonzola & Spinach en Croûte
main veg cheese
I had the last of my Christmas gorgonzola to use up, and this seemed like an ideal vehicle.
Indeed, it's not too bad - just a couple of observations:
- Firstly the filling quantity is huge - far too much for a single roll.
Probably you should halve the quantities for the same amount of pastry.
- Secondly I used about ⅔ volume of stock in the sauce, and also correspondingly less cream.
It seemed to produce a reasonably flavoured sauce, which I think would have been far too dilute with the recommended stock volume.
- Although the original recipe calls for Shropshire Blue cheese I used Gorgonzola. Of course any blue cheese will be satisfactory.
- I reduced the oven temperature from Gas 7 to 6. But perhaps it should have been even lower?
- I kept back some of the sauce leeks and fried them in oil and butter until they caramelised to make a crispy topping.
Which Flora described as The Spider Corpses. So maybe you shouldn't do that?
- Finally I found 200g bags of whole cooked chestnuts
and puréed chestnuts at my Local Fucking Supermarket™
and that seemed like sufficient quantities.
- Good luck finding all-butter puff pastry at your Local Fucking Supermarket™.
Serves 8
- 50g butter
- 500g pack leeks, thickly sliced
- 3 garlic cloves, thinly sliced
- 240g bag baby spinach
- 415g can chestnut purée
- 3 large eggs, plus 1 for glazing
- ½ nutmeg, finely grated
- 200g pack vacuum-packed whole cooked chestnuts, halved
- 85g fresh white breadcrumbs
- 220g blue cheese, rind trimmed, diced
- 500g pack all-butter puff pastry
- 500ml vegetable stock
- 2 leeks, thinly sliced
- 1 tbsp cornflour
- 300ml pot double cream
Melt the butter in a large frying pan.
Add the leeks and garlic, stir well, cover and cook for 10 mins until the leeks are soft, stirring a few times to check that they don’t catch.
Tip into a large bowl.
Put the spinach in the pan and allow it to wilt.
Leave to cool and, when cold, squeeze out as much liquid from it as you possibly can.
Tip the chestnut purée into the bowl with the leeks and add the 3 eggs, the nutmeg, chestnuts, spinach, breadcrumbs, cheese and seasoning, and stir until well mixed.
Chill for at least 1 hr until the mixture firms up.
Heat oven to 180°C/Gas Mark 6.
On a lightly floured work surface, roll out the pastry to a rectangle large enough to completely enclose the filling.
Carefully lift onto a large, long baking tray that has been lined with baking parchment, then brush round all the edges of the pastry with the remaining egg.
Spoon the filling down the centre of the length of the pastry, leaving the ends clear.
Tuck the ends over the filling, then firmly lift up the sides to wrap them round, trimming away any excess pastry as you go.
Brush with more egg to glaze, then make a few holes in the top so steam can escape as it cooks.
Bake for 40 mins until golden and the filling is firm.
Remove from the oven, brush with more glaze and then bake for 10 mins more.
To make the sauce, heat the stock in a medium pan, add the leeks, boil for 5 mins, then take off the heat and scoop out 2 tbsp of the leeks.
Blitz the rest in the pan with the cornflour using a hand blender, then cook, stirring, until thickened.
Pour in the cream and reserved leeks and warm through.
Can be made 2 days ahead and chilled. Serve the pastry in thick slices with the sauce.
By Karl
Celeriac and Sun-Dried Tomato Purée
side veg
I really wanted a pink purée to suit my meal plan's colour scheme.
This seemed like it would work, and the flavours are quite complementary too.
Bonus!
It's the celeriac and the sun-dried tomatoes which are puréed by the way, not just the tomatoes.
To clear up any confusion 😉
- celeriac
- sun-dried tomato
- large knob of butter
- cream
- splash stock
Peel the celeriac and chop into chunks.
Simmer in salted water until soft and drain.
Blend together with a knob of butter and as many sun-dried tomato pieces as you need to get the colour or taste you require.
Lubricate and thin with cream or stock as needed.
Season and serve.
By Karl
Red Wine, Redcurrant and Liquorice Steak Sauce
meat sauce
A rather thick and delicious alternative to
McPhail's steak sauce,
and another step taken in my crusade to combine liquorice with
everything.
The fruit jelly is optional.
Serves 1 Steak
- butter
- garlic
- red wine
- herbs - rosemary and thyme
- redcurrant or rowan jelly
- liquorice pellets
After you've fried your steak, add a large knob of butter and some garlic and herbs to the pan, if you didn't already.
Fry until the garlic becomes to colour, then de-glaze with red wine.
Add stock and bubble to reduce and thicken.
Grind liquorice pellets to a powder in a mortar and mix through the sauce to taste.
Season, strain, and serve with the steak.
Kale with Tête de Moine and Lemon Cream Sauce
veg side cheese
You'll need a generous amount of kale - it will disappear almost like spinach in this recipe.
You'll want to use a melty cheese. I liked the tète de moine, but any hard melty cheese like gruyère, emmental, or even parmesan would work well.
You can make a decorative rose out of a Tête de Moine by shaving thin slices from the around the centre of the cheese wheel with a specialist Girolle.
Or a coarse approximation using a potato peeler or a cheese slicer.
Serves 4
- 10 oz kale leaves
- 1-2 garlic cloves, sliced or minced
- large knob of butter
- 4 tblsps double cream
- stock
- ¼ cup Tête de Moine or similar cheese, grated
- juice of 1 lemon
Cut away the stalks from the kale, wash and drain them and roughly tear or chop.
Mix the lemon juice with about an equal quantity of the cream.
Heat a large knob of butter or a splash of olive oil in a saucepan or skillet and sweat the kale until it begins to collapse, but still retains its vibrant green colour.
Add sliced garlic and sweat until fragrant.
Add some cream, bubble and then add grated cheese and stir until it thickens and all melts together.
Off the heat stir in the cream and lemon juice mixture.
Season if required and serve.