Sue's Vee Duck - Post-Valentine 2025
I got a sous-vide affair for Christmas. Well, technically I only got the plastic tub to put the water in, despite everything being on my list 😠, but still it was a start.
I bought myself the rest.
My meal plan was to try my new sous-vide affair on some duck breasts, and serve them with orange sauce, a beetroot purée, fondant potatoes, and cabbage leaves arranged like an oyster shell with a pile of horseradish pearls atop.
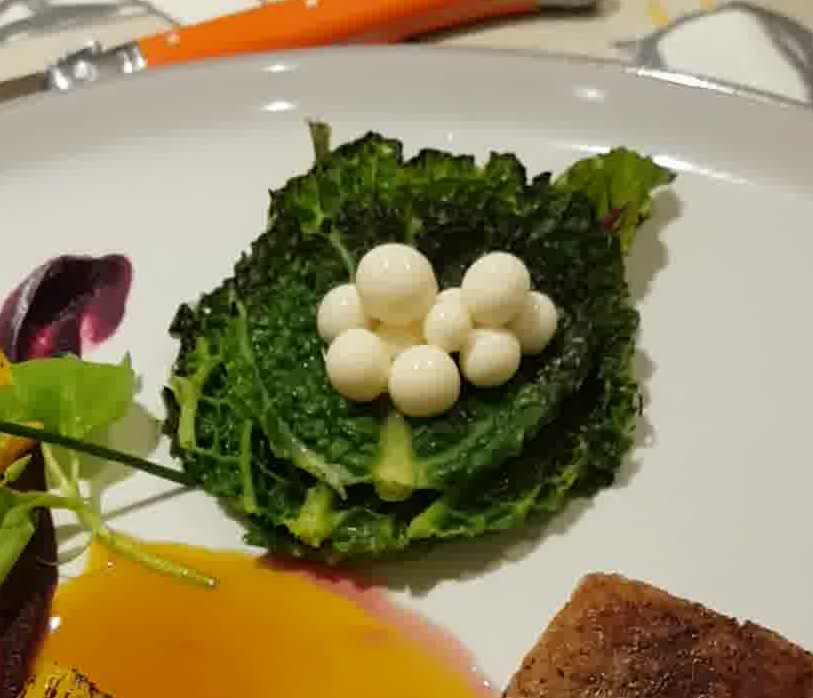
On reflection perhaps savoy cabbage was not the best choice as it didn't look at all like a shell; oyster, scallop or otherwise. Perhaps a Chinese or white cabbage could be made to look more convincing? Or I could abandon shell, and go for more of a nest - made of crispy onions maybe?
Maybe next time.
But the horseradish pearls were great!
I worked on getting the pearls right for about a week not continuously you understand which turned out to be quite tricky, but should be easily managed in a couple of hours with a bit of practice.
The day ahead I made up my beetroot purée, orange sauce and the final, perfect, round of horseradish pearls. I also seasoned the duck breasts and set them to dry off in the fridge overnight to concentrate their flavour.
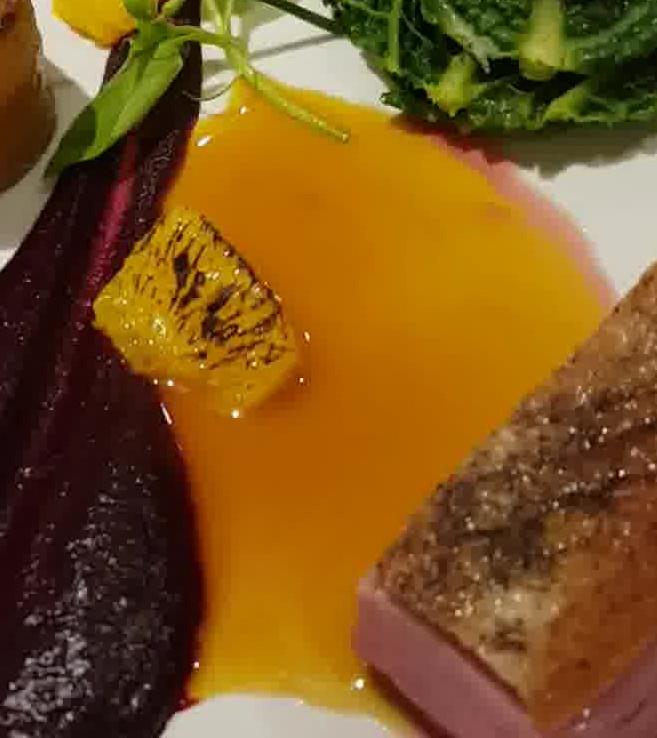
Cut some tidy orange segments, set them on baking foil So you don't set fire to your chopping board! and torch them lightly until they develop attractive branching scorch lines across the surface.
Torch the edges of the cabbage shells and arrange two or three of them on top of each other as best to imitate an oyster (or scallop) as you can. Pile horseradish pearls on top.
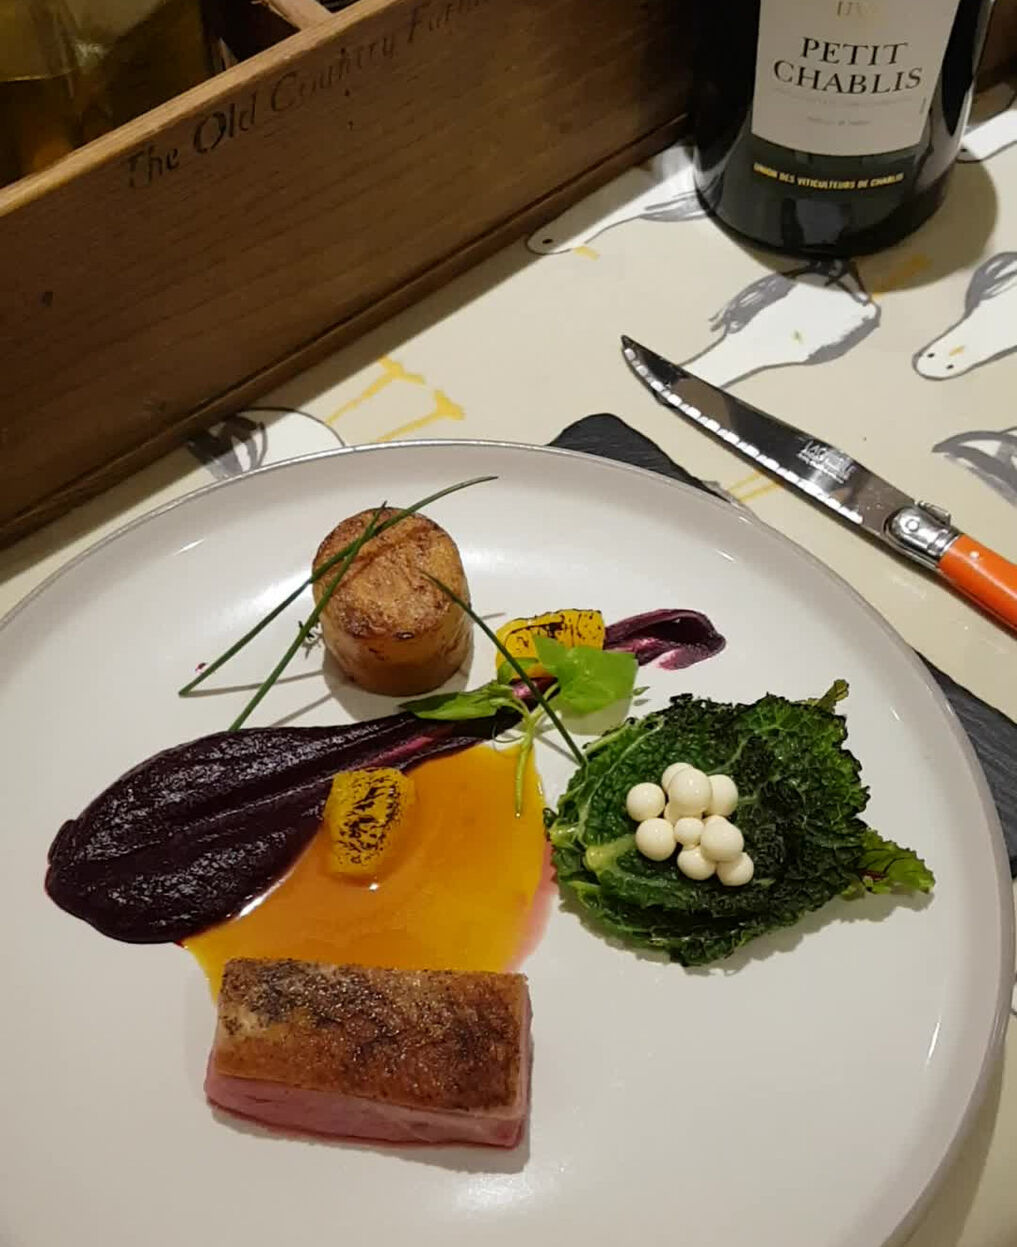
Cut a neat lozenge of duck breast (lay it on a chopping board skin-side-down for this) and place it on the plate. Add a potato cylinder or two, arrange a few scorched orange segments, drizzle a puddle of orange sauce, decorate with a few chives and salad leaves.
Present to gasps and applause. You know, if you had an audience 🙁
My meal plan was to try my new sous-vide affair on some duck breasts, and serve them with orange sauce, a beetroot purée, fondant potatoes, and cabbage leaves arranged like an oyster shell with a pile of horseradish pearls atop.
On reflection perhaps savoy cabbage was not the best choice as it didn't look at all like a shell; oyster, scallop or otherwise. Perhaps a Chinese or white cabbage could be made to look more convincing? Or I could abandon shell, and go for more of a nest - made of crispy onions maybe?
Maybe next time.
But the horseradish pearls were great!
I worked on getting the pearls right for about a week not continuously you understand which turned out to be quite tricky, but should be easily managed in a couple of hours with a bit of practice.
The day ahead I made up my beetroot purée, orange sauce and the final, perfect, round of horseradish pearls. I also seasoned the duck breasts and set them to dry off in the fridge overnight to concentrate their flavour.
Cut some tidy orange segments, set them on baking foil So you don't set fire to your chopping board! and torch them lightly until they develop attractive branching scorch lines across the surface.
Torch the edges of the cabbage shells and arrange two or three of them on top of each other as best to imitate an oyster (or scallop) as you can. Pile horseradish pearls on top.
Cut a neat lozenge of duck breast (lay it on a chopping board skin-side-down for this) and place it on the plate. Add a potato cylinder or two, arrange a few scorched orange segments, drizzle a puddle of orange sauce, decorate with a few chives and salad leaves.
Present to gasps and applause. You know, if you had an audience 🙁
menu
Duck of Orange
Crispy Sous Vide Duck Breasts
A Fondant Potato Cylinder
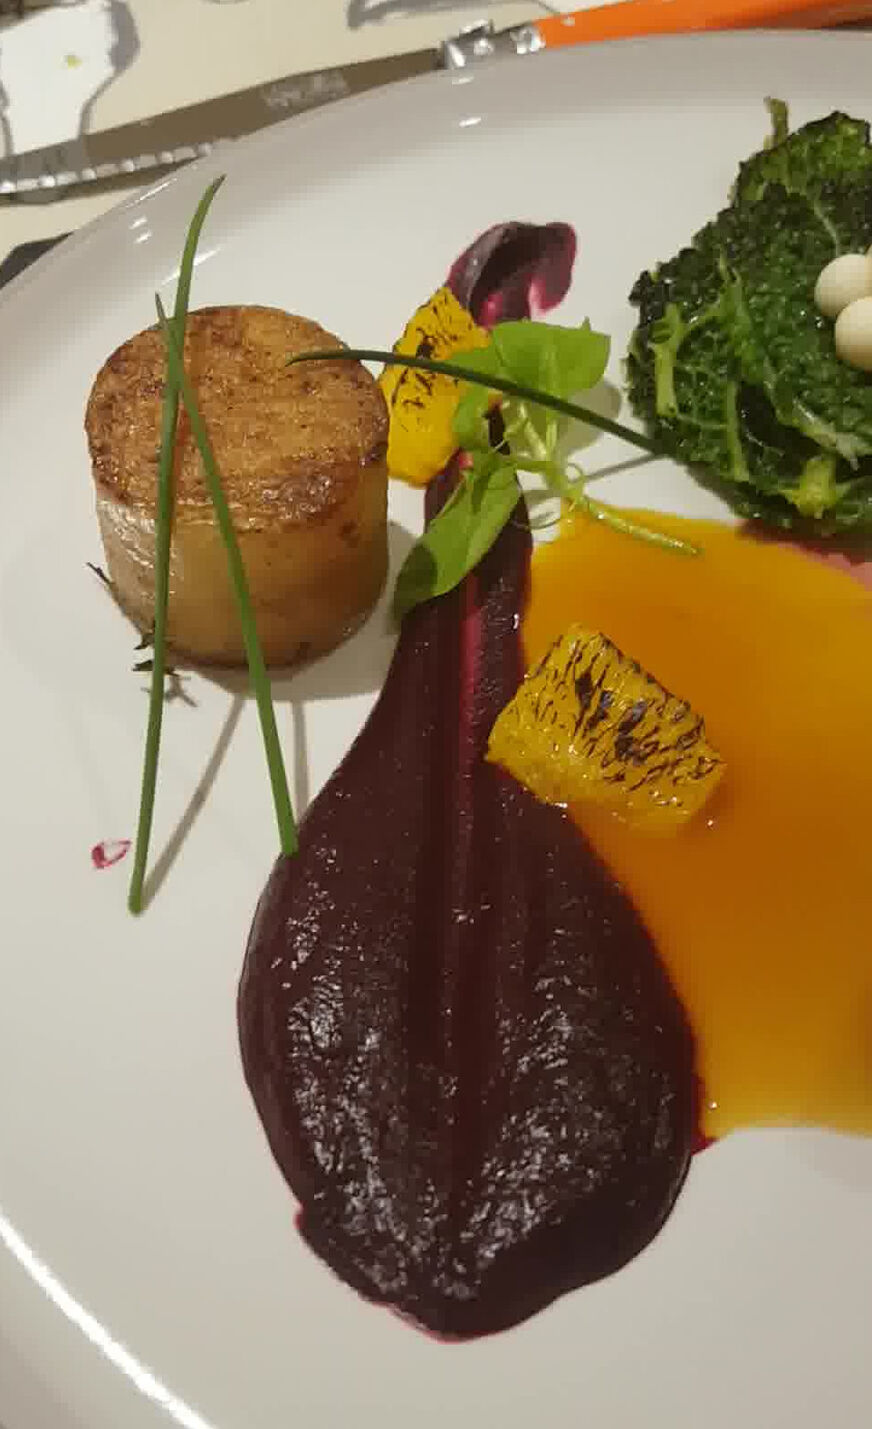
A smear of Silky Smooth Beetroot Purée
Horseradish Pearls
Crispy Sous Vide Duck Breasts
With...
Orange SauceA Fondant Potato Cylinder
A smear of Silky Smooth Beetroot Purée
Horseradish Pearls
Served on...
A Cabbage Seashell
If you squint.
Orange Sauce
vegan sauce
This sauce can be really orange-y depending on how much orange you use.
I think you do need to add some stock to give the sauce body and depth, so it doesn't just taste like thickened orange juice,
but you should try to find a very pale stock in order to retain the magnificent bright colour.
You could even use vegetable stock to make the thing vegan! (Skip the butter. And the honey.)
You could add more complexity with a splash of Grand Marnier or some cider vinegar if you fancied.
As an aside, the juicer I used also generated quite a lot of orange foam, which might be quite nice to use in other culinary contexts?
You could add more complexity with a splash of Grand Marnier or some cider vinegar if you fancied.
As an aside, the juicer I used also generated quite a lot of orange foam, which might be quite nice to use in other culinary contexts?
Makes about 1 Cup
Ingredients
- 4 navel oranges
- 1-2 shallots
- perhaps ½ cup white wine
- perhaps ½ cup light stock
- handful of sprigs of thyme
- couple lumps butter
- tablespoon of honey or to taste
- salt & pepper
- a pinch or three of xanthan gum
Peel the zest from 2 of the oranges, in as large strips as you can manage.
Either do this with a sharp knife, taking care not to include any white pith, or roughly peel with a vegetable peeler then slice the pith away from the zesty pieces.
(The pith is bitter.)
Plunge the zest into boiling water for a few minutes, then refresh in cold water.
Chop the shallots and simmer them in enough white wine to cover until it has reduced by two thirds.
Add the stock and continue reducing (unless the stock is already reduced) It's best if the stock is light in colour so as not to darken the final sauce.
Add thyme and blanched orange zest.
Add the orange juice and reduce a little to intensify the flavour.
Add a tablespoon or so of honey and salt & pepper seasoning to taste.
Whisk in a few lumps of butter, then thicken the sauce as desired with just a pinch or two of xanthan gum.
Strain the sauce to serve.
Plunge the zest into boiling water for a few minutes, then refresh in cold water.
This is to remove any extra bitterness, though I'm not sure it's strictly necessary if you managed to get rid of all the pith.
Juice the oranges no pith, if you're using a juicer, reserving a few segments for decoration.
Cut the segments out with a sharp knife along the inside of their membranes so you have a clean honeycombed appearance.
Chop the shallots and simmer them in enough white wine to cover until it has reduced by two thirds.
Add the stock and continue reducing (unless the stock is already reduced) It's best if the stock is light in colour so as not to darken the final sauce.
Add thyme and blanched orange zest.
Add the orange juice and reduce a little to intensify the flavour.
Add a tablespoon or so of honey and salt & pepper seasoning to taste.
Whisk in a few lumps of butter, then thicken the sauce as desired with just a pinch or two of xanthan gum.
Strain the sauce to serve.
Super orangey in taste and colour.
Silky Beetroot Purée
veg side

One of the problems of blending vegetables like beetroots is that you need to add so much liquid to get the blend going that you can end up diluting the purée.
So why not lubricate with the vegetable's own juice instead?
I juiced about the same number of beetroots as I kept whole for roasting.
This seemed to result in about the right proportion of liquid/solid for blending, with just a bit of stock for flavour.
So why not lubricate with the vegetable's own juice instead?
I juiced about the same number of beetroots as I kept whole for roasting.
This seemed to result in about the right proportion of liquid/solid for blending, with just a bit of stock for flavour.
Makes about 1 Cup
Ingredients
- a dozen smallish beetroots
- 25g butter a couple of good chunks
- ¼-½ cup chicken or duck stock
- rosemary and thyme sprigs optional
- salt & pepper
Juice half the beetroots.
Cut the top off the other beetroots, along with any leafy stalks, and trim away any long root.
Place them cut top side down in an oven-proof dish, season and drizzle with olive oil. You can throw on some thyme and rosemary and cover with tin foil, if you like.
Bake at Gas Mark 5 for about an hour until they are tender and easily penetrated with a knife (they won't feel completely soft).
Scrape their skins off with a small knife or peeler, then roughly chop them and put them in a blender or food processor along with some stock, a few chunks of butter, and the beetroot juice.
Blend for 5 minutes until you get a nice smooth purée. Add more stock, or water, if necessary to keep things moving.
Hopefully the purée will be so smooth, like mine, that you won't even need to pass it through a sieve!
Season and keep warm until using.
Super Silky! And incredibly red.
Fondant Potato Cylinders
side veg

Choose waxy potatoes I used large new Cyprus potatoes that are fatter than the depth of cookie/vegetable cutter you intend to use.
I have sturdy metal ones, the smallest of which is 4cm wide and 4cm deep, so that's what I used.
I have sturdy metal ones, the smallest of which is 4cm wide and 4cm deep, so that's what I used.
Ingredients
- waxy potatoes
- large knob butter
- sprigs of thyme
- couple of cloves of garlic
- chicken or duck stock
- salt & pepper
Trim the top and bottom of your potatoes to the height of your cutter. It will be much easier to push the cutter through even if you've removed just the skin.
Press your cutter through the potato and extract neat potato cylinders.
Throw in a generous knob of butter along with a couple of peeled, halved cloves of garlic and a small bunch of thyme, and when the butter foams, baste the potato for few minutes until the garlic begins to colour and the potatoes are well-coated.
Season generously with salt & pepper and stand the potato cylinders in a close-fitting oven-proof dish.
De-glaze the pan with chicken stock. Heat it until it bubbles then pour everything over the potato until the stock comes about half-way up the cylinders.
Bake at Gas Mark 5 for about 30 minutes until the potato is tender but not falling apart.
If you're not using the potato cylinders immediately, store them in salted or acidulated water until required to prevent browning.
Heat vegetable oil in a frying and brown both end of the cylinders over high heat until golden.Throw in a generous knob of butter along with a couple of peeled, halved cloves of garlic and a small bunch of thyme, and when the butter foams, baste the potato for few minutes until the garlic begins to colour and the potatoes are well-coated.
Season generously with salt & pepper and stand the potato cylinders in a close-fitting oven-proof dish.
De-glaze the pan with chicken stock. Heat it until it bubbles then pour everything over the potato until the stock comes about half-way up the cylinders.
Bake at Gas Mark 5 for about 30 minutes until the potato is tender but not falling apart.
Excellent!
Be very careful when lifting the cylinders out - they may come apart. Get a palette knife or a spoon underneath them and lift from the bottom.
Although you need to beware of over-cooking these, they do keep warm quite well if you turn the oven down to minimum after about 25 minutes when they still have some bite to them.
Horseradish Pearls
veg side
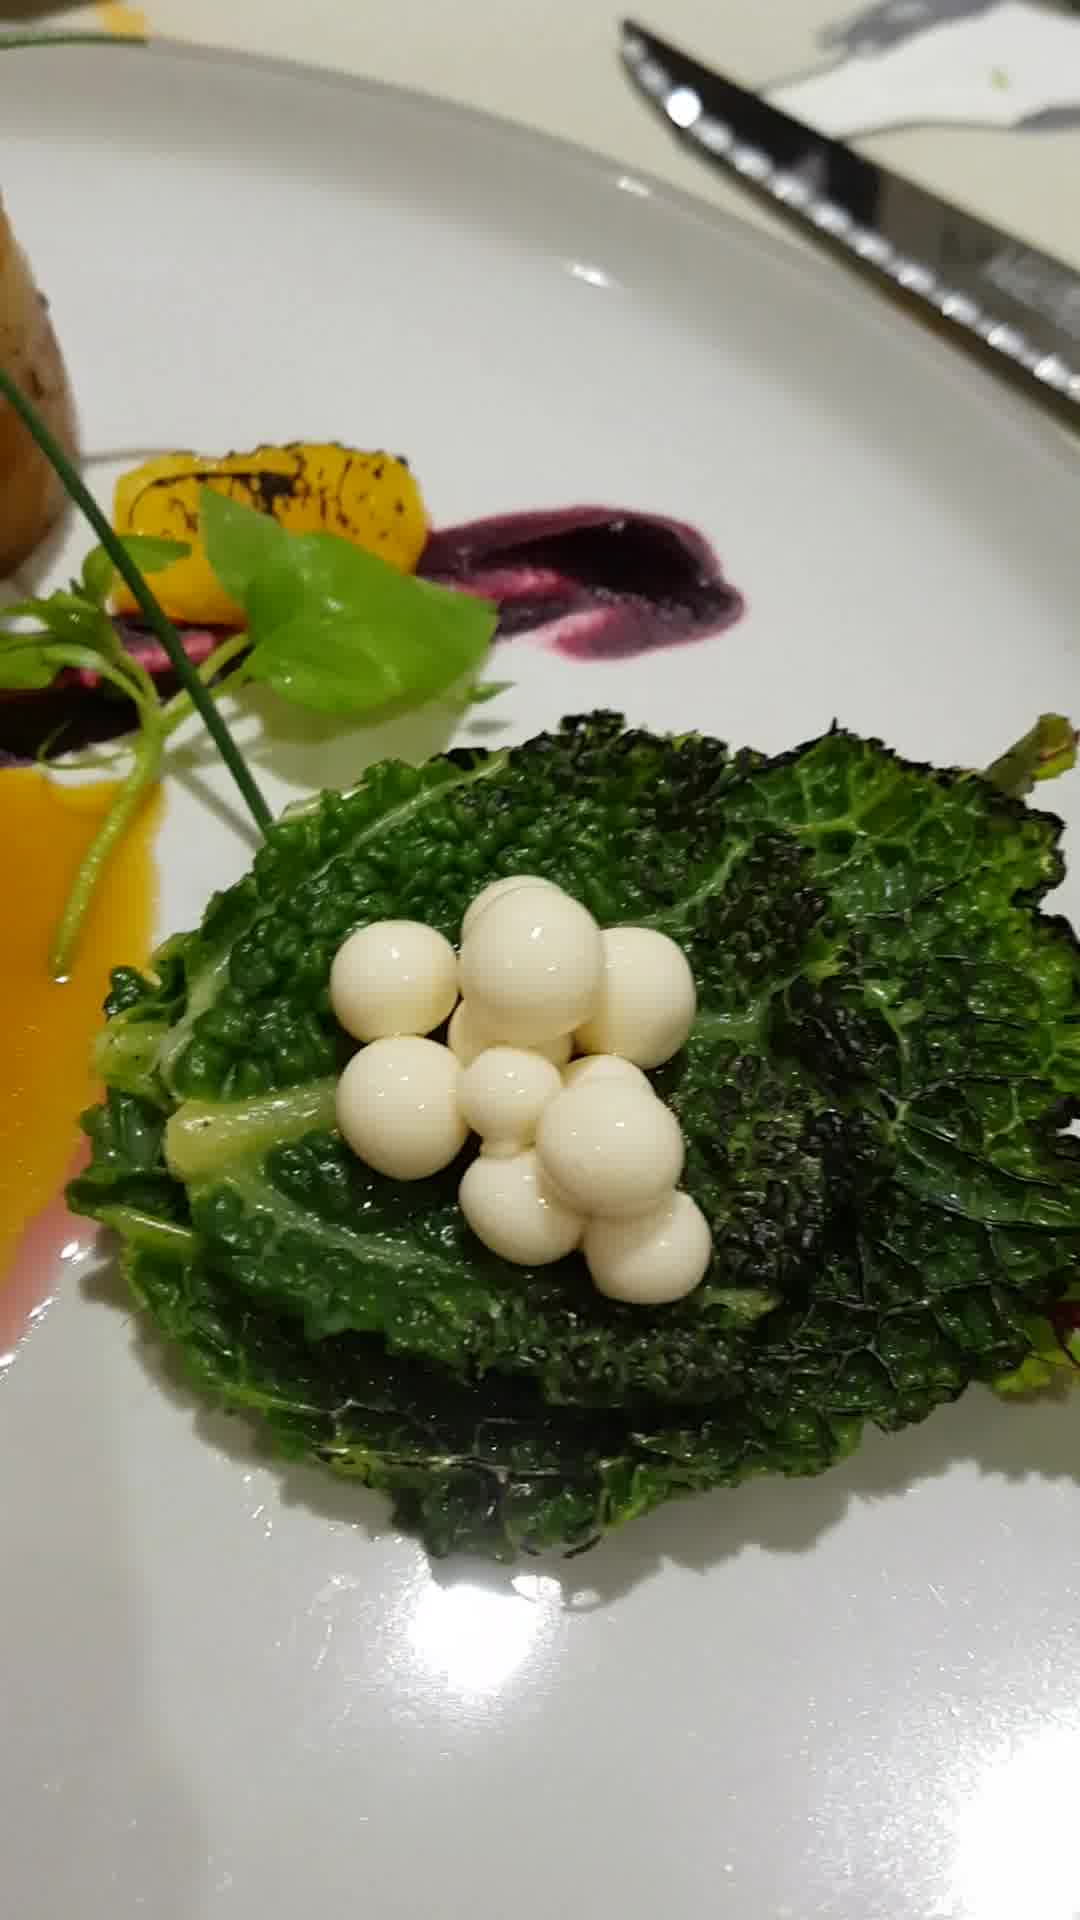
What I wanted was some small spheres with a horseradish flavour that tasted of horseradish and looked like pearls.
I planned on using agar agar and cold oil to make the spheres, rather than spherifying them, at least for this first round.
First I tried making my mixture from milk, cream and grated horseradish, but this thickened too aggressively with the agar agar, and the droplets seemed too light to sink through the oil.
So then I tried using apple juice with a little cream, which kind-of worked, but I didn't like the flavour.
I finally hit on heating the agar agar with wine, adding a little cream to give a whitish iridescence, and steeping in grated horseradish.
This works quite well, though getting the pearls to sink into the oil is a bit of a challenge. Using a small syringe wasn't working for me, so I switched to just dripping the mixture from a teaspoon.
It seems necessary to flick them downwards off the spoon into the oil:
I took a teaspoonful of the mixture, held the spoon a few inches above the surface of the oil, then tipped the spoon while dropping it downwards so fat drops would squirt off the spoon into the oil.
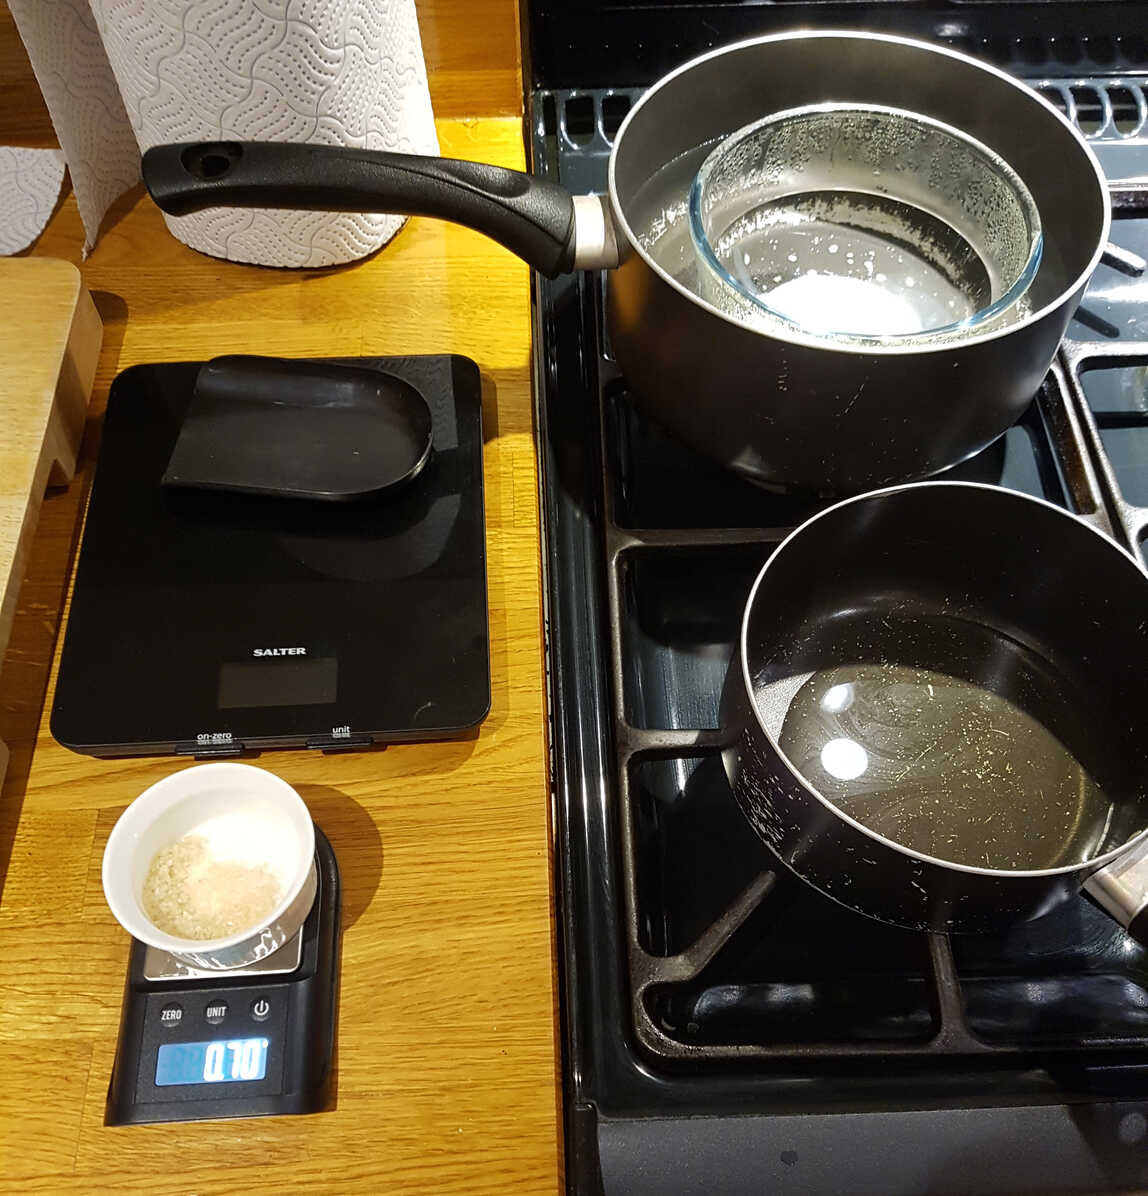
Also the amount of agar agar is quite sensitive, so you might need to buy yourself some micro-scales to accurately weigh things out.
You need to keep the mixture warm in a bain-marie while you do all this to prevent it from setting too soon. But you don't want it to be too hot so as to degrade the horseradish' potency.
A bit of trial and error may be required 🙂 About a third of the novelty shapes I created were usably pearl-like.
I planned on using agar agar and cold oil to make the spheres, rather than spherifying them, at least for this first round.
First I tried making my mixture from milk, cream and grated horseradish, but this thickened too aggressively with the agar agar, and the droplets seemed too light to sink through the oil.
So then I tried using apple juice with a little cream, which kind-of worked, but I didn't like the flavour.
I finally hit on heating the agar agar with wine, adding a little cream to give a whitish iridescence, and steeping in grated horseradish.
This works quite well, though getting the pearls to sink into the oil is a bit of a challenge. Using a small syringe wasn't working for me, so I switched to just dripping the mixture from a teaspoon.
It seems necessary to flick them downwards off the spoon into the oil:
I took a teaspoonful of the mixture, held the spoon a few inches above the surface of the oil, then tipped the spoon while dropping it downwards so fat drops would squirt off the spoon into the oil.
Also the amount of agar agar is quite sensitive, so you might need to buy yourself some micro-scales to accurately weigh things out.
You need to keep the mixture warm in a bain-marie while you do all this to prevent it from setting too soon. But you don't want it to be too hot so as to degrade the horseradish' potency.
A bit of trial and error may be required 🙂 About a third of the novelty shapes I created were usably pearl-like.
Hopefully makes a good half dozen pearls
Ingredients
- 80ml white wine
- 8g agar agar
- 10-15ml double cream
- 20g grated horseradish root
- salt & pepper
- 1 litre neutral vegetable oil, chilled
Pour neutral vegetable oil like sunflower into a fairly tall container and put it in the fridge overnight.
Remove from the heat and after a few seconds mix in the cream and the grated horseradish. Season with a little salt & pepper.
Set the saucepan in the bain-marie to keep warm for 5-10 minutes while the horseradish flavours the liquid. Give it a few stirs.
Strain the mixture into the pre-warmed glass bowl you have ready, pushing it through the sieve with the whisk. Continue to keep the bowl and strained mixture warm in the bain-marie.
Now you are ready to start dripping the mixture into the container of oil. Use a spoon or a syringe, pipette, sauce bottle or whatever you like to drip fairly fat drops into the oil. The hot droplets will congeal and set as they sink through the cold oil making nicely formed pearls at the bottom.
Honest!
Pour the container of oil back into the bottle through a sieve, catching the pearls in it. My pearls kept well covered in the same cold oil in a smaller dish in the fridge for several days.
You can wash off the oil before using them if you need them to be clean.
If you like you can also stick it in the freezer for 20 minutes before using it to give it an extra chill, which is what I did, but I really don't know if that's necessary.
Grate the horseradish.
Measure out the agar agar.
Set up a large pot or bain-marie with simmering water, and put an extra glass bowl in it.
During my early experiments I was using quite a lot more cream, so I heated it up in this bowl before adding it to the hot wine,
but if you're only adding a small amount that may not be necessary.
Bring the white wine to a boil in a small saucepan and whisk in the agar agar. Continue simmering and whisking for two minutes.Remove from the heat and after a few seconds mix in the cream and the grated horseradish. Season with a little salt & pepper.
Set the saucepan in the bain-marie to keep warm for 5-10 minutes while the horseradish flavours the liquid. Give it a few stirs.
Strain the mixture into the pre-warmed glass bowl you have ready, pushing it through the sieve with the whisk. Continue to keep the bowl and strained mixture warm in the bain-marie.
Now you are ready to start dripping the mixture into the container of oil. Use a spoon or a syringe, pipette, sauce bottle or whatever you like to drip fairly fat drops into the oil. The hot droplets will congeal and set as they sink through the cold oil making nicely formed pearls at the bottom.
Honest!
You will need to regularly clear the surface of the oil of floating mixture which doesn't want to sink -
just ladle oil over them with a clean spoon or fork to break the surface tension and they'll sink away.
Pour the container of oil back into the bottle through a sieve, catching the pearls in it. My pearls kept well covered in the same cold oil in a smaller dish in the fridge for several days.
You can wash off the oil before using them if you need them to be clean.
They really looked pretty good, and tasted distinctly of horseradish, but the jellified texture made them difficult to eat with the dish.
I shall probably have to work on a proper spherification so the insides remain liquid.
I shall probably have to work on a proper spherification so the insides remain liquid.
Cabbage Seashells
side veg
I pictured arranging cabbage leaves in a way that imitated a seashell, like an oyster or scallop.
I thought savoy cabbage would look the best, but I think I was wrong about that - they just looked like round cuttings of cabbage leaf.
I tried cutting the raw cabbage leaves into shell-like pieces using a (plastic) cookie cutter, but they were too tough so I blanched them first to soften them up.
I'm not sure that would otherwise be necessary, say with a different cabbage or metal cutters. They would probably cook well enough completely in the beurre monté.
Probably Two leaves per Shell
Ingredients
- cabbage leaves
- butter
- water
Drop whole cabbage leaves into boiling salted water for a couple of minutes, then drop into iced water to shock cool.
Take two fluted cookie cutters and cut rounds of two differing sizes which have shell-like patterns from the leaves.
Prepare a Beurre Monté:
Place a glass bowl in a bain-marie. Pour in a few tablespoons of hot (but not boiling!) water and gradually whisk in enough cold butter to make enough emulsion to cover the cabbage.
Drop the cabbage shells into the beurre and hold them at a hot but not boiling temperature until required. And long enough to heat (or cook!) the cabbage.
Just before using, remove each shell, shake off excess butter and run a torch along the edge furthest from the stalk so it blackens and curls up.
This is my attempt to make the leaf look more shell-like!
Arrange as required.
Yeah, they taste fine - a bit like cabbage really, but they don't look much like shells.
Maybe try again with a different cabbage?
Sous Vide Duck Breasts
fowl main

OK, so the whole reason for the meal was to try out sous-vide-ing some duck breasts, but to be frank I'm not sure it's worth the trouble.
Pan-fried (and oven-finished if required) duck breasts are pretty fabulous and fairly easy to get right anyway.
Given that you still have to crisp-fry the skin of your sous-vided breasts anyway, you don't end up saving any time really.
Plus my skin wasn't as crispy.
Perhaps that's because the sous-vide process soggifies the skin, or perhaps it was just me.
I didn't think the duck meat was cooked quite enough for my taste either, but of course that's just a matter of adjusting the water temperature.
I followed time and temperature suggestions by Kenji López-Alt at Serious Eats. So it's his fault.
I'll just note that some Michelin restaurants of my acquaintance cut the skin off their duck breasts before they sous vide them, then fry them separately and stick them back on afterwards with transglutaminase - the meat glue.
Perhaps there's a reason for that?
Ingredients
- duck breasts
- orange peel, blanched
- salt & pepper
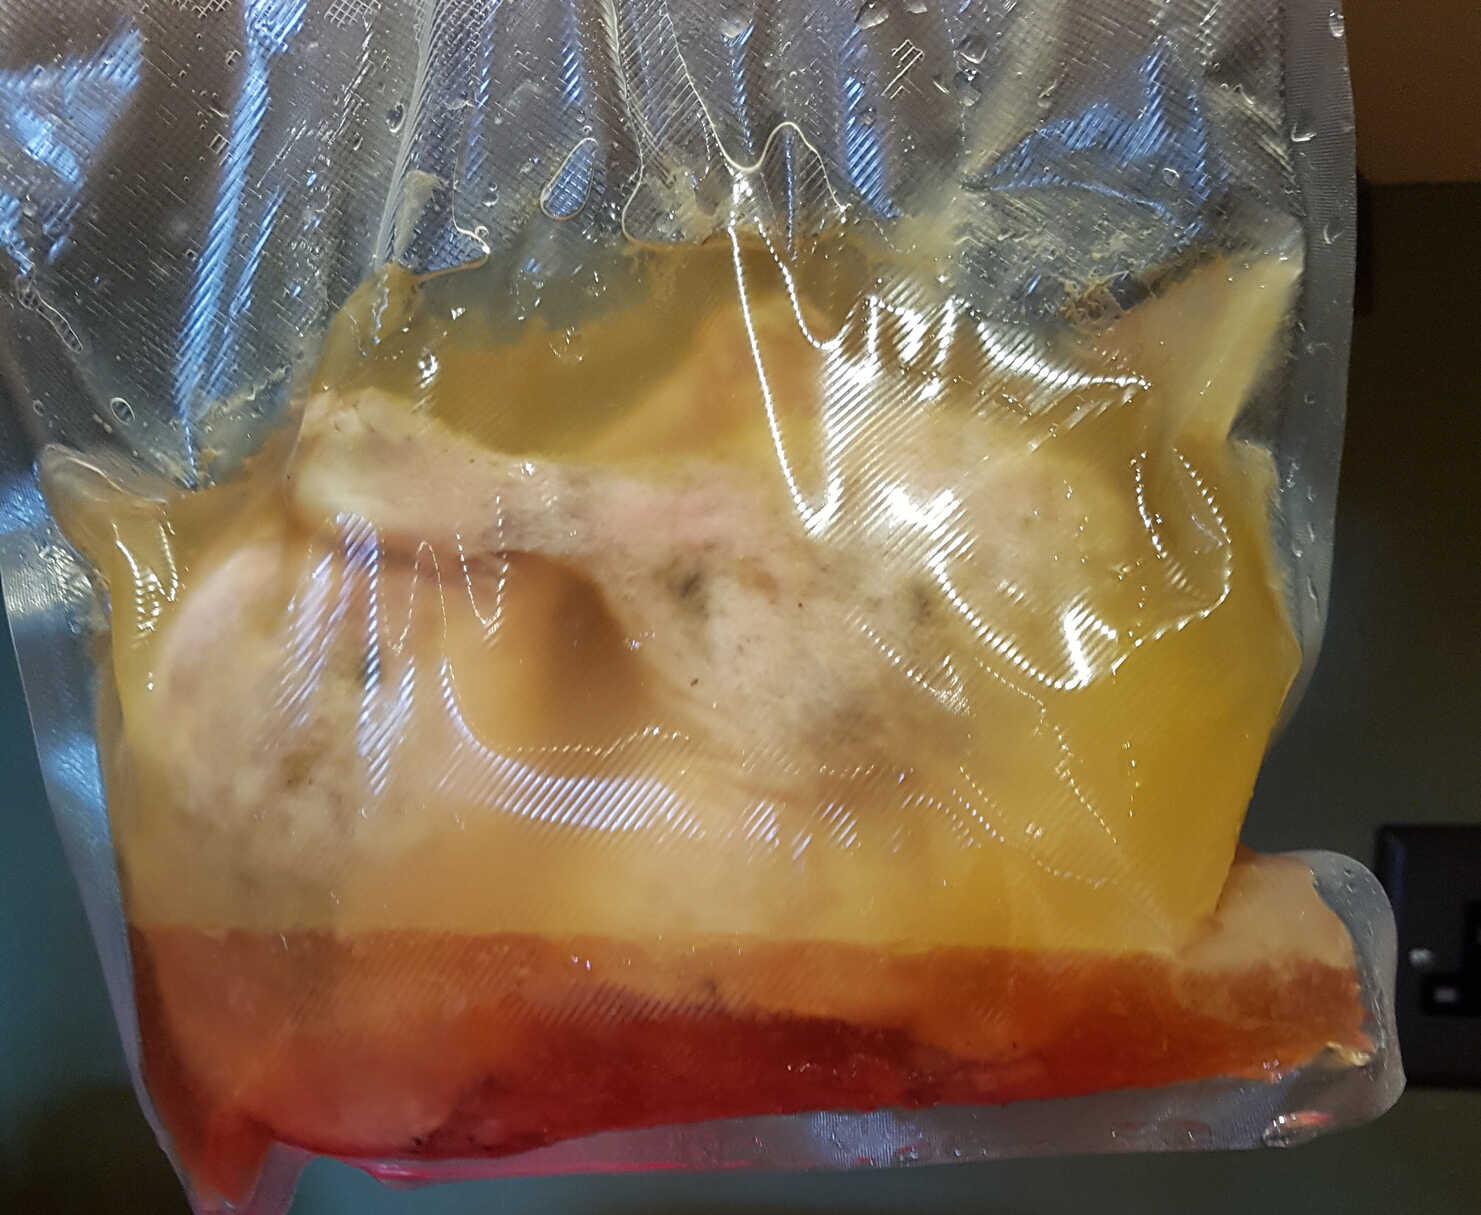
Trim any tendons or silver-skin from the duck breasts. Score the skin in a criss-cross pattern. Season with salt and pepper and place, uncovered, on a rack in the fridge overnight to dry out and intensify the flavour.
Next day, when ready to start, heat the sous vide water bath to 54°C. Seal the duck breasts in vacuum bags along with a few pieces of blanched orange peel. Other flavourings are also available.
Cook them in the bath for between 1 and 4 hours.
Set the heat to high and leave the duck to begin rendering for about 3 minutes.
After the pan gets hot, reduce the heat to medium and continue cooking the skin for another 3-4 minutes until if you're lucky it nicely browns and crisps.
Remove to the chopping board, rest for a few minutes, then slice or trim to tidy up the breast for serving.
Next day, when ready to start, heat the sous vide water bath to 54°C. Seal the duck breasts in vacuum bags along with a few pieces of blanched orange peel. Other flavourings are also available.
Cook them in the bath for between 1 and 4 hours.
Aim for around 2 hours.
When ready to serve, remove the breasts from the bag, pat dry and place skin-side-down in a cold, preferably cast-iron, frying pan.Set the heat to high and leave the duck to begin rendering for about 3 minutes.
After the pan gets hot, reduce the heat to medium and continue cooking the skin for another 3-4 minutes until if you're lucky it nicely browns and crisps.
You may need to pour away excess rendered fat as you go.
Flip the duck breast and brown the flesh side for a bare 30 seconds.Remove to the chopping board, rest for a few minutes, then slice or trim to tidy up the breast for serving.
Meh. A lot of work for little benefit.
If there was one improvement over just frying them normally I'd say that the degree of done-ness was more uniform throughout the breast.
If there was one improvement over just frying them normally I'd say that the degree of done-ness was more uniform throughout the breast.
Sous Vide Duck Confit
fowl snack ingredient
I have previously confited duck legs using a Heath-Robinson affair of partial tinfoil lids over a slow cooker - to good effect I have to say.
But I figured this might be something at which my new sous vide gear would shine, so I read up a bit and it seems there are two options:
Allegedly you don't need any extra duck fat when using vacuum bags. But I don't believe it. Why mess with tradition?
Oh wait, I've got an electric immersion heater and water circulation pump. That's not traditional at all!!
- Reproduce the traditional temperature and timings.
- Lower the temperature and increase the time significantly.
- Why bother?
- Sounds like a challenge!
Allegedly you don't need any extra duck fat when using vacuum bags. But I don't believe it. Why mess with tradition?
Oh wait, I've got an electric immersion heater and water circulation pump. That's not traditional at all!!
Ingredients
- sea salt flakes
- pepper
- herbs like thyme, rosemary, bruised
- juniper berries, bruised
- garlic cloves, crushed
- a few tablespoons of duck fat
Although Serious Eats doesn't recommend it, I quite like the idea of a traditional cure first,
so I rubbed my duck legs with a tablespoon or so of salt each mixed with some bruised thyme, rosemary, garlic and juniper berries.
These I left wrapped in clingfilm in the fridge overnight.
Which may have been a mistake. My first round of legs were way too salty. Either I had cured them for too long, or not cleaned them sufficiently well before bagging.
So cure your legs for only 4-8 hours, then rinse them thoroughly, pat them completely dry and vacuum seal along with a couple of tablespoons of extra duck fat.
Set them in the sous vide for 36 hours at 68°C then cool the bags down and just stick them in the fridge until you want to try them out.
Although the internet seems generally over-worried about botulism poisoning, I'd have little hesitation in keeping them for months.
When you want to eat them, they really are best with the skin nicely crisped up. Which, because of their shape, is difficult to achieve by pan-frying.
So I'd suggest scraping most of the fat off, then either grilling them skin-side up (British grills have the heat at the top!), or roasting them for 5-10 minutes in your hottest oven.
So far so salty.
But shortly I'll have another batch to try!
But shortly I'll have another batch to try!
Duck Rillettes
fowl snack

Rillettes are an ancient French dish, being referred to by the 15th Century novelist Rabelais as brown pig jam.
They are a form of confit, usually made from duck, goose or common commercially - pork, and there are two ways of making them:
Perhaps a week.
Since I'd bought a whole duck to start with, from which I confit-ed the legs, I had the wings left over. So I cooked those up in stock, wine, thyme, rosemary, garlic, juniper berries and orange zest for 4 hours in the oven until they were completely tenderized, and shredded them down too, together with some of the resulting liquor..
- Just shred some duck that has already been confited, mix it with flavourings, and (re-)seal it in duck fat.
- Slowly simmer the duck in water, stock or wine until the meat is ready to fall off the bones. Then proceed as for 1.
Perhaps a week.
Since I'd bought a whole duck to start with, from which I confit-ed the legs, I had the wings left over. So I cooked those up in stock, wine, thyme, rosemary, garlic, juniper berries and orange zest for 4 hours in the oven until they were completely tenderized, and shredded them down too, together with some of the resulting liquor..
Ingredients
- confit duck legs
- armagnac or calvados
- salt & plenty of pepper
Optional Flavourings:- grated orange zest
- parsley or rue!
- shallots, minced
- nutmeg powder
- cinnamon powder
- allspice powder
- cloves powder
Scrape the fat off the confit duck legs, and remove the skin.
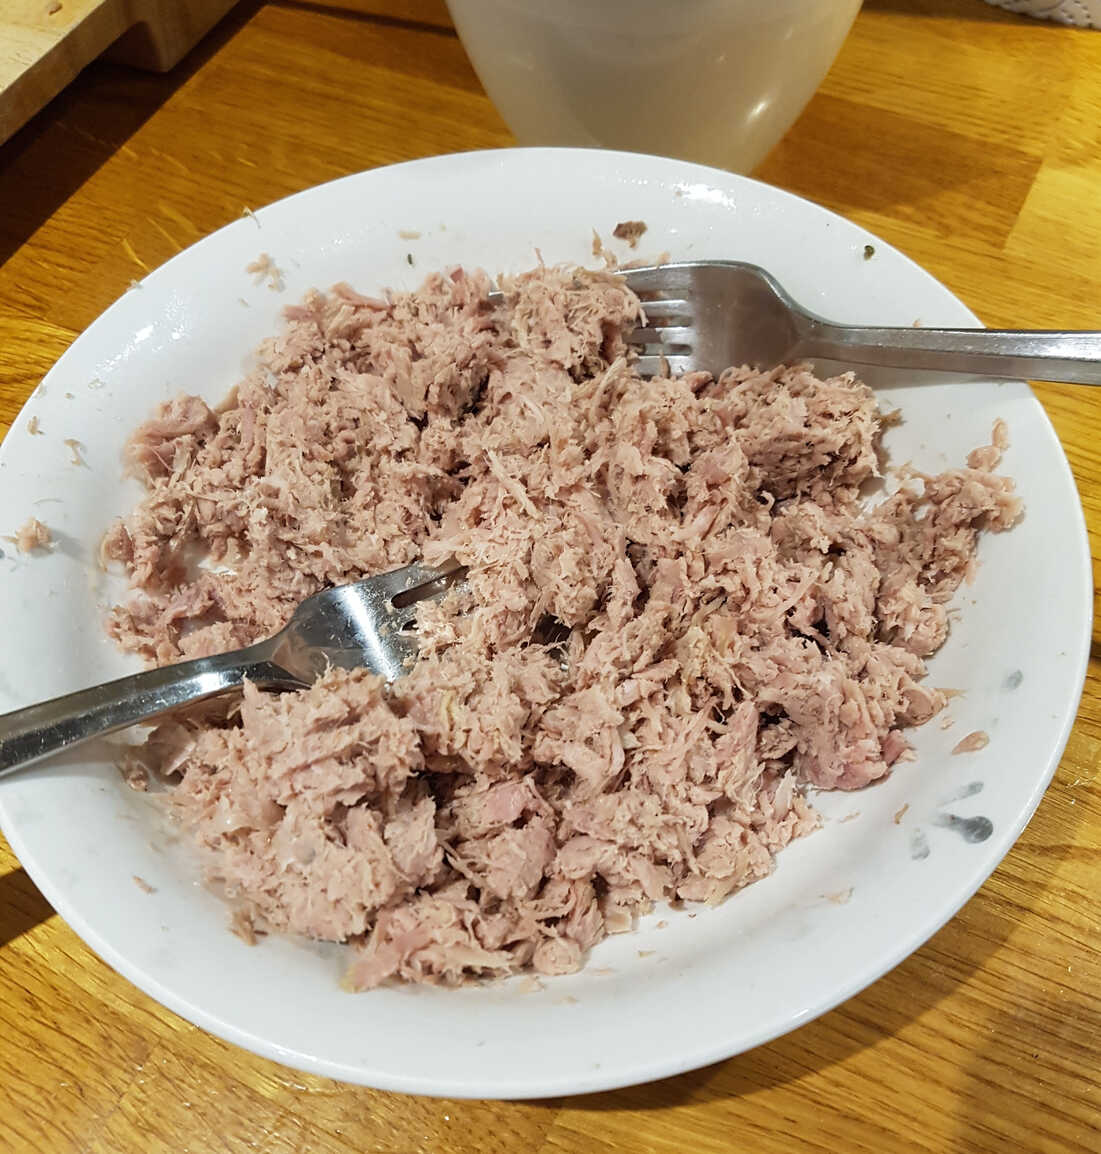
Pull apart the meat and place it in a large, flat bowl carefully avoiding the bones, cartilage or gristle.
Using a couple of forks, thoroughly shred the duck meat.
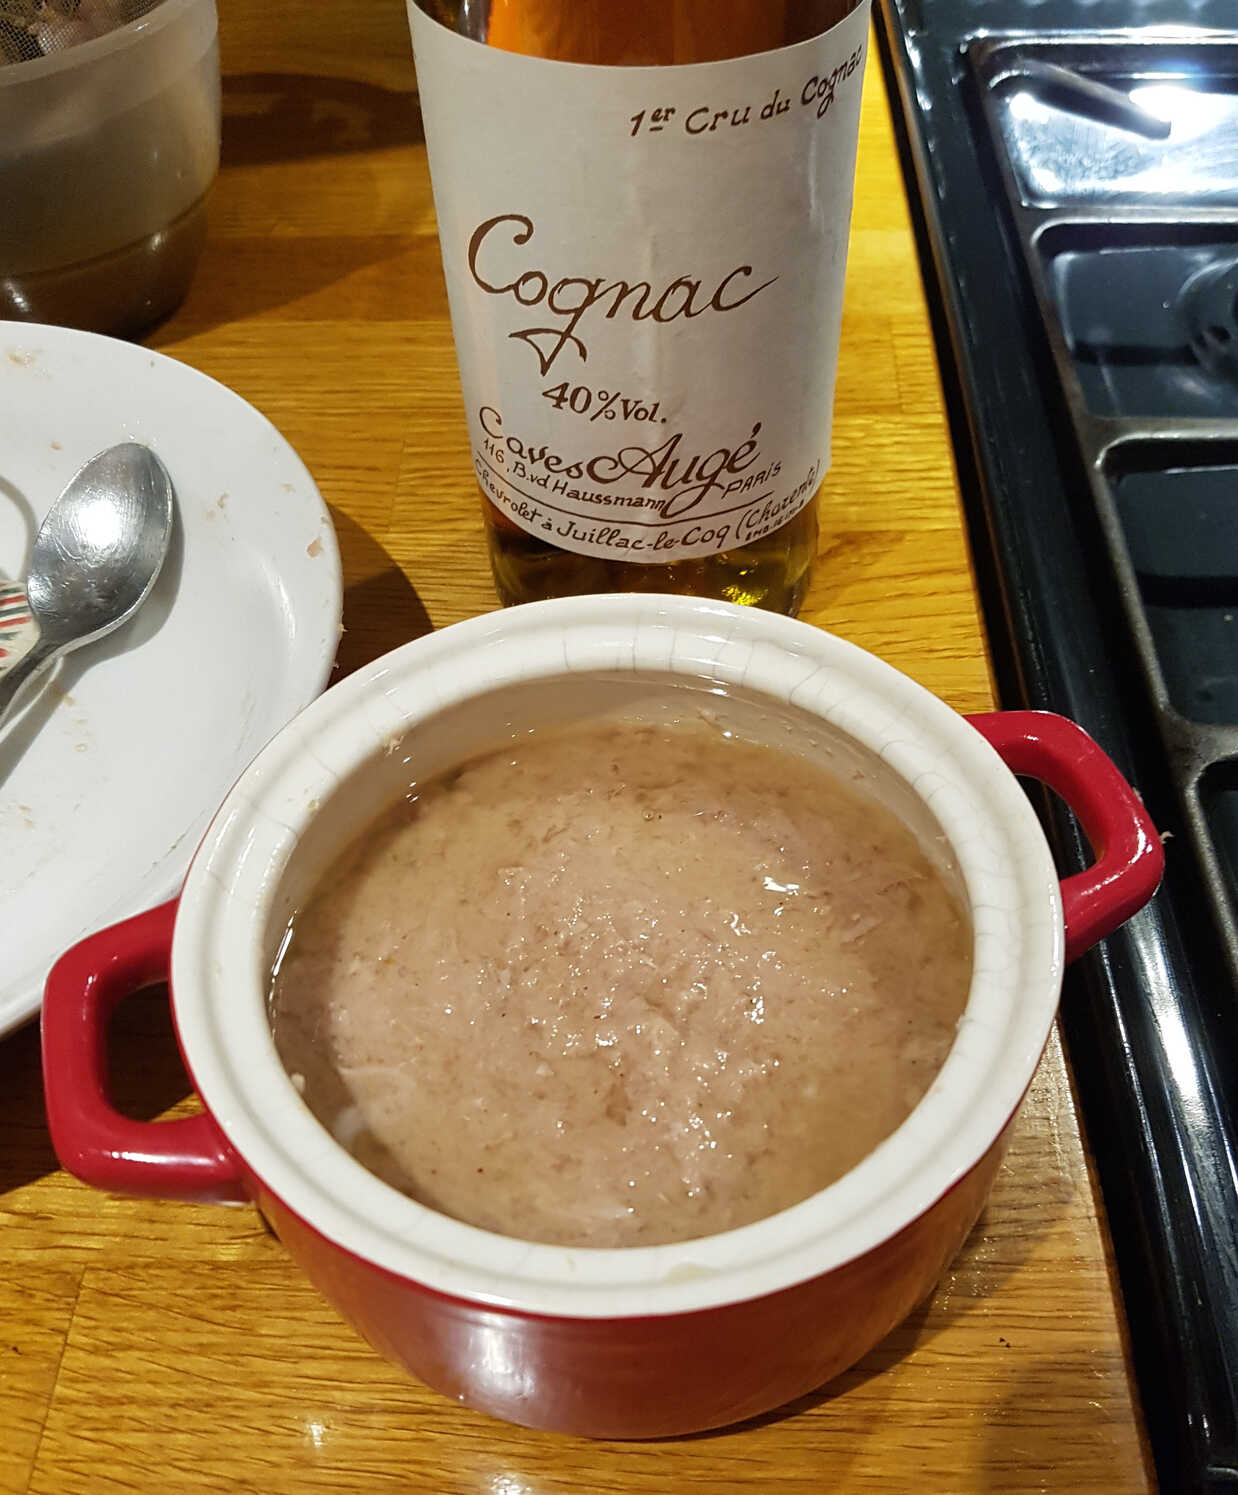
Beat in some cold duck fat until the rillettes are creamy with good mouthfeel, and add armagnac, cognac or calvados and the flavourings of your choice.
Best aged for a week, this should keep in the fridge for weeks or months.
Allow them to come back up to room temperature to serve.
Pull apart the meat and place it in a large, flat bowl carefully avoiding the bones, cartilage or gristle.
Using a couple of forks, thoroughly shred the duck meat.
Apparently you can also do this in a stand-up mixer with a paddle attachment. Whatever that is.
Of course you could just use a food processor, but I think rillettes is supposed to have a different, stringier texture than paté, so better not.
Moisten the meat with a little duck stock, or confit juice to taste - though be careful with this as it can be extremely salty.Of course you could just use a food processor, but I think rillettes is supposed to have a different, stringier texture than paté, so better not.
Beat in some cold duck fat until the rillettes are creamy with good mouthfeel, and add armagnac, cognac or calvados and the flavourings of your choice.
Although you do want the rillettes to be strongly flavoured and well seasoned, since they will be served cold, you can overdo it.
You should be able to taste the armagnac, without it being overpowering.
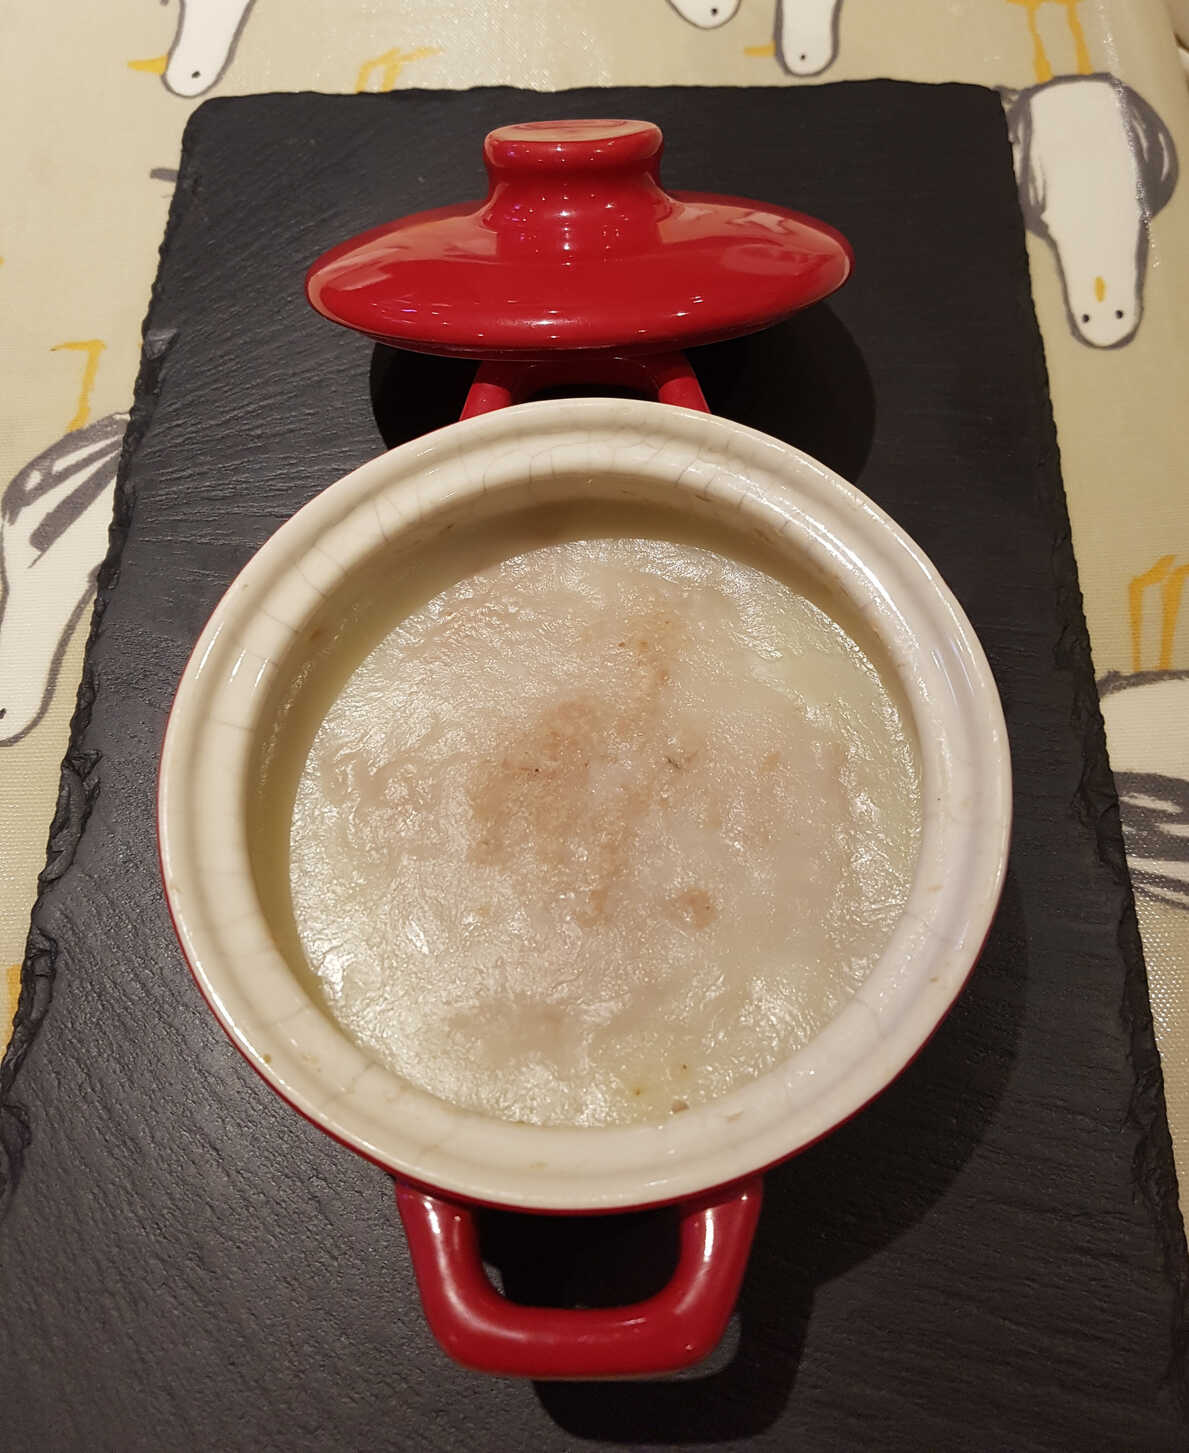
Finally, press the rillettes into ramekins or other ceramic dish to remove any air bubbles and cover with a generous layer of duck fat (you can pour melted fat over to seal properly).Best aged for a week, this should keep in the fridge for weeks or months.
Allow them to come back up to room temperature to serve.
Pretty good stuff, as long as you don't mind fat.
The fork shredding is hard work though. Wish I had a stand-up mixer with a paddle attachment!
The fork shredding is hard work though. Wish I had a stand-up mixer with a paddle attachment!
So I had a bit of disassembly to do first. On the plus side I now have legs for duck confit.