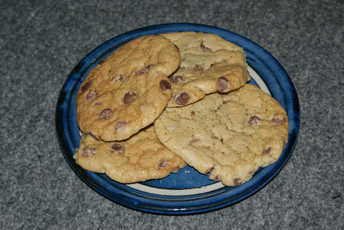
Babysitting With Cookies
I have discovered that babysitting goes better with cookies.
It certainly beats trying to force-feed them fish (yeuch!), olives (yeuch!) or anything you wouldn't find in a jar of Dolmio pasta sauce.
Or at least, it does once the sugar rush has worn off.
Mum bought Rachel's girlies a cookbook for Christmas, and the girls were keen on the recipe for American brownies, so we had a stab at it. Went pretty well I thought.
Chocolate Chip Brownies
sweet veg
Makes about a dozenIngredients
- 6 oz walnuts/pecans or raisins crushed
- 4 oz plain chocolate chocolate
- 6 oz butter
- 12 oz caster sugar
- 1 tsp vanilla essence
- 3 eggs
- 4 oz plain flour
- 1 level tsp baking powder
- 1 baking tin 9"x12"x1"
Preheat the oven to 180°C/350°F/Gas 4 I set Rachel's fan-assisted oven to 160°C
Grease the baking tin and line the bottom with parchment.
Crush the nuts, break the chocolate into a heatproof bowl and stand over simmering water.
Cut the butter into pieces and stir them into the chocolate until everything melts.
Pour the chocolate mixture into a bowl and stir in the sugar and the vanilla. Whisk the eggs then beat them into the chocolate mixture with a wooden spoon.
Sift in the flour and the baking powder, add nuts we used a half-dozen marshmallows instead and mix well.
Pour into the baking tin, smooth the top and bake for 40 minutes. Check after 30 minutes or so.
Leave until cool enough to handle, cut into squares and leave to cool on a wire rack.
From a cookie recipe
on Nigella.com
Astoundingly Good Chewy Chocolate Chip Cookies
sweet veg
Georgina requested an evening of chewy American-style chocolate chip cookies,
so I went online and discovered a suitable-looking Nigella recipe.
Only it wasn't Nigella - it was just a submission to her web-site by someone called "Norm".
What a swizz.
Good job it turned out to be bloody fantastic - or I'd have been coming for you "Norm"! If that's your real name.
Georgina did all the work, since Sophie was busy making dresses. Sigh. They grow up so fast!.
It's a fairly easy recipe for a youngling to manage, though the dough is quite stiff to stir, and I did melt the butter for her and lift the cookies in and out of the oven. But she is at least as competent at setting the oven temperature as her mother.
The dough itself is delicious by the way, so you need to supervise the final stages to make sure it doesn't all disappear before it gets into the oven, but Georgina went mad for the finished product too.
Not literally mad, obviously.
That would be an entirely inappropriate thing to say about a 10-year-old.
Just metaphorically mad.
Makes about 24 cookies
Ingredients
- 2/3 cup (150ml) melted butter
- 2 cups (500ml) lightly packed brown sugar not too brown or it will colour the cookies
- 2 eggs
- 2 tablespoons of hot water
- 2 2/3 cups (650ml) all-purpose (ie plain) flour
- 1 tsp (5ml) baking powder
- 1 tsp (5ml) baking soda (ie bicarb)
- 1/4 tsp (1ml or a 'pinch') salt
- 1 package (270g) Hershey's Chipits milk chocolate chips or other quality chocolate chips - you could also use white/dark or butterscotch chips.
Preheat oven to 375F/190C.
Mix together melted butter, brown sugar, eggs and hot water. Stir in flour, baking powder, baking soda and salt. Mixture will form into a stiffish dough. Stir in chocolate chips until well distributed throughout the dough.
The dough tastes pretty delicious raw , but try not to eat it all. Drop the dough from a spoon onto 3 or 4 ungreased cookie sheets. The mixture will make a couple of dozen reasonably sized cookies. Leave a reasonable amount of room for spreading.
Bake for 8 to 10 minutes until just turning golden brown from white. Don't allow them to brown too much. Eat a few whilst still warm - that's when they're at their best. Store in an airtight tin for as long as you can resist guzzling the lot.
I used 180°C for Rachel's fan-assisted oven, which seemed about right -
the top shelf of cookies took 8 minutes, the middle shelf 12 minutes and the bottom shelf 15
Mix together melted butter, brown sugar, eggs and hot water. Stir in flour, baking powder, baking soda and salt. Mixture will form into a stiffish dough. Stir in chocolate chips until well distributed throughout the dough.
The dough tastes pretty delicious raw , but try not to eat it all. Drop the dough from a spoon onto 3 or 4 ungreased cookie sheets. The mixture will make a couple of dozen reasonably sized cookies. Leave a reasonable amount of room for spreading.
Bake for 8 to 10 minutes until just turning golden brown from white. Don't allow them to brown too much. Eat a few whilst still warm - that's when they're at their best. Store in an airtight tin for as long as you can resist guzzling the lot.
Absolutely delicious - but they can be tricky to prise away from the cookie sheets.
I'm not sure why "Norm" says not to grease them - I would have thought a thin buttering would have helped.
The second time of making, in my own oven, the cookies had a distinctly cakey texture,
and were noticeably thicker than the first lot.
Possibly my (gas) oven wasn't set hot enough since they seemed to take quite a bit longer than 10 minutes.
Possibly my (gas) oven wasn't set hot enough since they seemed to take quite a bit longer than 10 minutes.
It's Haggis Time. Again.
It's Tuesday. It's the 25th January. It's Crackerjack!
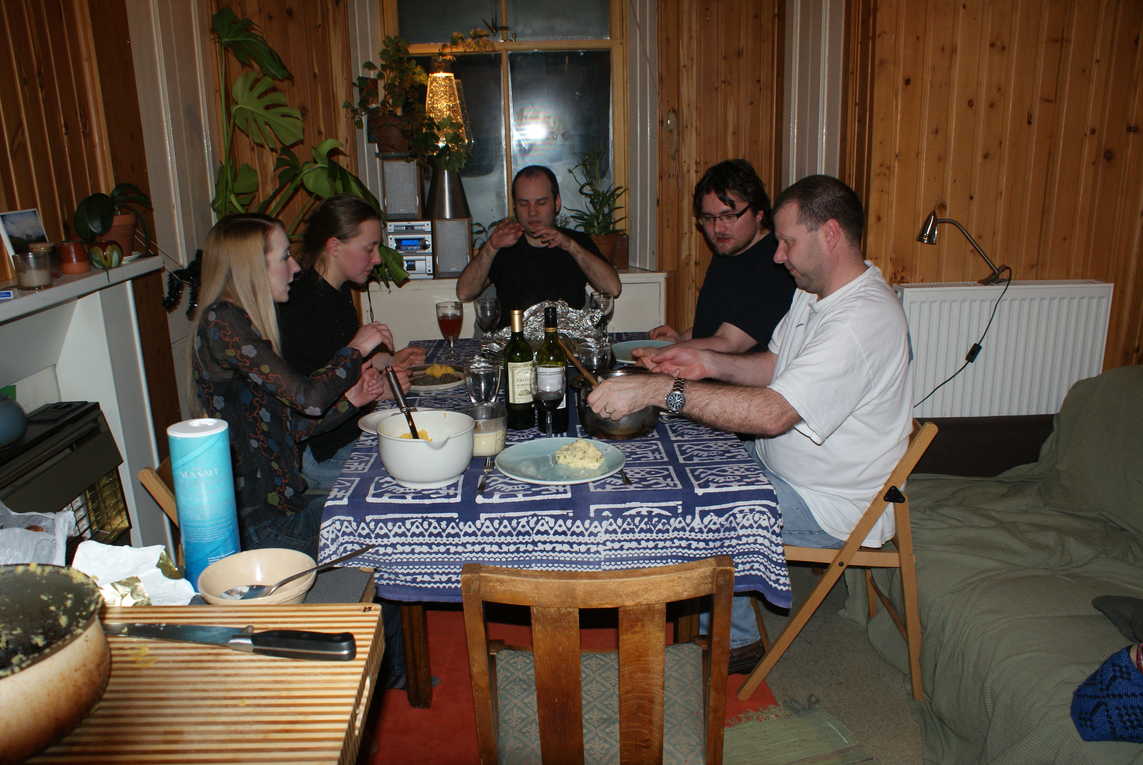
OK, it's not Crackerjack, but it is Burn's Night, so time to wheel out the old Haggis recipe for one more spin.
It seems to be getting harder and harder to find all the bits of sheep you need to make the haggis these days.
This time I had to visit three different butchers before I had everything - no one seems willing or able to sell a complete pluck any more, then I thought the liver I got first was a bit skimpy so went back out for more, and then I had to fight to get hold of any lungs.
On the plus side though, whilst butcher hopping I did score a very nice extra lamb's heart for my aprés offal dinner that night.
Part of the problem with getting all the bits from different butchers (never mind different sheep) is that the quantities end up a bit unbalanced, and vary every time you make this stuff.
This time I had a huge kidney that looked like it might have come from a camel, and that extra tiny liver that I didn't really need.
Which is how come I ended up with a simply unbelievable quantity that was too big for any mixing bowl I possess this time around, and kept me in haggis for the next two weeks.
However I had an interesting discussion with my lung guy about whether he thought it was worth bothering with them at all: I told him how after I'd finished picking all the capillaries out there never seemed to be much left to eat, and he told me that he didn't have that trouble at all after boiling the lungs for 2 hours.
I thought that sounded a bit excessive - considering it might be nice to have some flavour left in the buggers, but I think he was probably right - I boiled mine for an hour this time (double that from last time) and there certainly was a great deal less picking out of capillary to be done. Just the main big fat ones really, and they pulled out a lot easier too.
So this time I simmered the hearts, liver and kidneys for about half an hour first, then took everything out and put the lungs into the same pan for an hour.
This left some offaly nice :) stock after straining which I used to cook the barley and to moisten the heart and lungs when I whizzed them up in the food processor to make mousse (which my food processor did not enjoy - indicating it's unhappiness with clouds of smoke). And in fact this time, I used up all of my cooking water. Probably because I didn't need so much of it cooking the lungs separately.
Though I got the spices better balanced than last time (frying up a sample to taste as you go saves the day), on the whole I didn't like the flavour as much, maybe because there was too much kidney?
Although the earliest Haggis-type recipes like the medieval For hagese, published in Liber Cure Cocorum in (probably) Lancashire around 1430 A.D. are happy to use kidney (and in fact, that recipe doesn't seem to have any liver), later references such as Gervase Markham's mention of haggas or haggus in his 1615 publication The English Huswife often seem to skip the kidneys, and it now doesn't seem to be all that common an ingredient.
Not that it tasted bad or anything - just a bit stronger than I like.
As usual I did my best not to over-pack the ox socks, firmly packing the end of the bag, then rolling the haggis back out again along the whole length so it was only half-stuffed, but as usual I failed, and once again my Haggis did not survive the boiling process un-split.
It's a real shame too - it made it right up to the third hour before finally going, but the trouble is when they split it happens in a real gush, so you don't have very long to rescue the situation and wrap them in tin foil. If you see the warning sign of a thinning patch, like a ladder in a stocking, or an actual hole, then don't hang about - wrap the haggis immediately in aluminium foil.
So back to the drawing board on my packing skills - I really must stop worrying about under-filling the casings no matter how limp they look, since the stuffing swells massively during cooking, and maybe I should think about double-wrapping the haggises in an extra ox cecum?
I actually remembered to weigh stuff as I worked this time so at least I have an idea of what went in - I think next time I would use a bit less liver maybe 2lb, and a lot less kidney - say 8 oz?
Oh, and this year's secret ingredient? Armagnac. Though I did wonder about adding a touch of mint. Those medieval recipes liked to use quite a lot of herbs, which seems like an idea worth resurrecting.
Haggis III
main meat
Feeds an armyIngredients
- 9oz/260g heart
- 2lb 10 oz/1120g liver of which one single liver weighed 1lb/465g
- 1lb 5oz/590g kidney
- 1lb/450g kidney suet
- 1 set of lungs
- 2 cups pinhead oatmeal, which is ¾lb toasted
- 1 cup pearl barley
- 2 medium onions, chopped - about 2 cups
- ½ head garlic, minced
- a glass Armagnac
- spices as for Haggis I
- one or two ox ceca/bungs
Cook the heart, liver and kidneys for 30 mins, (picking out any smaller pieces if they are cooked through quicker),
then take them out to cool and cook the lights (lungs) for 1 hour in the same stock.
You should probably skim off the brown foam which inevitably bubbles up during this process.
Now:
Now you're ready to stuff the cecum - fill one half of the sock, then squeeze out any air, tie off the very end then roll the mixture back out so it half-fills the entire length. I'll definitely try double-bagging the sock next time!
I hung my haggis in a cool place for a day to dry off the somewhat spongey surface before wrapping it in cheesecloth and leaving in the fridge until it was needed, but maybe the hanging stage is unnecessary?
The haggis keeps just fine for at least a week this way.
Since you have just created a haggis far too large to fit in any of your existing pots, you will need to buy an extra-large oven tray to cook it in.
Just cover the haggis with warm water, put the oven-tray over a low heat and cover with tin foil.
Simmer for 3 hours until it is swollen and ready to eat - make sure you keep a close eye on it, especially towards the end, be prepared to wrap it in tin foil at the slightest sign of bursting.
Serve with neeps and tatties.
You should probably skim off the brown foam which inevitably bubbles up during this process.
Now:
- hand-grate the liver, removing any tubules
- hand-grate the larger pieces of kidney
- hand-grate the suet
- dry pan-toast the oatmeal
- cook the barley in twice its volume of offal stock
- purée the lungs, heart and leftover kidney, removing any tubules
- chop the onion, moderately finely
- mince the garlic
Now you're ready to stuff the cecum - fill one half of the sock, then squeeze out any air, tie off the very end then roll the mixture back out so it half-fills the entire length. I'll definitely try double-bagging the sock next time!
I hung my haggis in a cool place for a day to dry off the somewhat spongey surface before wrapping it in cheesecloth and leaving in the fridge until it was needed, but maybe the hanging stage is unnecessary?
The haggis keeps just fine for at least a week this way.
Since you have just created a haggis far too large to fit in any of your existing pots, you will need to buy an extra-large oven tray to cook it in.
Just cover the haggis with warm water, put the oven-tray over a low heat and cover with tin foil.
Simmer for 3 hours until it is swollen and ready to eat - make sure you keep a close eye on it, especially towards the end, be prepared to wrap it in tin foil at the slightest sign of bursting.
Serve with neeps and tatties.
Oh Yeah.
We've been here before. You know it's good!
We've been here before. You know it's good!
Edinburgh Fog
dessert veg
Apparently the original recipe used ratafia biscuits,
but there don't seem to be any of those around, and today's macaroons with their coconut and chocolate coating
seem like a completely different kettle of cookies, so I opted to use Amaretti biscuits instead.
Perhaps, though, they are not as moist as ratafias would have been?
The same website does have a recipe for them, but I couldn't be bothered to make them. Maybe next time.
The original also seems to have used Drambuie and bitter almond essence to flavour the fog, but I used Amaretto liqueur instead.
Makes enough for 4 desserts
Ingredients
- Half pint double cream
- around one ounce castor sugar
- Two ounces Amaretti, crushed or more traditionally small macaroon biscuits
- Amaretto liqueur or more traditionally almond essence and Drambuie
- One ounce flaked almonds, toasted.
- 3 or 4 raspberries per person, and some grated lemon peel to taste.
Whip the cream until it starts to stiffen, then add sugar to taste.
Crush the amaretti biscuits I pounded them through a colander with a rolling pin so they weren't too finely crushed and mix well with the cream.
Add a splash of Amaretto (or almond essence and Dramubuie, rum, whisky, brandy, or whatever) to taste.
Toast the almonds in a dry frying pan, put a few raspberries at the bottom of a glass or small serving dish, drizzle with Amaretto and a few gratings of lemon peel and pile on a heap of the fog.
Chill well and serve.
To be honest, I didn't like it much.
It's a bit greasy and has a rather cloying flavour. And I'm not sure it would have been any better with Drambuie either. Maybe it would be worth trying with a modern macaroon though, the amaretti vanished into the fog a bit.
One problem was that the fog was really dense, and would probably have benefitted from being whipped slightly less just to the point of it no longer pouring perhaps. Despite the original recipe instructing you to whip it until stiff.
Pants For Jenny
I lured Doctor Jenny over for dinner with the promise of food and Fanta
(she loves Fanta, and is easily lured - especially when she's supposed to be studying),
and so eager was she that she rushed over without her toothbrush, her revision books or clean pants.
But she did stay for two meals!
Lucky me, I got to cook twice. And all it cost me was a pair of pants.
Jenny loves Fanta and boys' pants.
There was a very nice little seafood restaurant in Edinburgh called Sweet Melinda's now closed :( and I particularly remember a delightful combination of fried cod and black pudding that I had there. So I decided to have a go at it, and at the same time use up some quince I had left over from Christmas.
The combination of cod and black pudding was as nice as I remember it, although I think it would have been even better if my fillet still had some skin on to blacken up, but hey - you take what the fishmonger has.
Jenny arrived desperate for feeding, and in no mood to endure my usual ridiculous cooking time, so I made up a starter by slicing a grapefruit in two halves, sprinkling them with brown sugar and grilling them until the tops caramelised.
Quick and easy - though it would definitely have been easier to eat if I'd cut the fruit into segments and freed them from the peel before sugaring and grilling.
The main course was the Cod, Quince and Black Pudding stacked on a blob of Pea Purée and served with boiled potatoes dressed with chopped mint and butter.
For dessert I made Individual Chocolate Soufflés (which I overcooked slightly), but they had chocolate in them - so Jenny was happy.
The quince didn't really work with the cod and black pudding, but I thought it was worth trying.
The peas, on the other hand, went very nicely I thought.
Since I'd bought too much cod, and had a very nice thick chunk left over, I decided to try wrapping it in bacon and roasting it for dinner the next day.
Funnily enough both Jenny and I had exactly the same idea about how to cook it - as she says Anything I put in my mouth would be improved by wrapping bacon around it, though I must admit to being reluctant to take her up on her offer of a demonstration.
So we had Roast Cod Wrapped In Bacon with Potato and Celeriac Gratin and Steamed Savoy Cabbage with Caraway Seeds with crème fraîche, and a quick salad of spinach leaves with chopped tomato, capers and black olives in a lime juice and olive oil dressing.
The cabbage was something of a return of the favour Jenny did me by reminding me of it with her broccoli with caraway seeds.
Since she wasn't absolutely ravenous this time, she actually had time to enjoy the food, and agreed with me that it was a very tasty meal.
Even if she didn't have time to stay for a dessert.
Roast Cod in Bacon
main fish meat
Ingredients- a nice thick chunk of cod
- bacon
- Noilly Prat
Pre-heat the oven to Gas 4.
Debone and skin the cod fillet and wrap it in bacon slices.
Pan-fry the wrapped cod on all sides in olive oil until the bacon browns and stiffens up.
Deglaze the pan with a glass of the vermouth.
Put the cod onto a sheet of aluminium foil, pour over the deglaze liquid and wrap the cod in the foil.
Get out your trusty meat thermometer and bake the cod in a roasting tin for about 10 mins per inch of thickness until the inside reaches 65°C/145°F.
Slice into thick rounds and serve drizzled with the juices.
Very tasty.
I opened the foil for 10 minutes to finish off my 2½" thick fillet (until the inside reached 60°C) since it wasn't quite ready after 20 minutes.
I'm not really sure you need to wrap it in foil at all, though in that case you might not need to brown the top of the wrapped fillet or bother with the vermouth either.
I used unsmoked bacon, but smoked would probably be fine too.
You could season the cod with herbs or spices before wrapping with bacon if you wanted - Jamie Oliver has a recipe using rosemary and finely grated lemon peel, accompanied by asparagus and lemon mayonnaise.
Fried Cod with Quince and Black Pudding
main fish meat
The cod and the black pudding complement each other beautifully.
The peas go nicely too.
The quince not so much. You should leave that out!
The peas go nicely too.
The quince not so much. You should leave that out!
Per Person:
Ingredients
- 1 cod fillet
- 1 slice black pudding
- 1 slice quince
- olive oil, or oil and butter
Peel the quince, core and cut across into ¼" rounds (or cut first, then remove the core).
Heat the oil in a frying pan, and fry the black pudding slices until they crisp a little, and the quince slices until the turn golden.
Set aside to keep warm and fry the cod fillets, skin side down (if they have skin) until they skin crisps and the fish is cooked (turns opaque) almost all the way through, then flip them over briefly until they are done.
Serve in a stack of black pudding, quince then cod fillet skin-side up.
Place this stack on a ladleful of pea purée if you're making it.
Heat the oil in a frying pan, and fry the black pudding slices until they crisp a little, and the quince slices until the turn golden.
Set aside to keep warm and fry the cod fillets, skin side down (if they have skin) until they skin crisps and the fish is cooked (turns opaque) almost all the way through, then flip them over briefly until they are done.
If you have two frying pans, you can do all the frying at once, otherwise it's probably a good idea to clean the pan in-between
or you'll find yourself choking your guest with all the smoke from the oozing quince juice left in it.
Serve in a stack of black pudding, quince then cod fillet skin-side up.
Place this stack on a ladleful of pea purée if you're making it.
Veery tasty - if you're not in too much of a hurry to appreciate it. Jenny!
Pea Purée
side veg
A classic combination.
Serves 2
Ingredients
- ½lb peas
- dozen or so mint leaves or basil leaves and ½ teaspoon cumin powder
- 1-2 tablespoons yoghurt
Blend the peas with the herbs and yoghurt, adding a little water if necessary.
I used (thawed) frozen peas, possibly if you used fresh ones you might want to blanch them first.
Heat the purée through gently in a pan just before serving.
Season to taste.
I used (thawed) frozen peas, possibly if you used fresh ones you might want to blanch them first.
Heat the purée through gently in a pan just before serving.
Season to taste.
A lovely, fresh, sweet purée.
Leftover Quince
Well, Christmas is over and you've got a heap of quince to use up left over from your Christmas stuffing.
This is a pretty nice way to do it.
Winter Sausages
main meat
Nigella's original recipe uses apple, but the quince is ideal.
Firm and tart, just like Nigella.
Serves 2
Ingredients
- 4 Pork sausages
- 2 Large washed/scrubbed potatoes (or 3 small)
- 2 Quince
- 2 Onions
- 3 Cloves garlic (or more or less depending on your taste - just don't leave it out completely)
- Rosemary sprigs (or tbsp dried rosemary)
- Little olive oil (or whatever oil you prefer) I preferred goose fat
- Largish roasting tin
Preheat the oven to 200°C.
Drizzle some oil into the tin and put it into the oven to get hot.
Peel the onions and then cut them into 8.
Cut the potatoes into 8 (or 4 if small).
Cut the sausages into 4.
When the oven's ready, put the sausages, onions and potatoes in.
Sprinkle over salt and pepper to taste. Add some of the rosemary. Stir it all around to coat everything.
Put it in the oven for about 20 minutes.
When the time's almost up, peel the garlic cloves and cut them in half.
Peel the quince, cut into 8 and take out the core bits. (Easier than coring the quince first).
Take out the tin, and turn the oven down to 180 C. Throw in the garlic, quince and the rest of the rosemary.
Stir them around to coat, and to unstick anything from the tin.
Put it back in the oven for about 30-40 minutes until everything is done (check after 30 minutes).
Nice collection of flavours, be sure to use a large oven tray though - it needs plenty of room or it will end up watery rather than roasty.
Needs some greens to go with. Something with a bit of juice. Courgettes maybe.
Also good with a sour cream or yoghurt sauce.
Needs some greens to go with. Something with a bit of juice. Courgettes maybe.
Also good with a sour cream or yoghurt sauce.
Christmas Boxing Day 2010
Christmas Dinner 2010
Back to a traditional Sourville family Christmas this year, goose and all.
A bit of a retreat I suppose, but at least we didn't argue so much over the Christmas dvd's this year.
The 12lb goose turned out particularly succulent, cooked foil-wrapped, breast down at Gas 4 for 6 hours, though we didn't turn it over to crisp up the skin. Which we could have.
I made Quince and Hazelnut stuffing this year, following the recipe I used in my latest chumpkin,
with a bit less hazelnut (a scant cup of whole hazelnuts) more finely minced,
3 quince,
1 onion and
6 slices white bread crusts removed.
Though not too bad, I don't think I'd make it again, the hazelnuts make the stuffing just too grainy. I'd be happy to work more with quince though. It's a nice cross between tart apple and pear.
Actually I'm pretty sure this was the year Mum and I had our Christmas Day dinner at the Kashmir Indian restaurant in downtown Bradford.
Kurt had more important people to spend Christmas Day with so Mum and I put off our proper Christmas dinner for a day and went out instead. It all felt a bit like that Chinese Christmas dinner in A Christmas Story - weird and wrong.
But then we cooked up the real deal on Boxing Day, Kurt came around for another Christmas dinner that couldn't be beat, and all was right with the world.
Port Poached pears with Stilton and walnuts
starter veg
Serves 4Ingredients
- 4 ripe pears
- 1 x 75cl bottle good-quality port
- 2 x 18cm/6 inch cinnamon sticks
- 2 cloves or a few more
- 100ml/3½fl oz clear honey
- 100g/3½oz Stilton
- scant 100g/3½oz toasted walnuts or pecans
Peel the pears and transfer them to a deep saucepan, just large enough to take them all snugly.
Cover the pears with the port and add the spices and the honey. Bring to the boil, reduce to a simmer and leave the pears to poach over a medium heat for 15-20 minutes until they are tender.
Return the pan of spiced port to the heat strain out the spices and leave to boil rapidly until there is only four tablespoons left. Set this aside.
In a food processor, blend together the Stilton and the nuts. process the nuts first to a gritty paste, then add the cheese Spoon some of the mixture into each of the pear halves and place them onto a baking tray.
Cook the pears under the grill for five minutes or until the cheese has melted.
Place one pear half or two onto each plate and spoon over a little of the port and spice sauce. or puddle it under the pears. You can slice a flat section under the pears if you want them to sit nicely on the plate.
Cover the pears with the port and add the spices and the honey. Bring to the boil, reduce to a simmer and leave the pears to poach over a medium heat for 15-20 minutes until they are tender.
It might take double the time if the pears aren't particularly ripe.
You can drain the pears and keep them until they are needed once they're poached, overnight if necessary
Remove the pears from the liquid and, when cool enough to handle,
cut them in half lengthways with a sharp knife and hollow out the cores using a teaspoon or a melon baller.
Slice a little off the rounded side of each pear half so they sit flat.Return the pan of spiced port to the heat strain out the spices and leave to boil rapidly until there is only four tablespoons left. Set this aside.
You'll have more like half a cup (8 tablespoons) of syrup left, it's about ready at the point it starts to foam up in the pan.
If you cook it until there are only 4 tablespoons you'll end up with a pot of glue
Preheat the grill to high.In a food processor, blend together the Stilton and the nuts. process the nuts first to a gritty paste, then add the cheese Spoon some of the mixture into each of the pear halves and place them onto a baking tray.
Cook the pears under the grill for five minutes or until the cheese has melted.
Place one pear half or two onto each plate and spoon over a little of the port and spice sauce. or puddle it under the pears. You can slice a flat section under the pears if you want them to sit nicely on the plate.
Pretty yummy. It works better if the pecans (which I prefer) are ground pretty finely,
though the cheese stuffing mixture doesn't really melt over the pears exactly,
and remains a bit of a clump. Maybe it would be worth adding a softer cheese to the mix - mascarpone perhaps.
The sauce has a terrific Christmassy aroma - you can pretty much leave the spices in as long as you want, they don't overpower the sauce.
The sauce has a terrific Christmassy aroma - you can pretty much leave the spices in as long as you want, they don't overpower the sauce.
Traditional Eggnog
drink veg
www.eggnogrecipe.net used to be a comprehensive source of eggnog recipes, till it died :(
I chose this recipe 'cos we were in a bit of a hurry and this looked like the quickest, even compared with the site's Easy Eggnog recipe.
I made a quarter of the published recipe, and measured out the volumes in Imperial fluid ounces (worth 28.4ml - 20 per Imperial pint/10 per Imperial cup) since those were the marks on the jug I used.
However, since I assumed the recipe's cup sizes to be U.S. (worth 236.6ml) as opposed to Imperial (worth 284ml) I figured assuming the U.S. proportions of 8 fluid ounces per cup (16 per pint) would give me approximately the right quantities, even though Imperial fluid ounces (28.4ml) are slightly smaller than U.S fluid ounces (29.57ml).
Oh, and I didn't have bourbon, so I just used brandy.
Here are the quantities I used:
- 3 eggs, separated
- 12 fl oz milk
- 4 fl oz double cream
- 5.5 fl oz brandy
- 3 fl oz sugar
- 1/2 teaspoons ground nutmeg
Serves 8
Ingredients
- 12 eggs, separated
- 6 cups milk
- 2 cups heavy/ thickened cream
- 2 cups bourbon
- 1+ 1/2 cups sugar
- 3/4 cup brandy
- 2 teaspoons ground nutmeg
In a large bowl and using a mixer or a fork!,
beat the egg yolks together with the sugar for approx 10 minutes
(you want the mixture to be firm and the colour of butter).
Very slowly, add in the bourbon and brandy - just a little at a time.
When bourbon and brandy have been added, allow the mixture to cool in the fridge (for up to 6 hours, depending on how long before your party you're making the eggnog). or stick the mixture in the freezer for half an hour if you're in a rush
30 minutes before your guests arrive, stir the milk into the chilled yolk mixture.
Stir in 1+ 1/2 teaspoons ground nutmeg.
In a separate bowl, beat the cream with a mixer on high speed until the cream forms stiff peaks.
In yet another bowl, beat the egg whites until stiff peaks form.
Gently fold the egg white mixture into the egg yolk mixture.
Gently fold the cream into the egg mixture.
After ladling into cups, garnish with the remainder of the ground nutmeg.
Makes a lovely thick, rich fluffy drink, but it's quite heavy going.
One glass will be enough.
OK, maybe two.
One glass will be enough.
OK, maybe two.
Red Onion Marmalade
pickle sauce veg
You really need a large stock or jam pan for this - I only had a pan just large enough to hold all the ingredients,
which meant the reduction times were about double those advertised.
Fills about 4 jam jars
Ingredients
- 2kg red onions or regular onions
- 4 garlic cloves
- 140g butter
- 4 tbsp olive oil
- 140g golden caster sugar
- 1 tbsp fresh thyme leaves
- pinch of chilli flakes (optional)
- 75cl bottle red wine
- 350ml sherry vinegar or red wine vinegar
- 200ml port
Halve and thinly slice the onions, then thinly slice the garlic. This may take some time!
Melt the butter with the oil in a large, heavy-based saucepan over a high heat.
Tip in the onions and garlic and give them a good stir so they are glossed with butter. Sprinkle over the sugar, thyme leaves, chilli flakes if using and some salt and pepper. Give everything another really good stir and reduce the heat slightly. Cook uncovered for 40-50 minutes, stirring occasionally. Longer if you are using a smallish pan
The onions are ready when all their juices have evaporated, they're really soft and sticky and smell of sugar caramelising. They should be so soft that they break when pressed against the side of the pan with a wooden spoon. Slow cooking is the secret of really soft and sticky onions, so don't rush this part.
Pour in the wine, vinegar and port and simmer everything, still uncovered, over a high heat for 25-30 minutes, stirring every so often until the onions are a deep mahogany colour and the liquid has reduced by about two-thirds. It's done when drawing a spoon across the bottom of the pan clears a path that fills rapidly with syrupy juice. Leave the onions to cool in the pan, then scoop into sterilised jars and seal. Can be eaten straight away, but keeps in the fridge for up to 3 months.
Delicious in bacon sandwiches.
Also supposed to be good with cheese, patés or terrines.
Commercial versions seem to be sweeter and less vinegary than this one, but the flavour here has depth and character.
Also supposed to be good with cheese, patés or terrines.
Commercial versions seem to be sweeter and less vinegary than this one, but the flavour here has depth and character.
Candy Dog Poo
Candy Canes
sweet veg
Another babysitting night, another round of sweets.
The girls want to make up some care packages for their little friends, and last time we made some chocolate spoons for stirring cocoa with - dip plastic spoons in melted chocolate and then sprinkle them with crushed peppermint candy canes or hundreds-and-thousands so this time we made some candy dog poos to add to the packets.
We didn't set out to make candy dog poo - we were aiming for that quintissentially Christmas sweet Candy Canes. But we took a wrong turn somewhere, and what resulted looked more like poo than candy. In fact, it was so embarrassingly bad I didn't even take a photo. Bit of a shame on reflection...
There are a few recipes on the web for making candy or rock candy, but they all seem to be American and involve corn syrup, which is pretty much unavailable over here. A bit of reading suggested that the syrup mainly provides glucose to stabilise the hot sugar mixture and prevent it from crystallising, and since it seems that golden syrup is mainly glucose I figured that ought to work just as well, but the first recipe I tried out using it just didn't work at all.
Possibly because I wasn't quite sure what to expect or how to manage the taffy mix,
possibly because golden syrup isn't an exact substitute for corn syrup
possibly because my thermometer is a bit off
or possibly because the recipe was a pile of candy poo
but for whatever reason I failed to get the candy mix to "pull" at all.
Bless their little cotton socks the kids were willing helpers but as the candy failed and failed to pull out they gradually drifted off to the thrall of Misfits leaving me to throw most of the effort into the bin.
I did shape some of the coloured candy poo into cane shapes, but pulled it definitely wasn't and was more like tablet (Scottish for fudge) in texture.
So after the kids had gone to bed I watched a couple of online videos of people successfully pulling candy, so I could see what to expect, then I adjusted the recipe in ways that I thought it might have gone wrong
Success!
Well, Partial Success!
The candy canes are still a bit limp, but at least they are made of glossy twisted coloured candy.
The girls want to make up some care packages for their little friends, and last time we made some chocolate spoons for stirring cocoa with - dip plastic spoons in melted chocolate and then sprinkle them with crushed peppermint candy canes or hundreds-and-thousands so this time we made some candy dog poos to add to the packets.
We didn't set out to make candy dog poo - we were aiming for that quintissentially Christmas sweet Candy Canes. But we took a wrong turn somewhere, and what resulted looked more like poo than candy. In fact, it was so embarrassingly bad I didn't even take a photo. Bit of a shame on reflection...
There are a few recipes on the web for making candy or rock candy, but they all seem to be American and involve corn syrup, which is pretty much unavailable over here. A bit of reading suggested that the syrup mainly provides glucose to stabilise the hot sugar mixture and prevent it from crystallising, and since it seems that golden syrup is mainly glucose I figured that ought to work just as well, but the first recipe I tried out using it just didn't work at all.
Possibly because I wasn't quite sure what to expect or how to manage the taffy mix,
possibly because golden syrup isn't an exact substitute for corn syrup
possibly because my thermometer is a bit off
or possibly because the recipe was a pile of candy poo
but for whatever reason I failed to get the candy mix to "pull" at all.
Bless their little cotton socks the kids were willing helpers but as the candy failed and failed to pull out they gradually drifted off to the thrall of Misfits leaving me to throw most of the effort into the bin.
I did shape some of the coloured candy poo into cane shapes, but pulled it definitely wasn't and was more like tablet (Scottish for fudge) in texture.
So after the kids had gone to bed I watched a couple of online videos of people successfully pulling candy, so I could see what to expect, then I adjusted the recipe in ways that I thought it might have gone wrong
- less golden syrup
- more water to ensure the sugars dissolve before heating
- a bit more cream of tartar to make sure it's doing its job
- lower cooking temperature because it seemed like the first attempt was setting at a temperature too hot to handle.
Success!
Well, Partial Success!
The candy canes are still a bit limp, but at least they are made of glossy twisted coloured candy.
makes about a dozen 6" canes
Ingredients
- 2 cups of sugar
- scant 1/2 cup of golden syrup
- 1/2 cup of water or more
- 1/2 tsp. of cream of tartar
- 3/4 tsp. of peppermint extract
- 1 tsp. of red food coloring (or as required)
Preheat the oven to 200°F/95°C
Lightly oil two baking trays large enough to hold the cooked sugar mixture. Or better yet, have a marble surface standing by.
Take a large, heavy bottomed sauce pan and add the sugar, golden syrup, water and the cream of tartar and mix them very well. Heat gently and stir the mixture until the sugar is completely dissolved. Add more water if necessary.
Once the sugar has completely dissolved and the liquid is clear, wipe the sides of the pan clean of any sugar crystals, insert a candy thermometer and cook the mixture without stirring until the candy thermometer reaches 270°F/132°C, bearing in mind that it will continue to cook slightly once the heat is removed.
Pour half the mixture into each oiled baking tray and drop in the peppermint extract, then add the food colouring if using perhaps after a short wait to make sure the colour doesn't burn.
You are supposed to be able to keep one of the trays warm in the oven until you're ready to pull it if you need to - though I haven't tried that yet. Leave the mixture until a skin starts to form on the surface, then work the mixture with a spatula folding the outside into the centre to start the pulling process. As you work the mixture it will begin to change colour, lightening slightly.
Lightly oil your hands to stop the candy sticking. Once the candy is cool enough to handle gather as much of it as possible up into a lump (I found I left quite a lot of candy mix stuck to the tin, spatula and anything else it had been in contact with). and start pulling the taffy.
Repeatedly stretch and twist into a loop, then fold back over itself.
The taffy will become stiffer and glossy, the clear taffy turning pearly white.
When each taffy is ready, stretch it into a 2" strand and leave in the oven until you are ready for it. It should stay soft and pliable, but don't leave it for too long or so hot that it melts. this works, but if the oven is much above 175°F/80°C the taffy tends to melt - maybe turn off the oven as soon as the taffy is cooked?
To make the canes, cut a 5" segment from the white and the red log, and place them next to each other. Begin to pull the candies together, twisting gradually to form the familiar candy stripes.
The candy canes should get very hard at room temperature, but will get soft and sticky if left out for too long, so wrap them in cellophane once they are set.
Lightly oil two baking trays large enough to hold the cooked sugar mixture. Or better yet, have a marble surface standing by.
Take a large, heavy bottomed sauce pan and add the sugar, golden syrup, water and the cream of tartar and mix them very well. Heat gently and stir the mixture until the sugar is completely dissolved. Add more water if necessary.
Once the sugar has completely dissolved and the liquid is clear, wipe the sides of the pan clean of any sugar crystals, insert a candy thermometer and cook the mixture without stirring until the candy thermometer reaches 270°F/132°C, bearing in mind that it will continue to cook slightly once the heat is removed.
Pour half the mixture into each oiled baking tray and drop in the peppermint extract, then add the food colouring if using perhaps after a short wait to make sure the colour doesn't burn.
You are supposed to be able to keep one of the trays warm in the oven until you're ready to pull it if you need to - though I haven't tried that yet. Leave the mixture until a skin starts to form on the surface, then work the mixture with a spatula folding the outside into the centre to start the pulling process. As you work the mixture it will begin to change colour, lightening slightly.
Lightly oil your hands to stop the candy sticking. Once the candy is cool enough to handle gather as much of it as possible up into a lump (I found I left quite a lot of candy mix stuck to the tin, spatula and anything else it had been in contact with). and start pulling the taffy.
Repeatedly stretch and twist into a loop, then fold back over itself.
The taffy will become stiffer and glossy, the clear taffy turning pearly white.
When each taffy is ready, stretch it into a 2" strand and leave in the oven until you are ready for it. It should stay soft and pliable, but don't leave it for too long or so hot that it melts. this works, but if the oven is much above 175°F/80°C the taffy tends to melt - maybe turn off the oven as soon as the taffy is cooked?
To make the canes, cut a 5" segment from the white and the red log, and place them next to each other. Begin to pull the candies together, twisting gradually to form the familiar candy stripes.
Actually it seems to be a bit easier to stick the two coloured taffy lumps together
and then to gently tease out a twisted skein of taffy from the join of the colours,
cutting lengths off to hand over for shaping to the rest of your team.
Once the twisted candy is the thickness you want,
use oiled kitchen shears to cut them to approximately 8" lengths.
Immediately form the hook at the top of the cane, and place it on a baking sheet to set at room temperature.The candy canes should get very hard at room temperature, but will get soft and sticky if left out for too long, so wrap them in cellophane once they are set.
I've worked through this 4 times now, so I'm getting a bit slicker at it.
But my canes are still not setting hard - firm but not hard - and will bend even when cooled.
I've varied my sugar cooking temperature down from 285°F soft crack I thought this was too hot - though it's possible that wasn't the main problem to 265°F hard ball still too soft then back up to 270°F but the canes are still not setting hard enough. Especially, it's worth noting, after the food colouring is added.
So next time I try this out, I'd increase the temperature still further (maybe back up to 285°F), and add the food colouring a bit earlier - while the mixture is still pretty hot so excess water evaporates off.
It seems to be critical to ensure all the sugar has completely dissolved and the mixture is clear before heating to your chosen candy stage. I also did this heating very slowly, though that may have not been necessary.
I might also be inclined to try other substitutes for corn syrup - maybe give liquid glucose a go?
Night Of The Living Pumpkins
Following on the overwhelming success of my cute landlady and my last feast
we booked ourselves a
whole Night of Pumpkin treats.
This time it was my friends who turned up and Aline's who bombed.
Alex brought some of his tasty French Onion Soup, Andrew and Ztacci brought beer just to emphasise the fact that I'm on the dry and Jenny brought a rubber ducky.
Since it's now over two weeks since Hallowe'en all the large pumpkins in our universe have turned into coaches or ceased to exist, so things weren't looking promising for the annual Chicken In A Pumpkin. I would have bought one earlier, but I wasn't sure that it would have kept well enough to still be edible so I started considering a brand new concept - Partridge In A Pumpkin. Actually I was starting to get quite keen on the idea, thinking it would probably be easier to find a good fit between pumpkin and bird, but then we went to the Farmers' Market on Saturday and lo and behold found the last large pumpkin in the world. So I bought it. It's going to be a Chumpkin evening after all. Hurrah!
Actually one of the advantages of missing out on the Hallowe'en pumpkin frenzy is that afterwards you can buy genuine culinary varieties, which definitely taste far better than their sour, stringy, watery overgrown cousins, even if they are much smaller. And we needed about half a dozen of the suckers.
The farmer's market also coughed up an incredibly expensive organic chicken, which ought to taste bloody fabulous for the price, but I was maybe a little cautious with the size and ended up with a very loose fit. It's easier to accommodate a too-small chicken by packing the pumpkin with extra stuffing than trying surgically reduce a too-large one, but from previous experience I know that this packed stuffing ends up too wet to eat.
With Christmas on its way, and with it the need to plan a stuffing for my family's traditional Festive Goose I thought I'd quite like to try a quince stuffing this year (I don't know why, but I've had "quince" and "kumquats" in my head for a couple of weeks now) having abandoned my original idea of working something around mango (too Eastern).
As you may recall from earlier meals, cooking for Aline brings its own special challenges (though not so very unusual in this increasingly food-fussy age), with her intolerance of all things fleshly, lactic or glutenous. Suffice to say she was not about to partake of the Chicken, so there I had a free hand, but had to do some dodgy adaptions for my other dishes.
So if they turned out rubbish - there's my excuse!
menu
Pumpkin "Damper" Bread
Thai-Spiced Pumpkin Soup
Roasted Pumpkin Salad
Chumpkin
Toasted Pumpkin Seeds
Chicken-In-A-Pumpkin. My seasonal centrepiece.
Pumpkin Bake
Well, you should do something with all those seeds.
Pumpkin Pie
To finish. What else?
Pumpkin Damper Bread
bread veg
I adapted this recipe
from Titania Hardie's Hubble Bubble Cookbook.
It's one I have tried very successfully before, but needed to make it gluten and lactose friendly for Aline,
so substituted soya margarine for the butter,
gluten-free flour (with added Xanthan gum) for the regular flour,
and soy milk for the regular milk.
Fortunately Aline has a very fine collection of plant pots available for bread baking.
Incidentally, Aline assured me that soy milk was an excellent milk substitute and that I would have trouble distinguishing it from the real thing. She was wrong. It's a thick glutinous white liquid that smells slightly sour and has the texture of phlegm. And there its resemblance to milk ends.
I then followed Titania's Damper bread method, but the bread hardly rose at all, and was still uncooked after 15 minutes. I stuck the pots back in the oven for another 15 minutes, after which the bread at least was cooked, though still unrisen.
Surprisingly the bread tasted rather good nonetheless.
So a complete gluten/lactose-free success!
Ingredients
- 2oz (60g) soya margarine
- 12 oz (350g) gluten-free flour with Xanthan gum
- 1½ teaspoons salt
- 1¾ fl oz (50ml) soy milk
- 1¾ fl oz (50ml) water
- 1½ lb (675g) cooked and mashed pumpkin.
That ol' Chicken In A Pumpkin thing.
Chumpkin
main fowl
The usual Chicken In A Pumpkin setup,
I calculated 20 minutes per pound plus 20 minutes cooking time for the overall weight
of stuffed pumpkin.
For my (approximately, since I didn't have scales with enough range) 10lb chumpkin,
that worked out at around 4 hours.
I actually allowed a bit more cooking time,
gradually adjusting the oven temperature down as the chicken cooked and the pumpkin darkened
so it wouldn't burn.
This time I also made sure the bird was properly cooked using a meat thermometer
to avoid any risk of poisoning.
Because we had a number of other dishes to prepare in the oven for the main course, I let the chumpkin stand, covered in tin foil, for about an hour before we ate it. It held its heat pretty well I thought.
Because we had a number of other dishes to prepare in the oven for the main course, I let the chumpkin stand, covered in tin foil, for about an hour before we ate it. It held its heat pretty well I thought.
Serves A Dinner Party
Ingredients
- A chicken
- A pumpkin
- some stuffing
Make the stuffing.
Cut the lid off the pumpkin and reserve to bake separately.
Clean out the pumpkin of seeds and stringy goop with a spoon.
Roast the chicken for about 20 minutes in a hot oven to crisp up the skin.
Fill the chicken with stuffing and the pumpkin with chicken.
Pack any huge gaps around the chicken with more stuffing.
Put the chumpkin in a baking dish large enough to hold it if the pumpkin should collapse.
Bake the chumpkin at Gas 6 for 20 minutes per pound plus 20 minutes.
Watch the chumpkin for browning/burning after half-time and reduce the heat as necessary (you can wrap the whole thing in foil if you prefer to better protect the skin).
Using a meat thermometer to check the chicken is cooked is a really good idea!
Cooked, the chumpkin will stay warm covered in tin foil for 30-60 minutes if necessary.
You can use quite a lot of the leftover pumpkin flesh (and anything else) too (I used about half of mine, plus some tomato bits and the stock is delicious!).
Cut the lid off the pumpkin and reserve to bake separately.
Clean out the pumpkin of seeds and stringy goop with a spoon.
Roast the chicken for about 20 minutes in a hot oven to crisp up the skin.
Fill the chicken with stuffing and the pumpkin with chicken.
Pack any huge gaps around the chicken with more stuffing.
Put the chumpkin in a baking dish large enough to hold it if the pumpkin should collapse.
Bake the chumpkin at Gas 6 for 20 minutes per pound plus 20 minutes.
Watch the chumpkin for browning/burning after half-time and reduce the heat as necessary (you can wrap the whole thing in foil if you prefer to better protect the skin).
Using a meat thermometer to check the chicken is cooked is a really good idea!
Cooked, the chumpkin will stay warm covered in tin foil for 30-60 minutes if necessary.
This time around my chicken was a bit on the small side for such a large pumpkin,
so I made plenty of stuffing, and packed the spaces between chicken and pumpkin with it,
even right up to the top of the pumpkin.
I baked the chumpkin a bit hotter (around Gas 8) for about 20 minutes just to get things going at the start, then reduced to Gas 6, then gradually lowered the heat towards the end as the pumpkin threatened to burn.
As usual, the chicken itself is wonderfully moist and tender and the stuffing inside the chicken was very good, but the stuffing inbetween the chicken and the pumpkin ended up very soggy from all the pumpkin juices.
Leaving (mostly) the lid off the pumpkin during cooking meant that the stuffing near the top of the pumpkin stayed dry and quite edible, and allowed the exposed chicken skin to crisp up nicely too. I think I'll make that a permanent chumpkin method!
I baked the lid separately in the oven for while too, just so I could serve the pumpkin with an equally cooked-looking lid on it if I wanted.
The next day, gather up all the leftover chicken skin, gristle and bones
and roast them up with flour and tomato purée at Gas 6 to make the base for a lovely
dark chicken stock.I baked the chumpkin a bit hotter (around Gas 8) for about 20 minutes just to get things going at the start, then reduced to Gas 6, then gradually lowered the heat towards the end as the pumpkin threatened to burn.
As usual, the chicken itself is wonderfully moist and tender and the stuffing inside the chicken was very good, but the stuffing inbetween the chicken and the pumpkin ended up very soggy from all the pumpkin juices.
Leaving (mostly) the lid off the pumpkin during cooking meant that the stuffing near the top of the pumpkin stayed dry and quite edible, and allowed the exposed chicken skin to crisp up nicely too. I think I'll make that a permanent chumpkin method!
I baked the lid separately in the oven for while too, just so I could serve the pumpkin with an equally cooked-looking lid on it if I wanted.
You can use quite a lot of the leftover pumpkin flesh (and anything else) too (I used about half of mine, plus some tomato bits and the stock is delicious!).
Pumpkin Bake
side main veg vegan
I thought a dish along the lines of Elizabeth David's Courgette Bake
might also work with pumpkin using a tomato base to replace the missing moisture
and cauliflower to break up the pumpkinness.
I also wanted to introduce a slightly sour flavour and would have used ricotta cheese or yoghurt,
but Aline's lactose intolerance precluded those.
So I decided to try and work in some tagine-style flavours using black olives and preserved lemons.
I must confess I had expected the pumpkin to disintegrate much more than it did
(and have more flavour also - damn those culinary pumpkins).
The verdict: Dry, dull and tasteless.
The dish might have potential (particularly the black olive and the cauliflower),
but would need a good deal more work.
Served 6
Ingredients
- ten shallots (or a couple of onions), sliced
- 1 teaspoon saffron
- 2" ginger, grated
- 1 small cauliflower, separated into florets
- 6 cloves garlic
- a dozen black olives
- ½ a preserved lemon, in very thin slices
- pumpkin, chopped into ½" cubes
- olive oil
- 4 tomatoes
- 1 teaspoon coriander seeds, crushed
- a glass white wine
- 2 cups Soft breadcrumbs, or to cover or some hideous gluten-free alternative
- any herbs you fancy I didn't
- liquor(?)
Grind the coriander seeds fairly thoroughly in a spice grinder.
Peel, de-seed and cut the pumpkin into chunks, sprinkle generously with sea salt and the crushed coriander seeds then roast in a hot oven until cooked through and starting to soften.
Make a small cross in each tomato near the stalk end and dunk them in boiling water. Peel, de-seed and dice.
Fry the cauliflower pieces in olive oil until they brown, and set aside
Soften the onions, add the garlic, ginger, saffron, cumin (which I skipped), coriander, tomatoes and cook with the wine until reduced to a thickish purée.
Mix the pumpkin, cauliflower, olives, herbs (if you like), Lay on a layer of preserved lemons.
Cover with soft breadcrumbs and dot with butter.
In deference to Aline's culinary peculiarities,
I used her strange rice-based crumb mix
and blended it up with soya margarine until it looked something like breadcrumbs (though still smelling of axle grease).
This topping seems able suck all the moisture from the world and yet still lie there like a heavy fall of moondust, so maybe things would have worked out better with real bread.
Bake at Gas 6 for 45 minutes.
This topping seems able suck all the moisture from the world and yet still lie there like a heavy fall of moondust, so maybe things would have worked out better with real bread.
Rubbish!
I blame the topping. And the filling. That was rubbish too.
It managed to have both too many competing flavours (I think I should have skipped the preserved lemon) and not enough taste (too dry, and the pumpkin was surprisingly tasteless).
Ho hum.
I blame the topping. And the filling. That was rubbish too.
It managed to have both too many competing flavours (I think I should have skipped the preserved lemon) and not enough taste (too dry, and the pumpkin was surprisingly tasteless).
Ho hum.
Quince Hazelnut stuffing
side ingredient veg
Makes enough for about 3 chickens, or 1 chumpkin
Ingredients
- 2 quince, probably around 1½ cups chopped quince flesh (they're surprisingly massive things, quince)
- 2 teaspoons brown sugar
- butter
- hazelnuts, maybe 1½ cups, roughly chopped Too much and too chunky?
- finely chopped onions
- 6 cloves garlic
- breadcrumbs, almost a whole baguette - probably 2 pints
- salt, herbs?
Roast the hazelnuts in a hot oven for 5 minutes.
Roll them in a tea towel to remove the skins.
Chop quite finely.
Peel, core and chop your quince.
Finely chop the onions and garlic.
Crumb the bread with a food processor or grater. I left the crust on this time because I didn't have much bread, but I would normally cut those off.
Heat a little butter in a frying pan, add the quince, sprinkle with the sugar. Cook, turning, for 15 minutes until they begin to nicely caramelise, then set aside. In more butter, fry the onions and garlic to soften.
Mix everything together (you could also add an egg or a little stock to soften things up), and stuff into the bird, and the pumpkin.
The stuffing was quite nice really, and popular,
but I wasn't keen on the big chunks of hazelnut.
I think you'd want to chop them more finely, and maybe use less?
The best stuffing was from the top of the chumpkin, which had picked up some juices from the bird and the squash, but stayed dry during the roasting process (since I left the lid off).
The next best bit was from inside the chicken. The stuffing from deep around the chicken was a bit too soggy really, though the leftovers baked up quite nicely left at the bottom of a moderate oven for two hours the next day.
Thai-spiced Pumpkin Soup
soup curry veg
Keep in mind that different Thai curry pastes have differing strengths.
Start with a teaspoon to start and then build from there until the soup has a level of spiciness and flavor
that works for your palate.
Top with toasted pumpkin seeds.
Serves 6
Ingredients
- 2 acorn squash, pumpkins, or other smallish winter squash
- 3 tablespoons unsalted butter, room temperature
- 1 14-ounce can coconut milk
- 1 teaspoon (or more) red Thai curry paste
- water
- 2 teaspoons fine grain sea salt (or to taste)
Preheat the oven to 375 degrees and place the oven racks in the middle.
Carefully cut each squash/pumpkin into halves (or quarters). Slather each piece of squash with butter, sprinkle generously with salt, place on a baking sheet skin sides down, and place in the oven. Roast for about an hour or until the squash is tender throughout.
When the pumpkin/squash are cool enough to handle scoop it into a large pot over medium high heat. Add the coconut milk and curry paste and bring to a simmer. Remove from the heat and puree with a hand blender, you should have a very thick base at this point. Now add water a cup at a time pureeing between additions until the soup is the consistency you prefer - a light vegetable stock would work here as well. Bring up to a simmer again and add the salt (and more curry paste if you like, I used just shy of 6 teaspoons but the curry paste I use is not over-the-top spicy).
A bit raw on the spices for my taste.
Aline made this without butter obviously (too lactic), and used green Thai curry paste. Lots of green Thai curry paste.
The result was a bit over-spiced (and you don't hear me saying that very often!), and I think the paste might be better fried to get rid of some of the harshness, though that does reduce slightly if you keep cooking the soup for a while.
Roasted Pumpkin Salad
salad veg
Serves 4Ingredients
- 3 cups of pumpkin (or other winter squash), peeled and cut into 1-inch cubes
- extra-virgin olive oil
- fine grain sea salt
- 12 tiny red onions or shallots, peeled (OR 3 medium red onions peeled and quartered)
- 2 cups cooked wild rice*
Dressing:
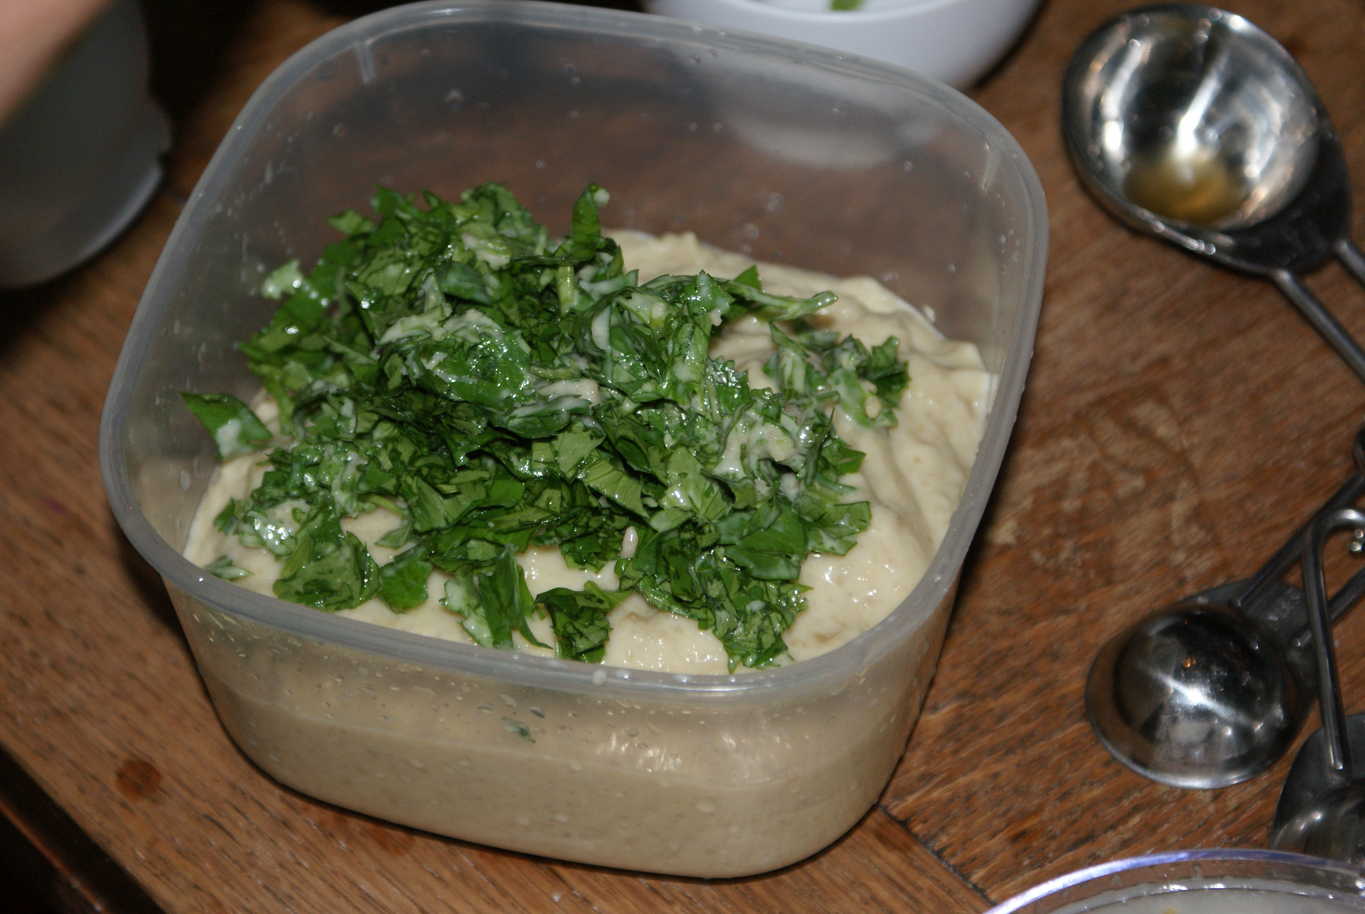
- 1/3 cup sunflower seeds
- 1/3 cup olive oil
- 2 tablespoons lemon juice
- 1/4 teaspoon salt
- 1 tablespoon honey
- 2 tablespoons warm water
- 1/2 cup cilantro, finely chopped
Preheat oven to 375.
Toss the pumpkin in a generous splash of olive oil along with a couple pinches of salt, and turn out onto a baking sheet. At the same time, toss the onions with a bit of olive oil, sprinkle with salt, and turn out onto a separate baking sheet. Roast both for about 45 minutes, or until squash is brown and caramelized. The same goes for the onions, they should be deeply colored, caramelized, and soft throughout by the time they are done roasting. You'll need to flip both the squash and onion pieces once or twice along the way - so it's not just one side that is browning.
In the meantime, make the dressing. With a hand blender or food processor puree the sunflower seeds, olive oil, lemon juice, salt, and honey until creamy. You may need to add a few tablespoons of warm water to thin the dressing a bit. Stir in the cilantro, saving just a bit to garnish the final plate later. Taste and adjust seasonings (or flavors) to your liking - I usually need to add a touch more salt with this dressing.
In a large bowl, toss the wild rice with a large dollop of the dressing. Add the onions, gently toss just once or twice. Turn the rice and onions out onto a platter and top with the roasted squash (I'll very gently toss with my hands here to disperse the pumpkin a bit). Finish with another drizzle of dressing and any remaining chopped cilantro.
* To cook wild rice:
Rinse 1 1/2 cups wild rice. In a medium sauce pan bring the rice and 4 1/2 cups salted water to a boil. Reduce to a simmer. Cook for 40 minutes or until rice is tender and splitting open, stirring occasionally. You'll have enough for this recipe and some leftover.
Rinse 1 1/2 cups wild rice. In a medium sauce pan bring the rice and 4 1/2 cups salted water to a boil. Reduce to a simmer. Cook for 40 minutes or until rice is tender and splitting open, stirring occasionally. You'll have enough for this recipe and some leftover.
When Aline made the dressing I thought it was pretty tasty,
but somehow it got completely submerged in the salad, and the result was a bit on the dull side.
Perhaps there was just too much rice?
Perhaps there was just too much rice?
Spice-Kissed Pumpkin Pie
dessert sweet veg
... freshly ground spices, make all the difference in a recipe like this.
For the filling, you can also substitute roasted sweet potatoes or other roasted winter squash as the base ingredient.
If you are pinched for time you can also use canned pumpkin puree (but I really prefer the flavor that comes from roasting my own).
If you used canned puree, be sure it is pure, non-spiced pumpkin puree.
You can certainly use a store-bought crust if you like, for a pie like this I use a standard pie dough recipe (pate brisee).
I use whole wheat pastry flour in place of all-purpose flour.
Alternate crust option:
you can make a simple pat-in-pan graham cracker pie crust by giving 2 cups well-crushed graham cracker crumbs, 1/3 cup melted butter, and 2 tablespoons of honey a whirl in a food processor. Then press (intensively) into a 9-inch pie pan, and proceed with filling.
You can use the filling in tarts, or for individual pies/tarts as well. I love to use deep, dark Muscovado sugar in place of standard brown sugar for its flavor, but some people are turned off by the darker color it lends to the filling.
Makes one 9 or 10-inch pie
Ingredients
- 1 pie crust (of your choice), see pat-in-pan option
- 2 cups hazelnuts (divided) , toasted
- 1/2 cup brown sugar
- 1 tablespoon pumpkin pie spice blend*
- 1 teaspoon salt
- 1 tablespoon arrowroot (or cornstarch)
- 1 1/2 cups of roasted pumpkin puree*
- 1 teaspoon vanilla extract
- 3 extra large eggs PLUS one for glaze, lightly beaten
- 1 cup coconut milk
Preheat oven to 350 degrees, racks in the middle.
Puree 1 1/2 cups of the toasted hazelnuts in a food processor until they turn into a hazelnut paste, past the 'crumble' stage. Set aside. Chop the remaining 1/2 cup of hazelnuts and set aside separately, these will be sprinkled on top after the pie is baked.
To make the pumpkin pie filling, whisk together the brown sugar, pumpkin pie spice blend, salt, and arrowroot. Stir in the pumpkin puree, and vanilla. Now stir in the eggs and coconut milk until just combined. Set aside.
Before filling the pie crust, crumble the hazelnut paste on top of the pie dough into the pie plate, quickly and gently press it into a thin layer across the bottom creating a layer of hazelnuts that will sit between the dough and the filling apparently helping to keep the crust from getting soggy. Using the last egg gently brush the decorative edges of the pie dough. Use a fork to prick the pie dough a few times to prevent air bubbles. Fill the pie crust with the filling and bake for about 50 minutes - the center of the pie should just barely jiggle when you move the pie - the edges should be set.
Let the pie cool a bit, this makes slicing less messy. Serve straight or with a dollop of bourbon-spiked, sweetened whipped cream or creme fraiche, and a sprinkling of chopped hazelnuts.
Aline went for the pat-in-pan pie crust option,
and I made some (delicious) maple-syrup squirty cream
to go with.
The crust was thick and oleaginous and the filling a bit too dry and heavy for my taste though. I don't think I'd try it again.
Note To Self:
Remember to give the foamer a shake and try an experimental squirt into the sink before you cover the guests in farty foam.
The crust was thick and oleaginous and the filling a bit too dry and heavy for my taste though. I don't think I'd try it again.
Kathy's Pumpkin Pie Spice Blend
ingredient veg vegan
Makes 2 tablespoonsIngredients
- 1 tablespoon freshly ground cassia cinnamon
- 3/4 teaspoon freshly ground allspice
- scant 1/2 teaspoon freshly ground cloves
- 1 1/2 teaspoons ground ginger (pre ground)
Use a coffee grinder to separately grind each of the following: cinnamon, allspice, and cloves.
Smash the cinnamon a bit before grinding it. The spices should be powder-fine, and sifted into a bowl together.
Stir in the ground ginger, and use in any recipe calling for a pumpkin pie spice blend.
Roasted Pumpkin Purée
ingredient veg vegan
Makes a couple of pounds of puréeIngredients
- 1 3 lb. sugar pie pumpkin
- 2 tablespoons olive oil
- salt
Preheat oven to 400 degrees.
Carefully cut the pumpkin into four big wedges - get rid of the stem.
Scoop out the seeds and pulp (you can toast the seeds if you like),
drizzle then rub the pumpkin wedges with olive oil,
sprinkle generously with salt, and then bake on a baking sheet (middle rack) until tender throughout - about an hour.
Scoop flesh out of the skins and puree with a hand blender or mash well by hand.
It is easier to peel the pumpkin once it's cooked and the flesh easily separates with a spoon,
but you can also peel and chop the pumpkin and just simmer it up instead.
Crab And Meringue
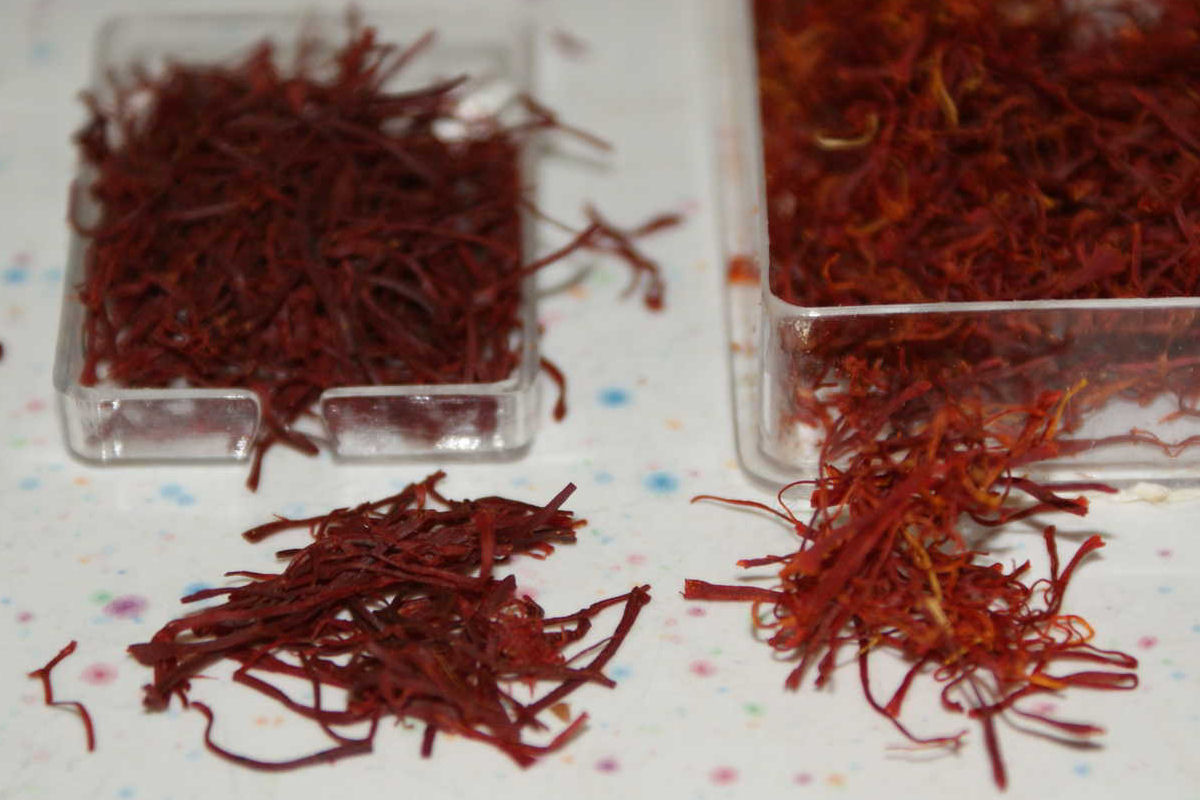
My Mum came up for a visit a couple of weekends ago,
and gifted me several small boxes of saffron that she brought back from her recent trip to Ladakh,
(The rest of my family visited me too - but they didn't bring me any saffron)
so I decided to use some of it up today making a quick dinner for myself and Flora,
who's come around to do her Day Skipper homework.
Or get it done :)
Unfortunately it turned out that the stuff Mum had carefully carried back with her was only a pale imitation of saffron. Or rather, it wasn't pale, but a slightly redder imitation, with none of saffron's lovely delicate flavour. Or aroma.
Pretty good imitation though - if you look closely at the photo.
Funnily enough, the food was still delicious, so the rest of the ingredients must have been good (and the saffron not made of poison!).
I fancied having another bash at my squid ink pasta, and it seemed appropriate to mix the squiddy pasta with something seafood so I popped in to my usual Musselburgh fishmonger at lunchtime hoping to find some nice crabs to make the sauce from, only to learn that local crabs are getting a bit skeletal at this time of year, and don't have a lot of meat. However he had plenty of big fat cooked crab claws from singapore (or somewhere less depressingly cold) so I decided to go with those, and make what is basically a spaghetti carbonara, except with crab instead of ham.
My fishmonger turned out to be right about the claws - there was plenty of very tasty meat in them, though a certain amount if fiddling is involved in getting it all out:
Take your tasty crab craw and start by levering open the knuckle (or elbow?) joint. If you're lucky you will pull out a nice chunk of delicious crab meat from the upper joint, otherwise you'll have to smash it open.
Then break open the claw itself - you can usually do this easily enough by laying it on a sturdy chopping block and striking it firmly with the flat side of a heavy meat cleaver. If you hit it too hard, or use the edge of the cleaver you'll end up shattering the shell into tiny shards and embedding them through the delicate meat that you've just pulped. But if you get it right you'll put just enough cracks into the claw to be able to peel off the shell and separate the flesh with your fingers or a small fork.
I didn't much fancy munching into unexpected clumps of saffron in my sauce, so I decided to crush the strands a little in a pestle and mortar then warm them up with the cream to leech out more of their colour and flavour.
But possibly all that isn't necessary - you could try having less homogenous colouring and just throw the saffron into the cold cream.
I was hoping to make a slightly richer and more squiddy version of the black pasta this time by using only egg yolks instead of whole eggs, but the dough just wouldn't hold together properly and I was ultimately forced to add some egg white.
The result didn't end up any more squiddy and I'm starting to think you're just not going to get a very strong ink flavour through black pasta simply due to the dilution involved.
Still, the taste was pretty good, I think having extra egg yolks did add a certain richness, though it's obviously trickier to get that when you're only making small quantities.
My dough (probably) ended up with the following proportions:
What with all this egg yolkery I ended up with a surfeit of egg whites, so under extreeeeeeeme pressure to provide Flora a dessert I whipped up a giant jam meringue that could really have done with another 6 hours of cooking.
After its first half-hour of baking, and an episode of Archer, we had bowls of the meringue with some of the leftover cream. It was still a bit raw, and distinctly "eggy" in the middle at this stage, but it was starting to show promise, so I stuck it back in the (turned off) oven for the rest of the night.
Unfortunately I didn't get to to taste (or photograph) the end result since my cute Landlady came back and snaffled up the lot, but apparently it really hit the spot ;) YUM.
Maybe I'll give it another shot sometime...
Or get it done :)
Unfortunately it turned out that the stuff Mum had carefully carried back with her was only a pale imitation of saffron. Or rather, it wasn't pale, but a slightly redder imitation, with none of saffron's lovely delicate flavour. Or aroma.
Pretty good imitation though - if you look closely at the photo.
Funnily enough, the food was still delicious, so the rest of the ingredients must have been good (and the saffron not made of poison!).
I fancied having another bash at my squid ink pasta, and it seemed appropriate to mix the squiddy pasta with something seafood so I popped in to my usual Musselburgh fishmonger at lunchtime hoping to find some nice crabs to make the sauce from, only to learn that local crabs are getting a bit skeletal at this time of year, and don't have a lot of meat. However he had plenty of big fat cooked crab claws from singapore (or somewhere less depressingly cold) so I decided to go with those, and make what is basically a spaghetti carbonara, except with crab instead of ham.
My fishmonger turned out to be right about the claws - there was plenty of very tasty meat in them, though a certain amount if fiddling is involved in getting it all out:
Take your tasty crab craw and start by levering open the knuckle (or elbow?) joint. If you're lucky you will pull out a nice chunk of delicious crab meat from the upper joint, otherwise you'll have to smash it open.
Then break open the claw itself - you can usually do this easily enough by laying it on a sturdy chopping block and striking it firmly with the flat side of a heavy meat cleaver. If you hit it too hard, or use the edge of the cleaver you'll end up shattering the shell into tiny shards and embedding them through the delicate meat that you've just pulped. But if you get it right you'll put just enough cracks into the claw to be able to peel off the shell and separate the flesh with your fingers or a small fork.
I didn't much fancy munching into unexpected clumps of saffron in my sauce, so I decided to crush the strands a little in a pestle and mortar then warm them up with the cream to leech out more of their colour and flavour.
But possibly all that isn't necessary - you could try having less homogenous colouring and just throw the saffron into the cold cream.
I was hoping to make a slightly richer and more squiddy version of the black pasta this time by using only egg yolks instead of whole eggs, but the dough just wouldn't hold together properly and I was ultimately forced to add some egg white.
The result didn't end up any more squiddy and I'm starting to think you're just not going to get a very strong ink flavour through black pasta simply due to the dilution involved.
Still, the taste was pretty good, I think having extra egg yolks did add a certain richness, though it's obviously trickier to get that when you're only making small quantities.
My dough (probably) ended up with the following proportions:
- 3 egg yolks
- white of around ½ egg
- 1 tablespoon olive oil
- 1 teaspoon salt
- 1 (5g) sachet squid ink
- around 5 oz semolina
What with all this egg yolkery I ended up with a surfeit of egg whites, so under extreeeeeeeme pressure to provide Flora a dessert I whipped up a giant jam meringue that could really have done with another 6 hours of cooking.
After its first half-hour of baking, and an episode of Archer, we had bowls of the meringue with some of the leftover cream. It was still a bit raw, and distinctly "eggy" in the middle at this stage, but it was starting to show promise, so I stuck it back in the (turned off) oven for the rest of the night.
Unfortunately I didn't get to to taste (or photograph) the end result since my cute Landlady came back and snaffled up the lot, but apparently it really hit the spot ;) YUM.
Maybe I'll give it another shot sometime...
Pasta Al Nero with Crab and Saffron Sauce
main fish pasta
It's probably obvious that my photography needs work - somehow the crab-smeared black pasta photos look rather unappetising.
Maybe a bowl of clean pasta with a dollop of crab in the middle would have looked more attractive?
Serves 2
Ingredients
- 1x4oz portion squid ink pasta, rolled and cut into linguine
- 200g shredded white crab meat, from around 8 claws
- 20g grated Parmesan, plus extra for topping
- ½ cup (8 tablespoons) double cream
- 1 teaspoon saffron strands
- 2 egg yolks
Crack open your crab claws and pluck out the meat into a bowl, then gently shred it with a fork.
Lightly crush the saffron strands in a pestle and mortar and add them to a small pot with the double cream and warm through gently, stirring occasionally, until the colour diffuses.
Allow to cool slightly before loosening up the egg yolks with a little of the cream and then blending into the pot. Add the crab meat.
Meanwhile cook the pasta (3-4 minutes) until cooked through, but al dente, drain, then return to the pot with the sauce and stir through.
The heat from the pasta should thicken the egg yolks making for a rich creamy sauce.
Serve
Really nice stuff (even without the saffron)!
Make sure you serve it hot though - it's probably a good idea to warm the serving dishes since you're not pre-heating the sauce.
Make sure you serve it hot though - it's probably a good idea to warm the serving dishes since you're not pre-heating the sauce.
Giant Jam Meringue
dessert veg
Don't think about eating this after its first half-hour of cooking - it will still be eggy and underdone.
Serves 4
Ingredients
- 2 egg whites
- 160g caster sugar
- 2 tablespoons blueberry jam or whatever flavour you fancy
- cream
Preheat the oven to Gas Mark 7
Whip up the egg whites until they stiffen, then gradually beat in the sugar.
Line a shallow cake tin with parchment, smear a couple of tablespoons of jam into the centre, then heap over the meringue mixture.
Put in the oven for 10 minutes, or until the top is golden but not burnt, then turn down to the oven's lowest setting and leave for another 30 minutes.
Finally turn off the oven and leave the meringue to dry out overnight (say 6 hours)?
Serve with a dribble of cream.
I didn't actually get to try the very end product, but it looked like it was going to be good!
OMG Eggnog!
'Tis the season.
And that's official - now Starbucks have started selling their eggnog.
Mmmm. Eggnog!
Not only that, but they've re-opened their old café at Fort Kinnaird just to lure me over for coffee from my Musselburgh offices. EVERY. SINGLE. DAY.
It's like stepping back in time. To last year. Except that instead of being in a Borders bookshop, it's now in HMV/Waterstones. Bookshop.
Now I'll have to pass by those bloody bargain cookbook tables all over again. And I'd just got my credit card paid off too.
Of course, I wouldn't need to drive over there for coffee EVERY SINGLE DAY if Musselburgh weren't quite such a poxy shithole. And that's just our office.
So it's time to start planning the season's jollities - I've got:
- Presents to buy
- Christmas cards to send
- A Christmas list to write
- Christmas cards to send
- I'd really like someone with some relevant skills (Bro - this means you) to get me some nice lights for photographing food.
- Mincemeat to make
-
And some nice mince pie recipes to sort out.
Ah well. Maybe next year :(
- A stuffing to decide on
-
For the Christmas goose. It's one of my duties.
I'm leaning towards something with quince or kumquats. My first thoughts were to do something with mango, but on reflection I don't really see that working.Well, I decided. But it's not a keeper. - A Christmas starter to design
-
I had the idea of making blue cheese soufflés by chilling a ball of cheese (perhaps blended with cream)
and sticking it in the middle of the soufflé mixture,
like a cheesy version of Ghirardelli's chocolate lava cakes
(as requested by Sophie while we made delicious
white chocolate crème brûlées
during my recent babysitting/cookery-lesson visit).
But then I realised that the last thing we really need at Christmas Dinner is another dish jealous of its oven time and temperature.
Better think again.
Something which can be made up well in advance and requires minimal cooking perhaps? - EGGNOG!
-
Maybe this year I'll get around to making some?
I already have a nice collection of recipes to work through.
Yep. Here's one we drank earlier.
Babysitting With Marshmallows
Well I selfishly volunteered for babysitting duties with the Eldorado girlies so that I still get to see them occasionally.
It's not their fault after all.
I've been wanting to try making some marshmallows after buying James Martin's Great British Winter Cookbook last winter and I figured it would be perfect for the girlies too, so I geared up all the ingredients and trucked on round after work.
It seemed surprisingly difficult to find liguid glucose when I first had the idea of trying this recipe, and I finally found some in Boots, heavily guarded behind the pharmacy counter. Then amusingly, when I was checking out the gleaming new giant Tesco which has just opened up near my office in Musselburgh any-fucking-town-in-the country I found little jars of liquid glucose by the dozen. Sitting right next to the leaf gelatin.
Which begs the question - what's the big deal with leaf gelatine anyway?
Of course as usual I managed to forget something.
It's not real Karl Cookery if you don't forget something.
That's my trademark. That and orange flavours. According to Jenny that's my trademark too. Though she kindly hasn't mentioned the forgetting something bit.
Usually I find the something just after I've served out the meal, but this time I forgot to bring the sugar thermometer before I even started.
And since Rachel doesn't have one (yet!) I had to guess the sugar temperature and I was probably a little on the low side.
Since it all worked out fine (though with rather more final whisking than advertised) maybe it isn't all that critical?
I was also a bit short of gelatin sheets, since they came only 12 to a pack, so I made up the difference with powder. According to the packets 12 gelatin leaves (20g) is sufficient for 3 pints of water, and one sachet (10g/4tsp) sufficient for 1 pint. So I added half a sachet of the powder too, and soaked the lot.
Obviously if you're making up a batch of marshmallows you need to have white ones and pink ones - all the best commercial bags do. So I thought I'd try some strawberry Nesquik as the flavouring agent.
Hugh Fearnley-Whatthehell uses beetroot in his, but I didn't think that was going to fly with my audience.
Also he doesn't use any glucose - so what does he know? (Does he know that you don't need glucose in your marshmallows?)
We made half white and half pink mallows, which worked out pretty well since we didn't have a large enough tray to set all of the mixture anyway.
We added (slightly more than) the advertised vanilla essence to the entire batch, poured half into one tray, then added the Nesquik and food colouring to the remaing mixture.
Usually my attempts to enlist the girlies enthusiasm for one of my cooking marathons meets with something approaching bitter disappointment (mine not theirs), but I think the girlies really enjoyed making up those pink and white fluffy pillows.
They did a fine job double-teaming the whisking (even dressing the part), there were lots of sticky sweet things to lick out and most importantly, it didn't actually take that long.
I think that's worth repeating. So I'll repeat it.
It didn't actually take that long.
You would think I would have learned that simple lesson after all my Eldorado Cookery - young girls having the attention span of the length of a pop song, but I still find it just about impossible to cook quickly, despite buying books with unconvincing titles like Fast Food in a desperate and usually futile attempt to get dinner on the table before midnight.
I'd be the worst MasterChef. Ever.
Waiting for the mallows to set is quite a challenge for girlies looking for a sugar high, but fortunately I brought along my awesome 10th Kingdom DVDs to keep them entertained.
They did a much better job than Sophie's homework.
All in all we must have done something right - the mallows were quite lovely, and I particularly liked the strawberry ones. Rachel must have thought so too, because she'd already eaten five before I'd even asked if she'd enjoyed her evening of freedom.
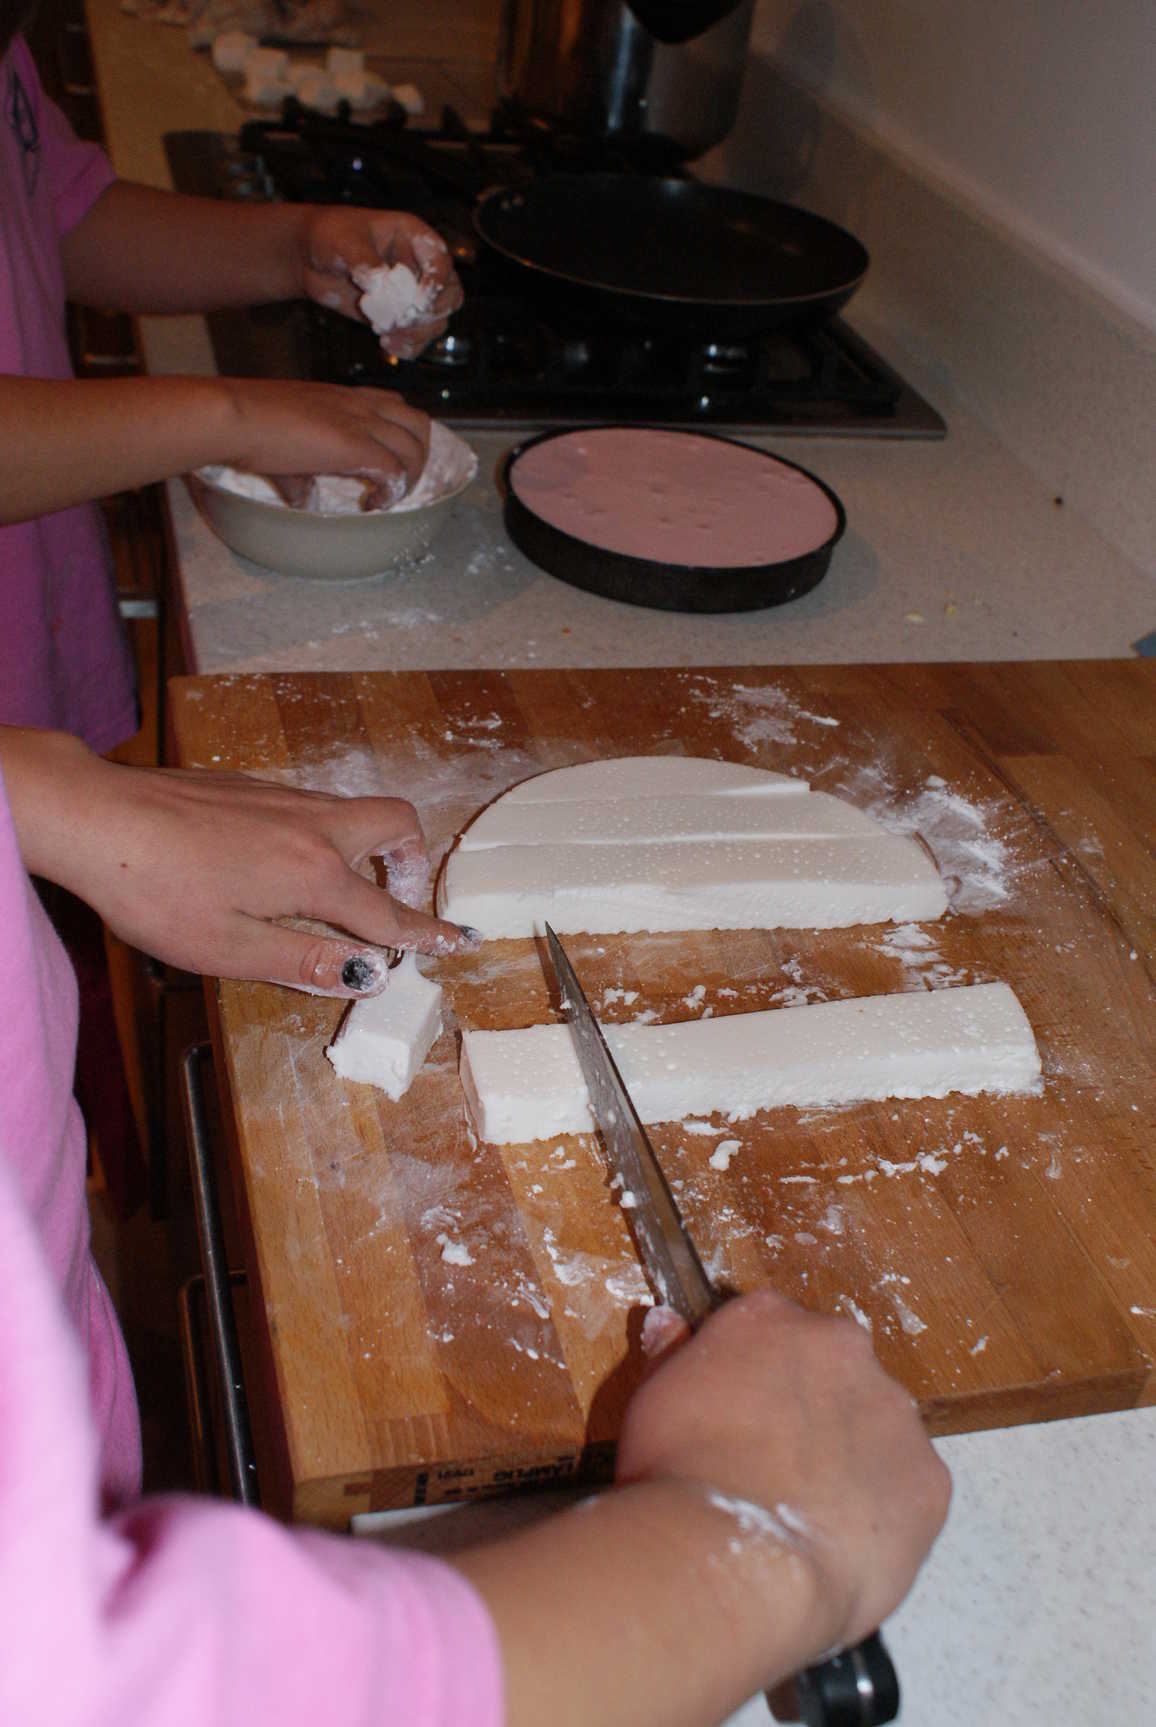
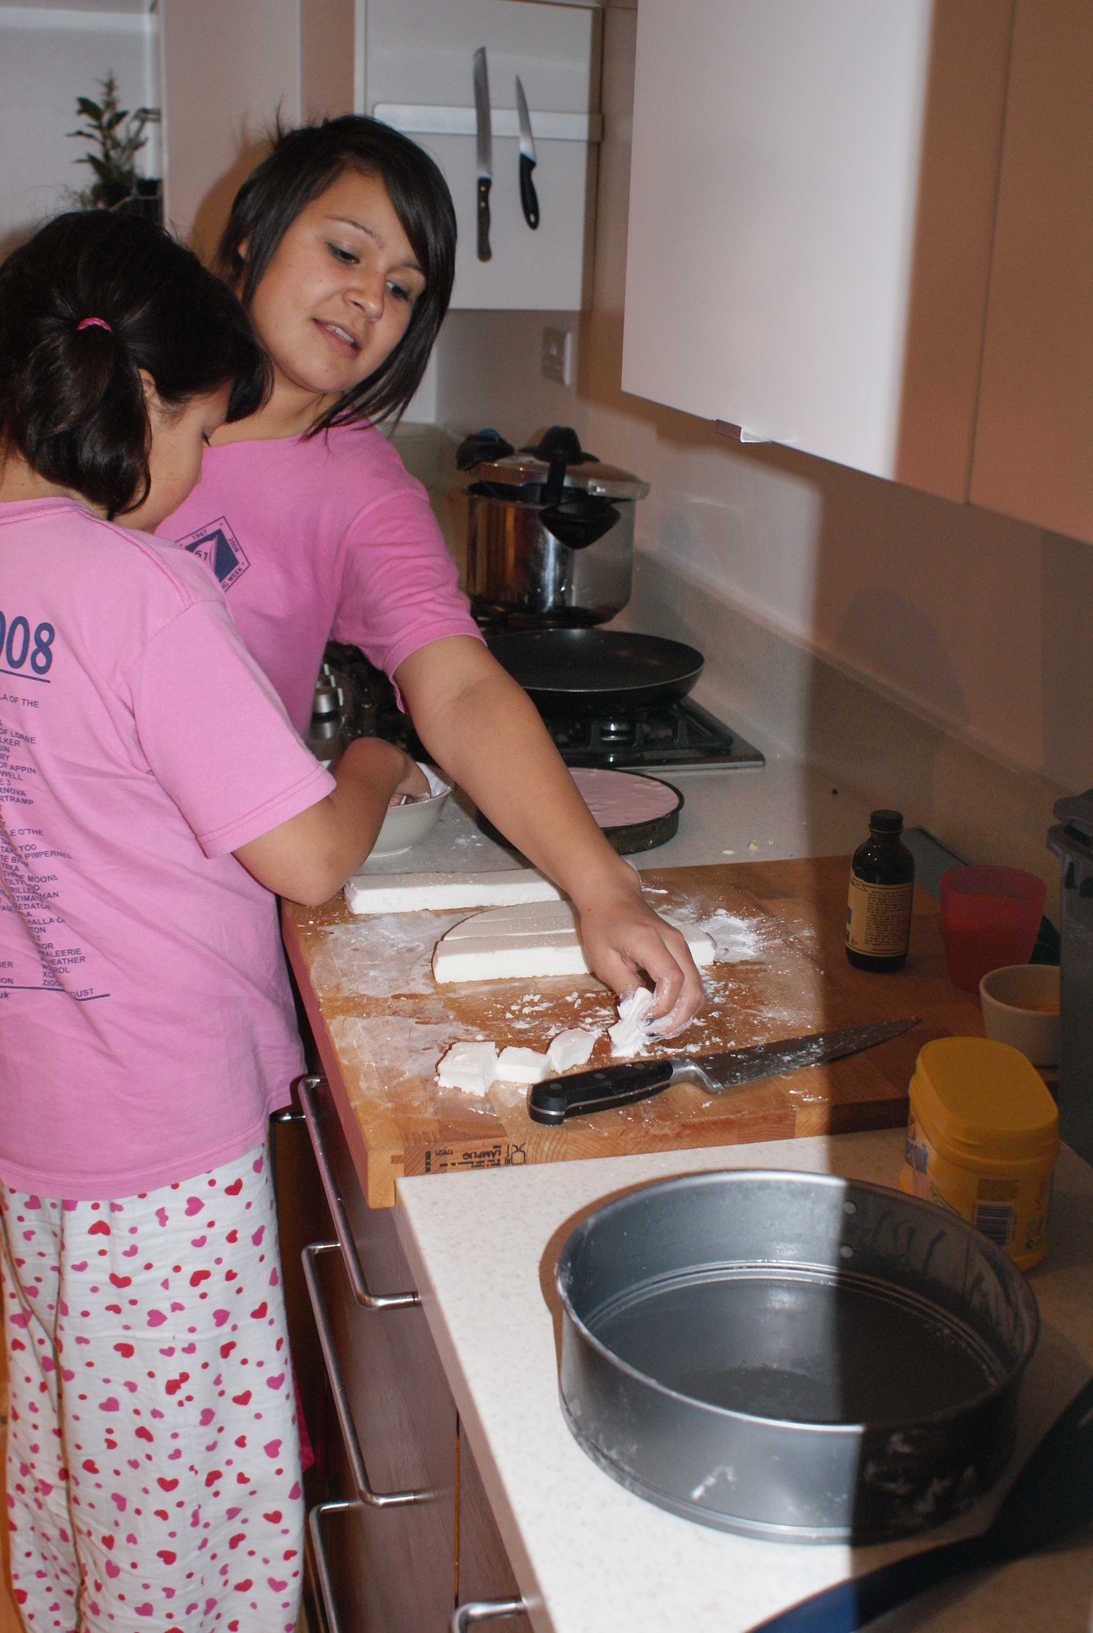
 Go Team Eldorado Girlies!
I've been wanting to try making some marshmallows after buying James Martin's Great British Winter Cookbook last winter and I figured it would be perfect for the girlies too, so I geared up all the ingredients and trucked on round after work.
It seemed surprisingly difficult to find liguid glucose when I first had the idea of trying this recipe, and I finally found some in Boots, heavily guarded behind the pharmacy counter. Then amusingly, when I was checking out the gleaming new giant Tesco which has just opened up near my office in Musselburgh any-fucking-town-in-the country I found little jars of liquid glucose by the dozen. Sitting right next to the leaf gelatin.
Which begs the question - what's the big deal with leaf gelatine anyway?
Apparently some cooks feel that leaf gelatin has no odour and makes a smoother clearer jelly.
I can see how the powder might end up being more grainy, but I disagree with them about the odour! - Ed
Of course as usual I managed to forget something.
It's not real Karl Cookery if you don't forget something.
That's my trademark. That and orange flavours. According to Jenny that's my trademark too. Though she kindly hasn't mentioned the forgetting something bit.
Usually I find the something just after I've served out the meal, but this time I forgot to bring the sugar thermometer before I even started.
And since Rachel doesn't have one (yet!) I had to guess the sugar temperature and I was probably a little on the low side.
Since it all worked out fine (though with rather more final whisking than advertised) maybe it isn't all that critical?
I was also a bit short of gelatin sheets, since they came only 12 to a pack, so I made up the difference with powder. According to the packets 12 gelatin leaves (20g) is sufficient for 3 pints of water, and one sachet (10g/4tsp) sufficient for 1 pint. So I added half a sachet of the powder too, and soaked the lot.
Obviously if you're making up a batch of marshmallows you need to have white ones and pink ones - all the best commercial bags do. So I thought I'd try some strawberry Nesquik as the flavouring agent.
Hugh Fearnley-Whatthehell uses beetroot in his, but I didn't think that was going to fly with my audience.
Also he doesn't use any glucose - so what does he know? (Does he know that you don't need glucose in your marshmallows?)
We made half white and half pink mallows, which worked out pretty well since we didn't have a large enough tray to set all of the mixture anyway.
We added (slightly more than) the advertised vanilla essence to the entire batch, poured half into one tray, then added the Nesquik and food colouring to the remaing mixture.
Usually my attempts to enlist the girlies enthusiasm for one of my cooking marathons meets with something approaching bitter disappointment (mine not theirs), but I think the girlies really enjoyed making up those pink and white fluffy pillows.
They did a fine job double-teaming the whisking (even dressing the part), there were lots of sticky sweet things to lick out and most importantly, it didn't actually take that long.
I think that's worth repeating. So I'll repeat it.
It didn't actually take that long.
You would think I would have learned that simple lesson after all my Eldorado Cookery - young girls having the attention span of the length of a pop song, but I still find it just about impossible to cook quickly, despite buying books with unconvincing titles like Fast Food in a desperate and usually futile attempt to get dinner on the table before midnight.
I'd be the worst MasterChef. Ever.
Waiting for the mallows to set is quite a challenge for girlies looking for a sugar high, but fortunately I brought along my awesome 10th Kingdom DVDs to keep them entertained.
They did a much better job than Sophie's homework.
All in all we must have done something right - the mallows were quite lovely, and I particularly liked the strawberry ones. Rachel must have thought so too, because she'd already eaten five before I'd even asked if she'd enjoyed her evening of freedom.


Marshmallows
sweet
Makes 1½lb
Ingredients
- 675g (1½lb) granulated sugar
- 1½ tablespoons liquid glucose
- 14 gelatin leaves
- 3 medium egg whites
- vegetable oil
- icing sugar
- cornflour
- 1½ teaspoons vanilla extract I used more like 2 teaspoons
- 12 teaspoons strawberry Nesquik and 2 teaspoons red food colouring optional
Put the sugar, glucose and 200ml (7fl oz) water in a heavy-based saucepan.
Add a sugar thermometer. Bring to the boil and cook until it reaches 127°C/260°F.
Meanwhile, soak the gelatine in 150ml (5fl oz) cold water and beat the egg whites until stiff. Lightly oil a shallow baking tray, about 30 x 20cm (12 x 8in). Dust it with sieved icing sugar and cornflour. I used a mixture of 60/40 icing sugar/cornflour.
When the syrup is up to temperature, carefully slide in the softened gelatine sheets and their soaking water. Hot gelatin doesn't smell all that appetising - a bit like boiling cow's feet really. The syrup will bubble up, so take care not to burn yourself. Pour the syrup into a metal jug.
Continue to beat the egg whites - preferably with an electric whisk - while pouring in the hot syrup from the jug. Do this very slowly, or the heat will cook the egg whites too much. The mixture will become shiny and start to thicken. Add the vanilla extract and continue whisking for about 5-10 minutes, Yeah? And the rest until the mixture is stiff and thick enough to to hold its shape on the whisk.
You can add the Nesquik and colouring too now if you like.
I used half the quantities of these above, pouring half the white mallow mixture off into a baking tray first, then mixing up the rest.
Spoon the mixture into a prepared baking tray, and smooth it with a wet palette knife if necessary. I didn't need to - the mixture was still pretty pourable. Possibly because I had to guess the sugar temperature since I didn't have a sugar thermometer. Leave for at least an hour to set.
Dust the work surface with more icing sugar and cornflour. Loosen the marshmallow around the sides of the tray with a palette knife, then turn it out on to the dusted surface. Cut into squares and roll in the sugar and cornflour. Leave to dry a little on a wire rack, then pack into an airtight box or jar.
Yumsk!
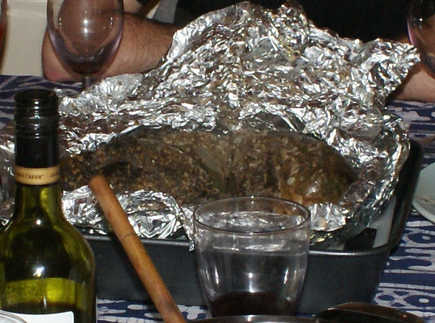
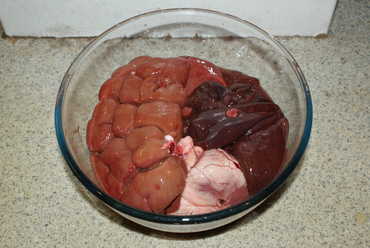
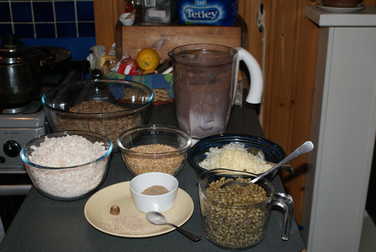
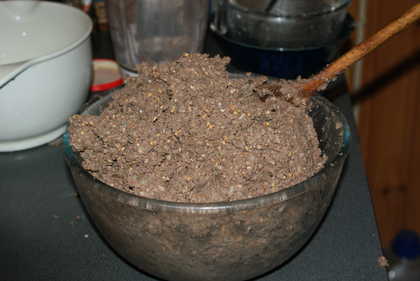
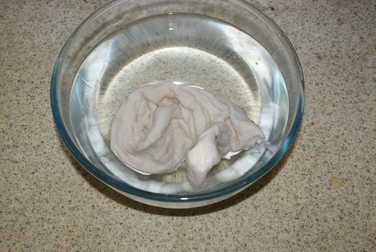
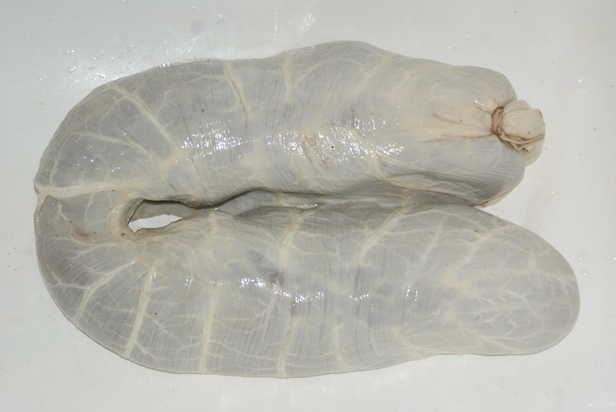
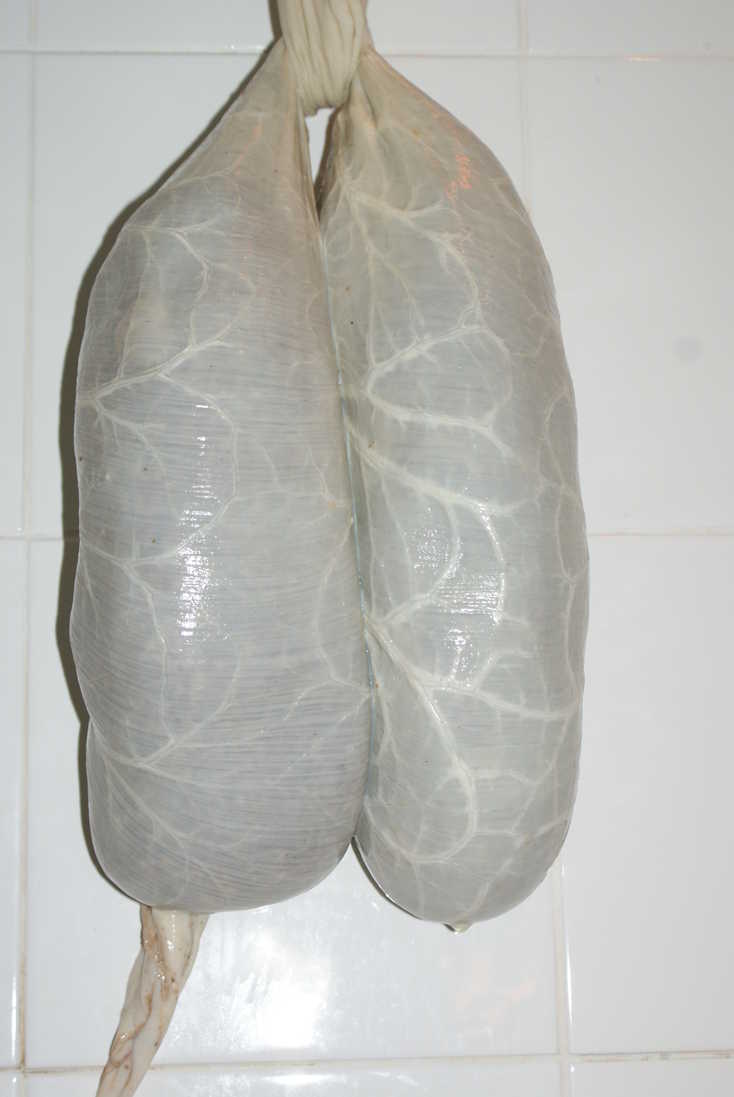
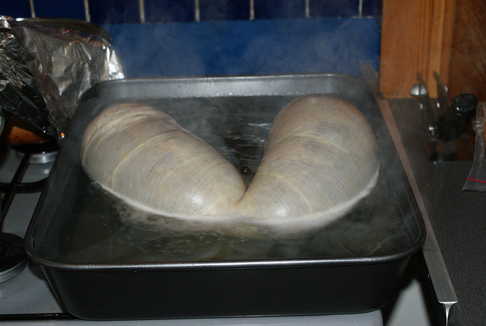
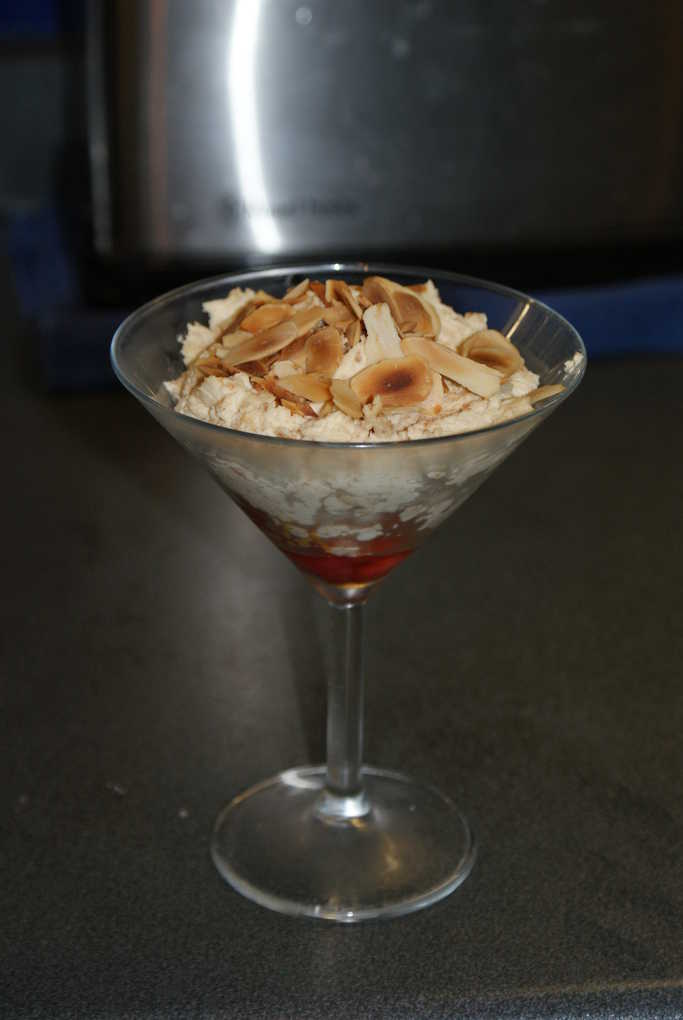
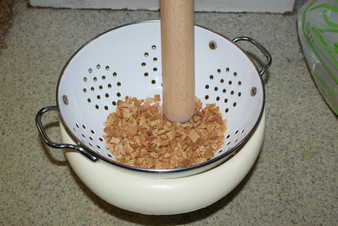
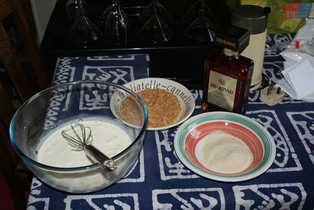
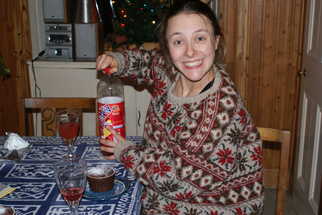
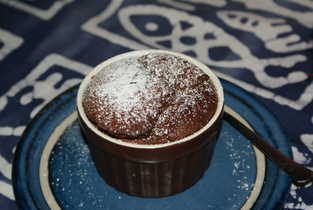
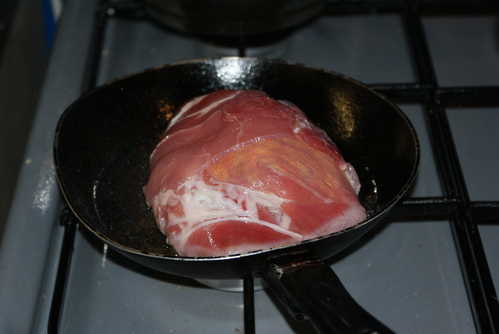
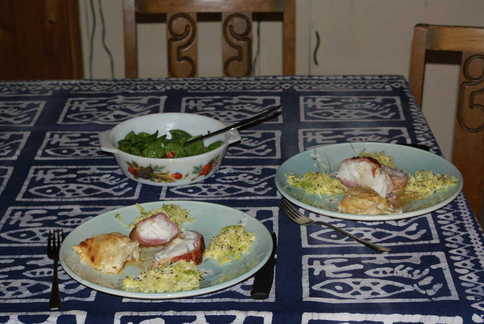
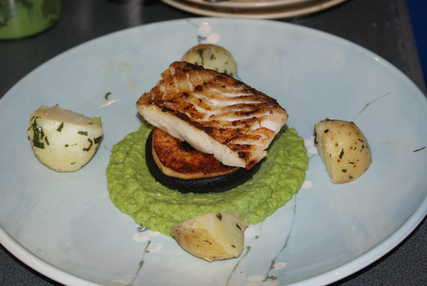
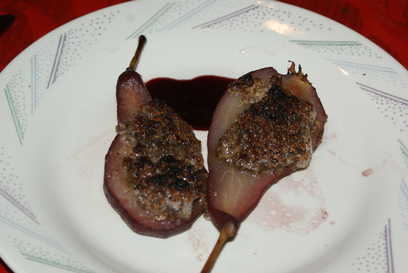
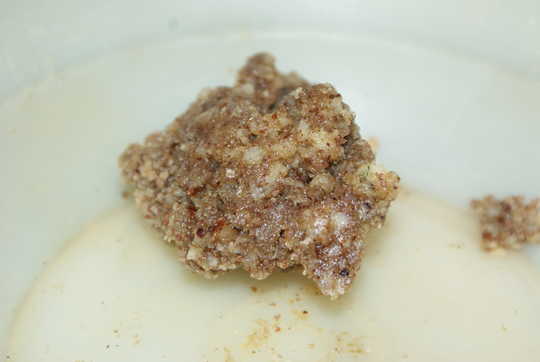
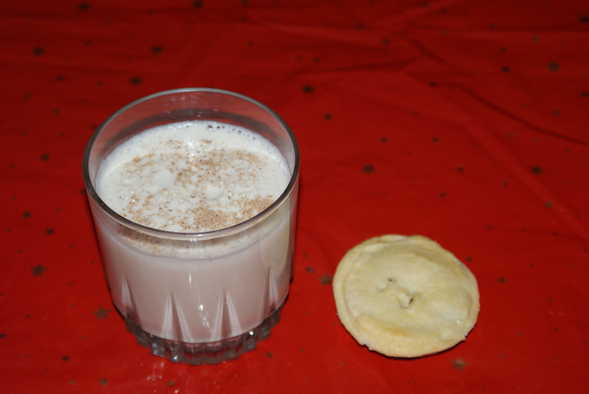
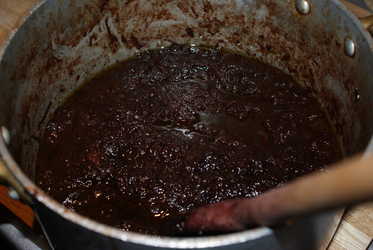
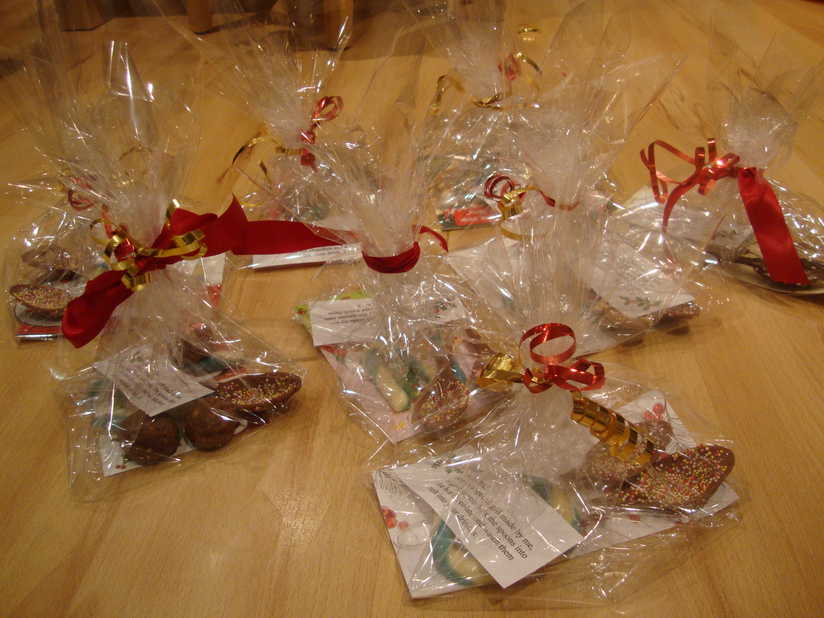
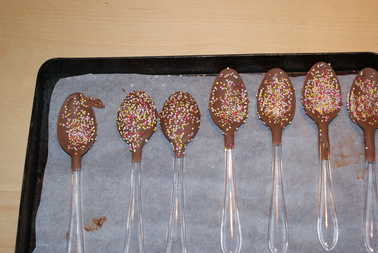
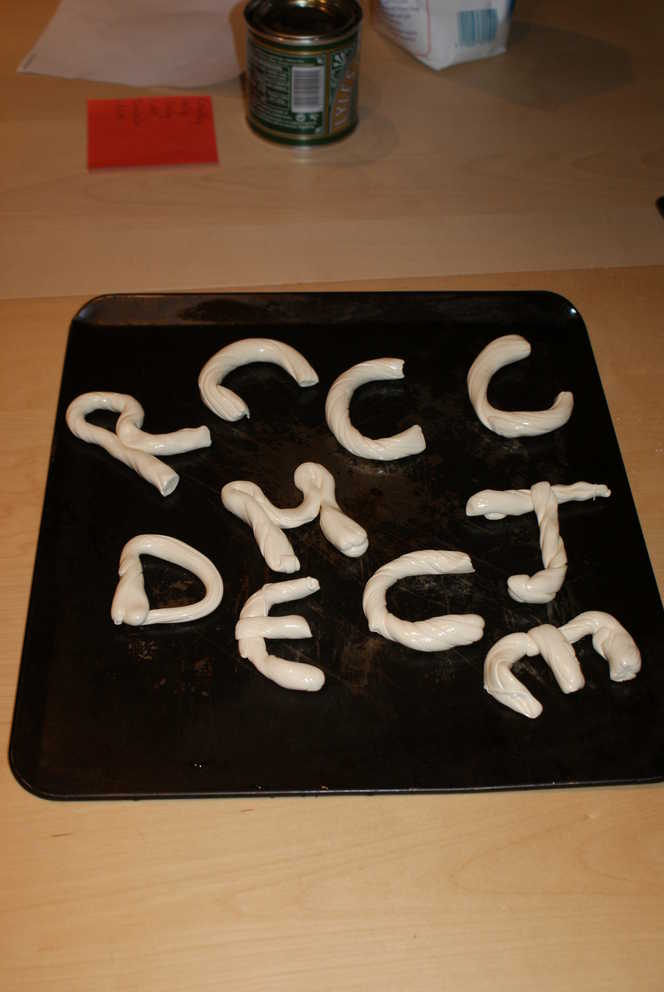
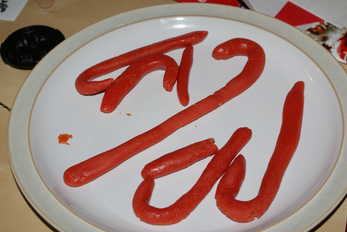
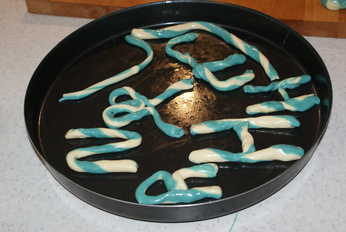
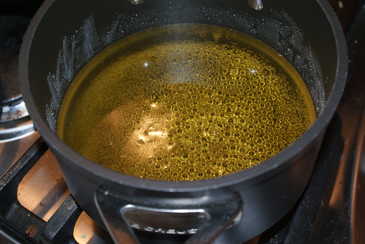
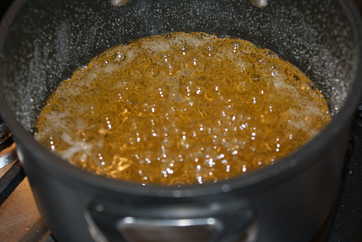
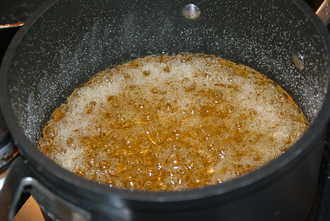

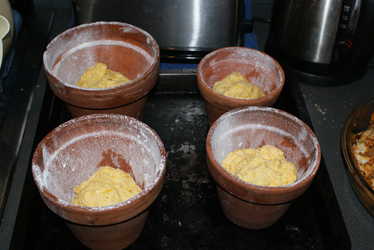
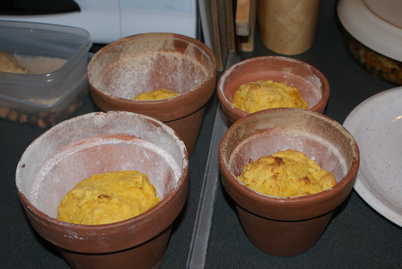
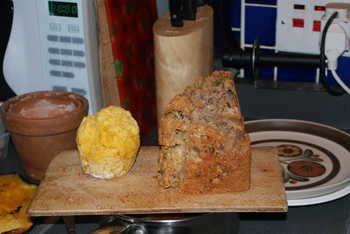
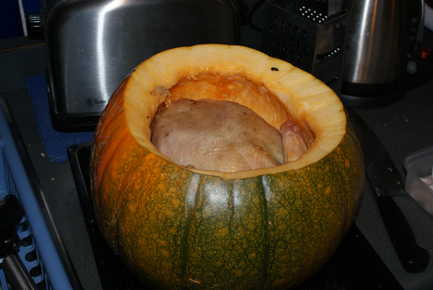
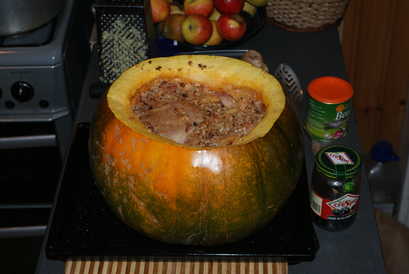
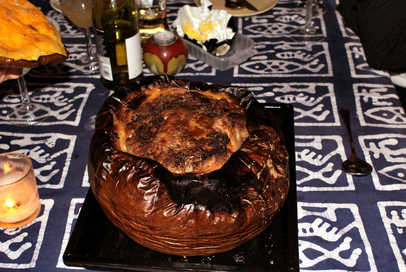
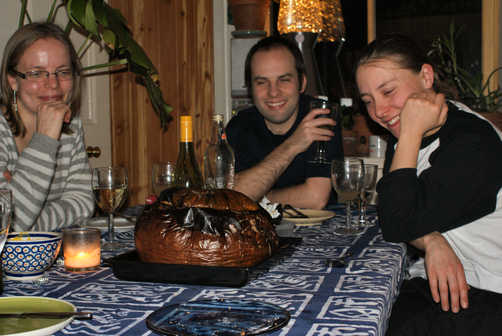
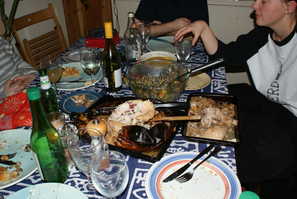
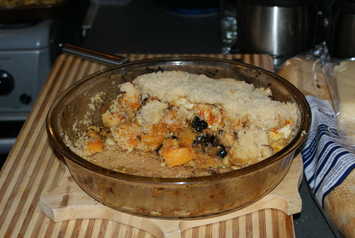
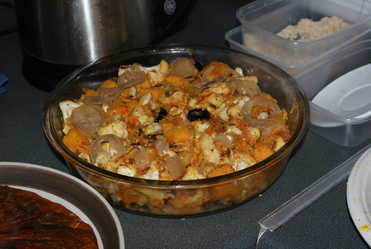
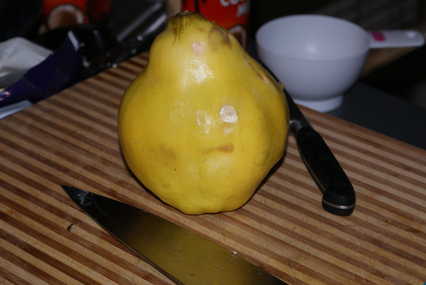
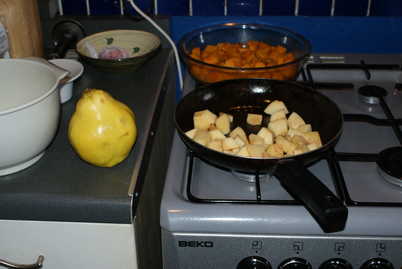
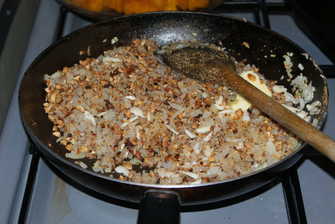
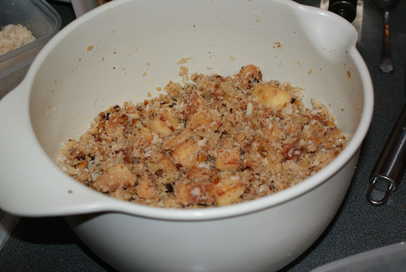
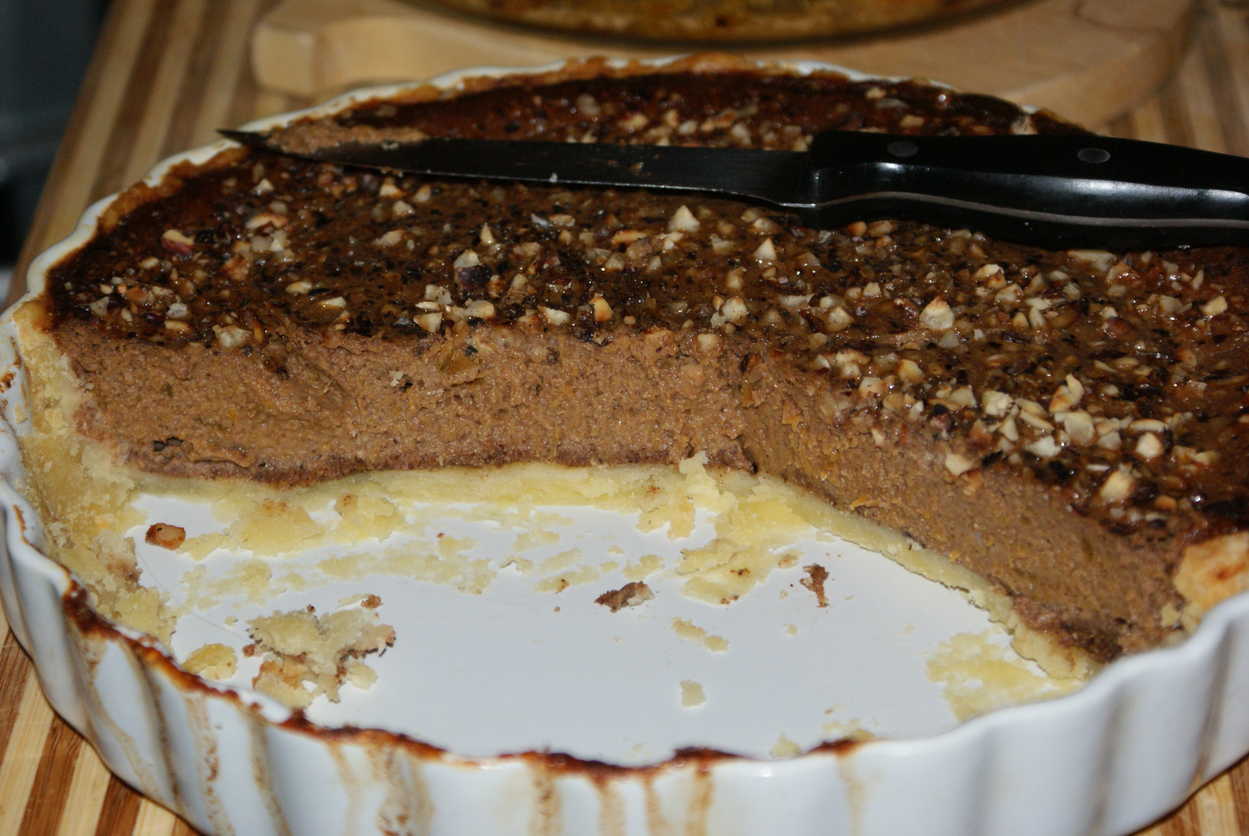
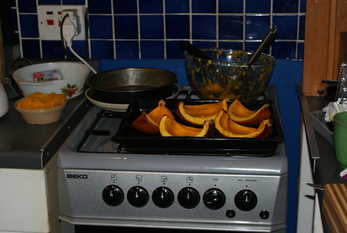
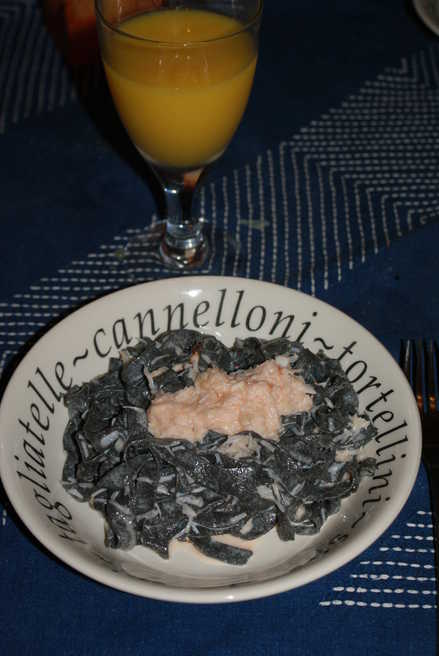
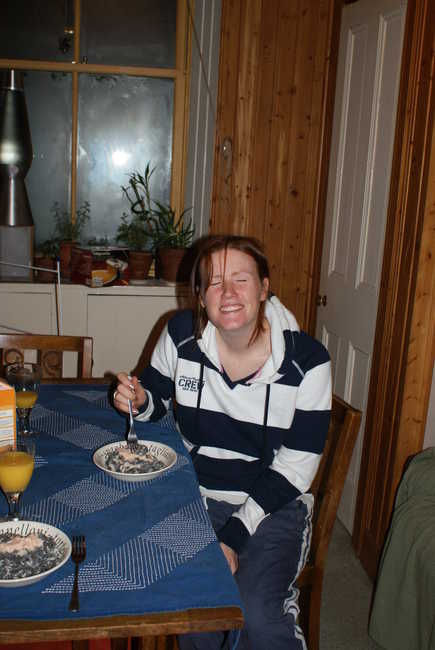
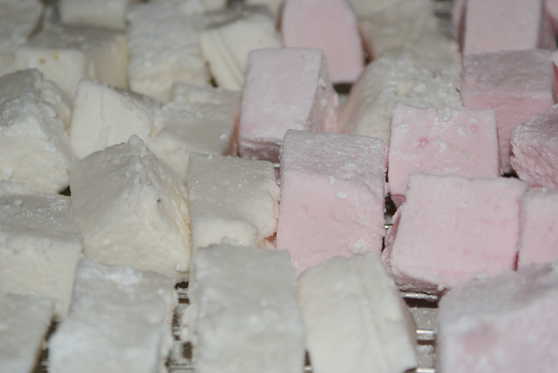
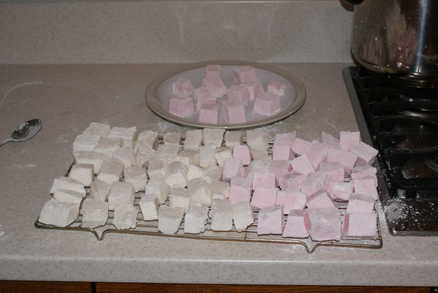
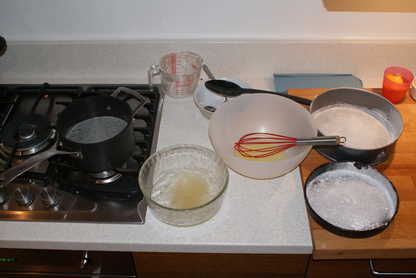
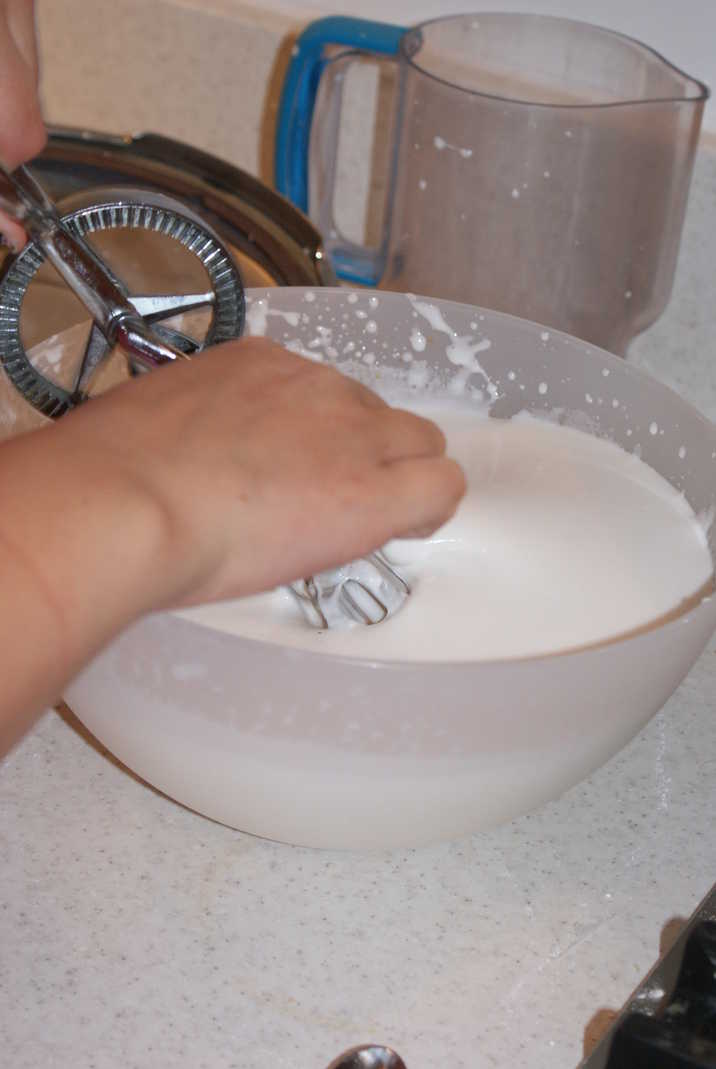
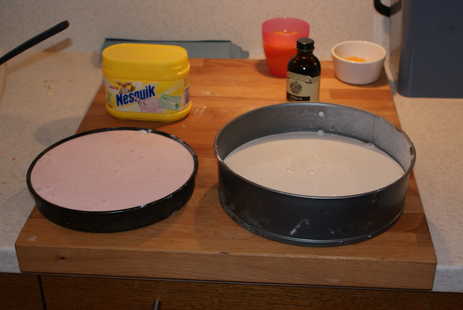
We skipped the nuts, but added a handful of marshmallows and some broken Yorkie bar instead.